• What Is Antigenic Variation and How Viruses Outsmart Immunity

    Ever wonder why you can catch the flu this year, even if you had it last year? The answer is a fascinating biological chess match between our immune system and the viruses trying to make us sick.

    The virus’s secret weapon in this ongoing battle is a clever trick called antigenic variation. It’s the single biggest reason why achieving lifelong immunity to certain pathogens—from Influenza A to HIV-1—is so incredibly difficult.

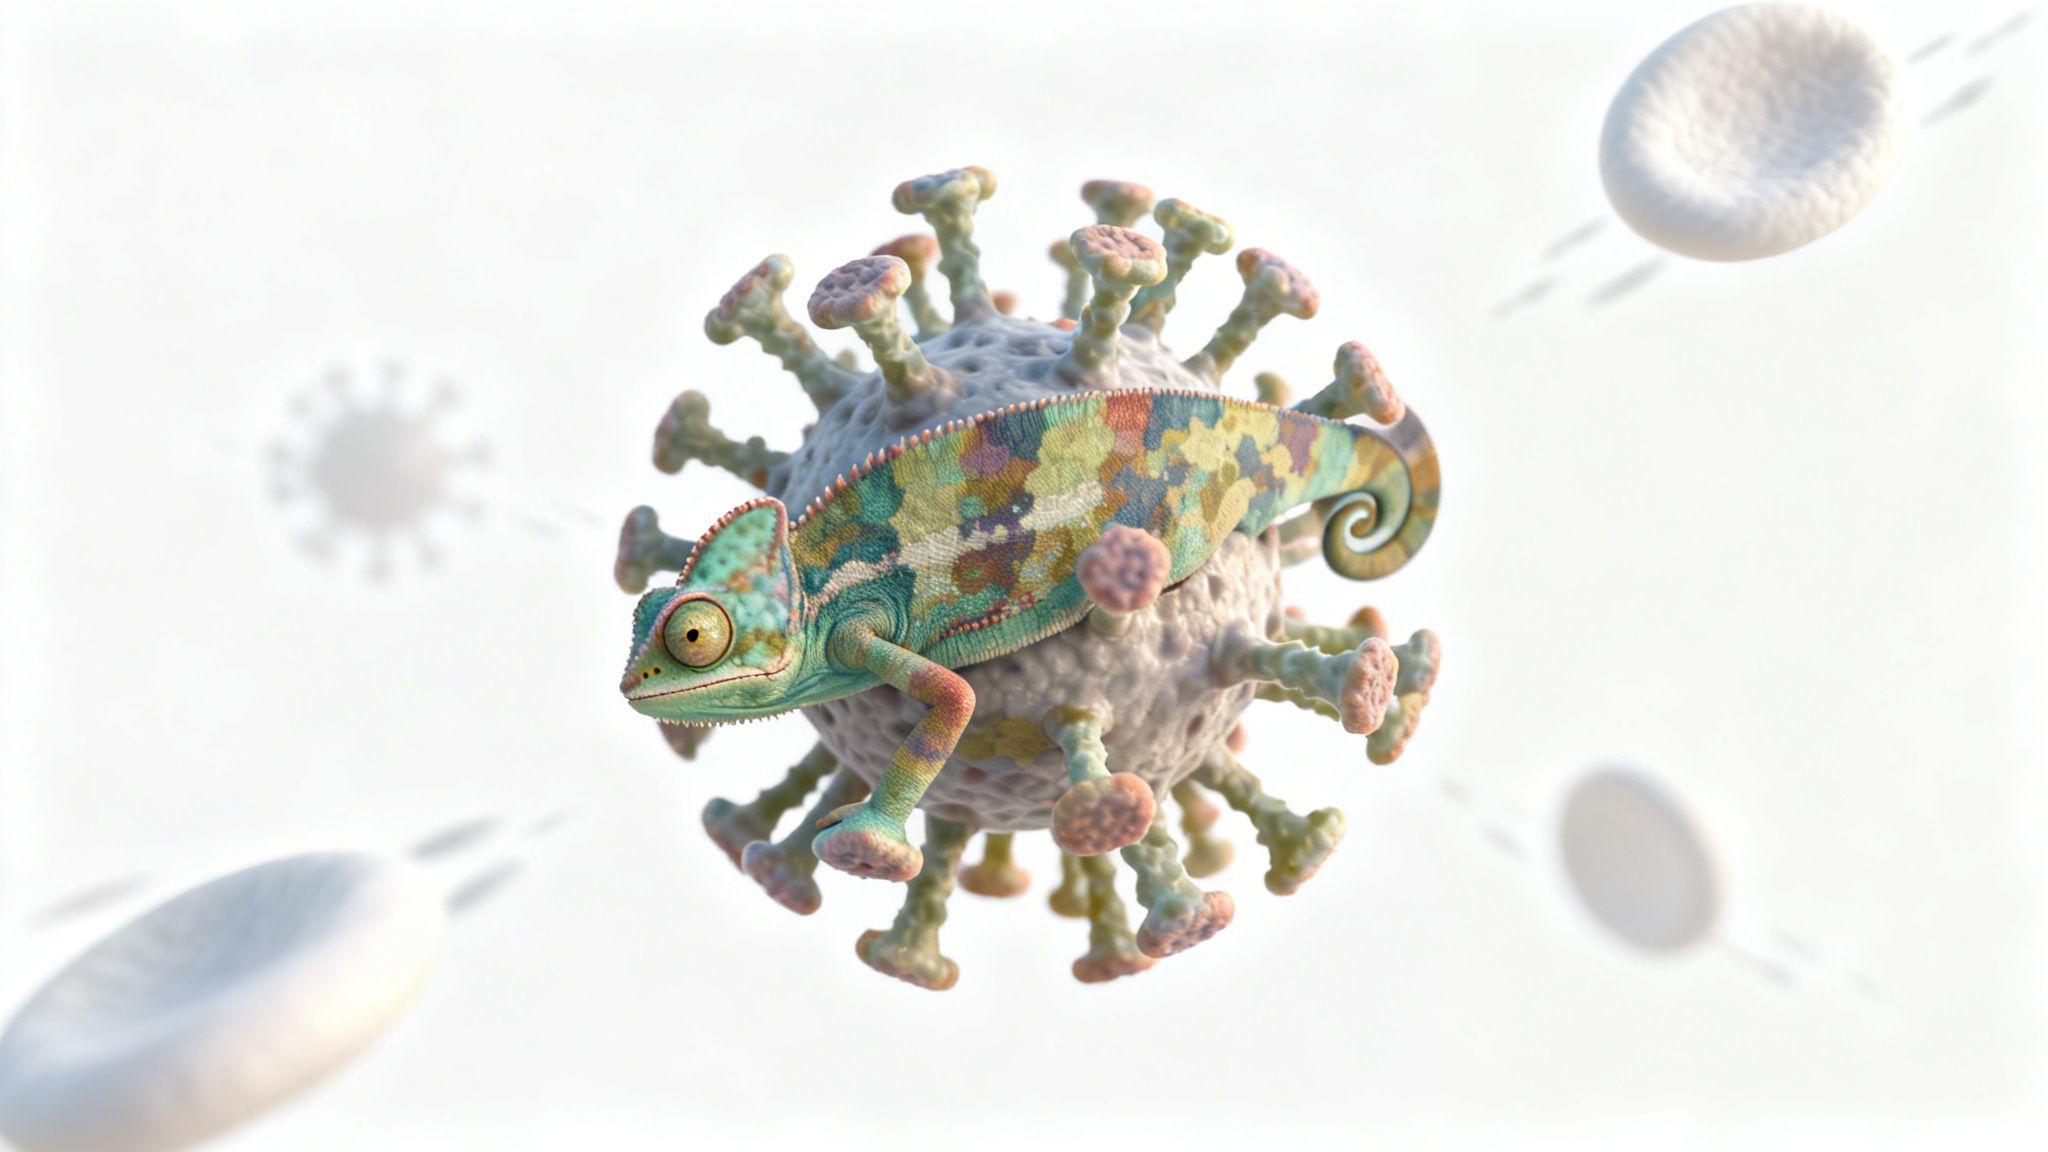
    Decoding How Viruses Play Hide and Seek

    At its heart, antigenic variation is a survival strategy. Viruses like Influenza and SARS-CoV-2 have surface markers called antigens, which our immune system’s antibodies learn to recognize and attack. But what happens when the virus changes those markers?

    When a pathogen successfully alters its antigens, our immune system's memory becomes useless. It’s like a security system that no longer recognizes a master thief because they’ve changed their disguise—new coat, different hat, altered walk. In a busy environment, where viruses can linger on surfaces, this stealth allows them to spread before our bodies even know what hit them.

    The Constant Arms Race

    This creates a perpetual arms race. Our bodies work hard to develop highly specific antibodies to fight off an infection. But by the time we’ve built up this defense, the virus may have already changed its appearance, rendering our new weapons obsolete.

    This constant evolution has huge implications for public health. It influences everything from how the annual flu shot is formulated to the frustratingly difficult search for vaccines against elusive viruses like HIV-1 and Hepatitis C Virus (HCV).

    Antigenic variation isn't just a minor tweak; it's a fundamental strategy that allows pathogens to persist in populations, cause recurrent infections, and sometimes trigger widespread epidemics.

    Understanding this concept is the first step to appreciating just how complex and adaptable viruses can be. It explains why:

    • Seasonal flu keeps coming back: The influenza virus is the classic example, constantly shifting its antigens and forcing scientists to reformulate the vaccine every single year.
    • Some vaccines are so hard to develop: Pathogens like Human Immunodeficiency Virus (HIV-1) and Hepatitis C Virus (HCV) mutate so rapidly, even inside a single person, that they present a constantly moving target.
    • New viral variants emerge: The same principle is behind the emergence of new SARS-CoV-2 variants, where changes to the surface proteins can help the virus evade immunity from past infections or vaccines.

    In this guide, we’ll unpack the clever mechanics behind this viral shapeshifting, showing you exactly how these microscopic invaders stay one step ahead.

    The Master Mechanisms of Viral Disguise

    To outsmart our immune system, pathogens have to be masters of disguise. This isn't just a random act; they rely on specific biological tricks to change their surface antigens—the molecular fingerprints our bodies learn to recognize. Understanding these mechanisms is key to seeing how slippery viruses like Influenza, HIV-1, and SARS-CoV-2 always seem to be one step ahead.

    Each strategy works a little differently. Some are subtle, like tiny tweaks over time, while others are dramatic, overnight transformations. These genetic escape tactics are what drive viral evolution and create some of the biggest challenges we face in public health today, from personal illness to community outbreaks.

    Antigenic Drift: Minor Typos in the Viral Recipe

    The most common mechanism is antigenic drift. Think of a virus’s genetic code as a recipe. Every time the virus copies itself, there’s a chance for small, random errors to creep in—like little typos. Most of these mistakes don't matter, but every so often, a typo changes a key "ingredient" in one of its surface proteins.

    Even a tiny change can be enough to make the virus just a bit less recognizable to our immune system’s antibodies. As these small changes pile up over time, the virus slowly "drifts" away from the original version our body was trained to fight. This slow and steady process is exactly why we need a new flu shot every year. Want to dive deeper? Check out our guide on what is antigenic drift.

    The concept map below breaks down how pathogens use these surface proteins to fly under the immune system's radar.

    Concept map illustrating antigenic variation, showing how pathogens mutate antigens to evade the immune system.

    This visual highlights the direct link between a pathogen's surface proteins and its ability to escape detection—the very heart of antigenic variation.

    Antigenic Shift: A Complete Recipe Swap

    Then there's the much more dramatic event: antigenic shift. Forget minor typos; this is like swapping out entire recipe books. Antigenic shift happens when two or more different strains of a virus infect the same cell at the same time. Inside that cell, they can shuffle and exchange large chunks of their genetic material.

    This genetic reassortment can cook up a brand-new virus with surface antigens that are completely foreign to the human immune system. Because almost nobody has pre-existing immunity to this new threat, antigenic shift can trigger widespread epidemics or even pandemics. The 2009 H1N1 "swine flu" outbreak is a perfect example.

    Antigenic drift causes seasonal epidemics, while antigenic shift has the potential to cause global pandemics. The difference lies in the scale and speed of the genetic change.

    Other Clever Disguise Tactics

    While drift and shift get most of the attention, pathogens have more than two tricks up their sleeves. Here are a couple of other important strategies:

    • Gene Conversion: This is like a card player holding a whole deck of "antigen cards" in their genome. When the immune system finally recognizes the card they're playing, the pathogen simply pulls a new gene sequence from its library and pastes it into the active slot. Voila—a brand-new surface protein.
    • Phase Variation: This tactic works like a simple on/off switch. A pathogen can turn the expression of certain surface proteins on or off, effectively changing its look by hiding or revealing different antigens at different times.

    These molecular strategies aren't just for textbooks. They have huge real-world consequences, shaping everything from how we design vaccines to how we respond when the next new viral threat emerges.

    Seeing Antigenic Variation in Action

    The biological tricks pathogens use to disguise themselves—like antigenic drift and shift—aren’t just abstract textbook concepts. They're active, real-world strategies fueling everything from the seasonal flu to global health crises. By looking at a few key culprits, we can see exactly how this molecular cat-and-mouse game plays out.

    Three distinct viral or bacterial models in petri dishes on a lab bench, suggesting scientific research.

    The influenza A virus is the classic example. Its relentless evolution through antigenic drift is the single biggest reason you need a new flu shot every fall. The virus's surface proteins, especially hemagglutinin (HA), are constantly accumulating tiny mutations. These small changes slowly alter their shape, making them just different enough that our immune system's memory from last year doesn't quite recognize this year's version.

    Influenza A: The Relentless Shapeshifter

    When it comes to influenza, the H3N2 strain is particularly notorious for its rapid-fire evolution. This constant drift keeps public health officials in a perpetual race against the virus, because last year’s immunity offers less and less protection against this year's model.

    In fact, antigenic variation is the very engine driving the massive global flu epidemics H3N2 causes each year. Researchers analyzing thousands of viral sequences discovered something fascinating: H3N2 variants don't just linger locally between seasons. Instead, they are constantly reseeded from East and Southeast Asia. This strain evolves antigenically much faster than its cousins, H1N1 or influenza B, which is why it triggers bigger outbreaks with higher attack rates and spreads across the globe more quickly. You can dive deeper into how these viral lineages migrate globally.

    This never-ending cycle forces an annual reformulation of the flu vaccine just to keep up, a direct and costly consequence of antigenic variation on global health policy.

    HIV-1: The Master of Internal Evasion

    Human Immunodeficiency Virus (HIV-1) takes antigenic variation to a whole different level. Instead of a slow, gradual drift across a global population, HIV-1 mutates at a blistering pace within a single infected person.

    This rapid evolution creates what's known as a "viral swarm" or quasispecies—a complex, ever-changing mixture of genetically distinct but related viral variants all coexisting in one host. It’s an immense challenge for the immune system, which finds itself constantly playing catch-up with a target that never stays still.

    HIV-1's high mutation rate means it can quickly develop resistance to antiretroviral drugs and evade the body's immune responses, making it one of the most difficult viruses to create a vaccine for.

    This internal diversity is a primary reason why a single exposure to HIV-1 doesn't result in lasting immunity. It's also why treatment demands a "cocktail" of multiple drugs—to suppress the diverse and ever-shifting viral population from all sides.

    Beyond Influenza and HIV

    The strategy of changing your coat to fool the immune system is hardly unique. It’s a widespread survival tactic used all across the microbial world.

    • SARS-CoV-2: The emergence of variants like Omicron is a perfect, recent example of antigenic drift. Small mutations in its spike protein helped the virus partially sidestep the immunity people had built up from previous infections and vaccinations.
    • Hepatitis C Virus (HCV): Much like HIV-1, HCV rapidly mutates within an infected individual, creating a quasispecies that helps it evade the immune system and establish chronic infections.
    • Norovirus: This highly contagious virus, a common cause of gastroenteritis, also uses antigenic drift. New strains emerge every few years, leading to widespread outbreaks because prior immunity is no longer effective.

    From viruses that cause respiratory illness like Rhinovirus to those causing severe gastrointestinal distress, antigenic variation is a fundamental force of nature. It’s how pathogens ensure their survival, and it’s a constant challenge to our immune defenses.

    Why Antigenic Variation Is a Nightmare for Vaccine Design

    If our immune systems are so good at creating antibodies to fight off germs, why can’t we make a once-and-done vaccine for something like the flu or HIV-1? The short answer is antigenic variation. This constant shapeshifting turns vaccine development into a frustrating race against a target that just won’t stand still.

    Think of it this way: a vaccine works by showing your immune system a "mugshot" of a specific virus, training it to recognize and attack that intruder on sight. But if the intruder dyes their hair, grows a beard, and puts on glasses, that mugshot becomes useless. That's exactly what antigenic variation does—it changes the virus's appearance, letting it slip past our defenses.

    The decades-long hunt for a "universal" flu vaccine is the perfect example of this struggle. Scientists are desperately trying to design a vaccine that targets parts of the virus that don't change, but finding those stable targets has been incredibly difficult. Until they succeed, we're stuck in an annual cycle of guessing, predicting, and reformulating.

    The Global Neighborhood Watch for Viruses

    To keep up with these quick-change artists, a massive global surveillance network is always running in the background. Organizations like the World Health Organization (WHO) run a global influenza program that’s basically a neighborhood watch for viruses.

    Labs and scientists all over the world collect samples of circulating flu strains, sequence their genes, and try to predict which variants will cause the most trouble in the upcoming flu season. This intelligence is absolutely critical for deciding which antigens to include in the annual vaccine—a decision made months in advance just to give manufacturers enough time to produce it.

    Because viruses are always changing, our strategies must also adapt. This global surveillance network is our best tool for staying one step ahead, but it highlights just how reactive we often have to be.

    This annual race also drives home a crucial point about prevention. While vaccines are a public health superstar, their effectiveness can fade as new variants emerge. This makes simple hygiene habits, like consistent hand washing and wiping down surfaces with effective disinfecting wipes, a powerful first line of defense that works no matter which variant is making the rounds.

    Finding Stable Targets in a Sea of Change

    And this challenge isn't just about viruses. Bacteria like Neisseria meningitidis, which causes meningococcal disease, also use antigenic variation to sneak past our immune systems and vaccines. But there’s a ray of hope from the world of genomics.

    Despite the dizzying genetic diversity these bacteria show, researchers have found that only a handful of antigenic variants for key vaccine targets are actually dominant in the real world. This discovery suggests that a smartly designed vaccine, using a mix of the most common variants, could offer broad, long-lasting protection.

    In fact, some of these variant combinations have stayed surprisingly stable for decades across different continents. It’s a powerful hint that a well-designed vaccine really could have a global impact. You can read more about these fascinating genomic database findings.

    The table below breaks down how these viral and bacterial gymnastics affect our public health strategies.

    Impact of Antigenic Variation on Public Health Strategies

    Antigenic variation isn't just a scientific curiosity; it has real, tangible effects on how we protect community health. This table summarizes how this constant viral evolution forces us to adapt our strategies across different areas of public health.

    Public Health Area Challenge Posed by Antigenic Variation Resulting Strategy or Action
    Vaccine Development Vaccines targeting specific antigens become ineffective as the pathogen evolves. Annual vaccine reformulation (e.g., flu), research into universal vaccines targeting stable regions.
    Immunity and Reinfection Prior infection may not protect against new variants, leading to repeat illness. Promoting booster shots and ongoing public health messaging about risk, even for the previously sick.
    Disease Surveillance Constant monitoring is needed to track which variants are circulating. Global surveillance networks (like WHO's) to collect samples, sequence genomes, and predict trends.
    Diagnostics Tests designed to detect one variant might miss new ones. Development of diagnostic tests that target more conserved regions or can detect multiple variants.
    Everyday Prevention Vaccine protection can be a moving target, requiring other layers of defense. Emphasizing non-pharmaceutical interventions like hand washing and surface disinfection.

    Ultimately, this ongoing battle means our public health toolbox can't rely on vaccines alone. A multi-layered approach—combining smart surveillance, adaptable vaccines, and steadfast hygiene—is our best bet for staying ahead of these ever-changing pathogens.

    How Animal Viruses Fuel New Human Threats

    While antigenic variation keeps familiar viruses like the seasonal flu on a constant merry-go-round, it also has a much darker side: creating entirely new threats. Many of the most dangerous emerging viruses don’t start in humans. Instead, they make a dramatic leap from animal populations in a process called zoonotic spillover.

    Think of animal reservoirs, especially birds and pigs, as biological "mixing bowls." In these hosts, different viral strains can meet, mingle, and swap genes. This is exactly where antigenic shift comes into play—an Avian Influenza Virus (H5N1) and a human flu virus could infect the same pig cell, shuffle their genetic material, and spin off a brand-new virus that the human immune system has never seen before.

    A pink pig stands in a muddy pen as a bird on a fence post blows bubbles in a foggy farm field.

    This isn’t just a hypothetical scenario. It’s exactly what gave us the 2009 H1N1 "swine flu" pandemic. That virus wasn't just a slightly drifted version of an old flu; it was a complex reassortant—a Frankenstein's monster containing genetic bits and pieces from North American swine, Eurasian swine, human, and bird flu viruses.

    The Swine Flu Example

    Swine influenza A viruses are a perfect, and frankly terrifying, illustration of this global threat. They are masters of antigenic variation, fueled by frequent spillovers from humans, which then evolve within pig herds and split off into distinct regional lineages.

    One landmark study showed how H3 antigenic diversity in U.S. swine absolutely exploded after 2010, far outpacing the steadier evolution seen in Europe. This divergence, which led to a mean pairwise distance of 12.6 AU between U.S. and European swine H3 viruses, proves just how differently viruses can evolve in separate livestock systems. You can dig into the specifics in these regional viral diversity findings.

    Understanding the link between animal and human health isn't just an academic exercise—it's the foundation of modern pandemic prevention. This interconnectedness is known as the One Health concept.

    One Health and Preventing the Next Pandemic

    The One Health approach is simple but powerful: it recognizes that the well-being of people is fundamentally tied to the health of animals and our shared environment. Antigenic variation churning away in animal populations is a direct threat to us, constantly generating a supply of potential pandemic pathogens.

    To get ahead of this, we need a proactive strategy. It’s not about waiting for the next spillover, but preventing it from happening in the first place. That means:

    • Strong Farm Biosecurity: Simple but effective hygiene measures on farms, like disinfecting equipment and limiting contact between different animal species, can slam the door on opportunities for viruses to mix and evolve.
    • Global Surveillance: We need boots on the ground, actively monitoring viral strains circulating in animal populations. This gives us an early warning system to spot new threats before they make the leap to humans.

    In the end, preventing the next pandemic means looking beyond our own species. By managing viral evolution in animal reservoirs, we can break the chain of transmission and protect global public health from the next threat fueled by antigenic variation.

    Common Questions About Viral Evolution

    Learning about how viruses constantly change naturally brings up some big questions. Understanding antigenic variation is the key that connects what's happening at a microscopic level to the real-world impact on our lives. Here are some straightforward answers to the most common queries.

    What’s the Main Difference Between Antigenic Drift and Shift?

    The easiest way to think about it is comparing a small tweak to a complete overhaul.

    • Antigenic Drift is the slow, steady accumulation of tiny mistakes. As a virus copies itself, it makes small errors in its genetic code. Over time, these little changes add up, altering the virus's surface just enough that our immune system doesn't recognize it anymore. This is why we have a new flu season every year.

    • Antigenic Shift is a sudden, radical change. This happens when two different viral strains infect the same cell and literally swap huge chunks of their genetic material. The result is a brand-new hybrid virus that no one has any pre-existing immunity to. It's the viral equivalent of smashing two different car engines together to create something totally new—and it's the mechanism that can spark a global pandemic.

    Can We Stop Viruses From Changing?

    In a word, no. Viral evolution isn't a flaw; it's a fundamental feature of biology. Viruses like influenza and HIV-1 have replication machinery that is naturally error-prone, meaning mutations are an unavoidable part of their life cycle. Their only goal is to survive and spread, and changing their appearance is their best defense.

    Trying to stop viruses from mutating would be like trying to stop the ocean's tide. Instead of fighting an unwinnable battle, we focus on adapting to it. We track the changes, update our vaccines, and rely on proven hygiene practices that break the chain of transmission no matter what the virus looks like.

    This is why global surveillance is so crucial. We can’t stop the evolution, but by watching it closely, we can try to stay one step ahead.

    How Does Antigenic Variation Actually Affect Me?

    This complex process has a very direct impact on your health and your daily life.

    It's the reason you need a new flu shot every year. The vaccine is updated to match the strains that have drifted the most and are expected to dominate the upcoming season. It’s also why new variants of viruses like SARS-CoV-2 can cause fresh waves of illness, sometimes even in people who were previously infected or vaccinated.

    On a practical level, this highlights why good hygiene is a non-negotiable line of defense. A vaccine's protection might wane as a virus changes its disguise, but washing your hands with soap and water or disinfecting a high-touch surface works against any variant. It’s a universal tool that disrupts transmission, regardless of a virus's genetic makeup.

    Why Isn’t There a Vaccine for Every Virus?

    It’s incredibly difficult to develop a vaccine for a target that’s constantly moving. For some pathogens like HIV-1 and Hepatitis C Virus (HCV), the rate of antigenic variation is so fast and furious that it presents a monumental challenge.

    HIV-1, for example, mutates so rapidly inside a single person that it creates what scientists call a "viral swarm"—a diverse population of slightly different variants. A single vaccine simply can't target all of them at once. HCV uses a similar strategy of constant evolution to outrun the immune system and establish a chronic, lifelong infection. These viruses are true masters of disguise, and until we can find a way to target a stable, unchanging part of them, a broadly effective vaccine remains one of science's most sought-after goals.

  • A Guide to the Electrostatic Disinfectant Sprayer

    Ever seen a balloon stick to a wall after rubbing it on your hair? That’s static electricity, and it’s the exact same principle that makes electrostatic disinfectant sprayers so effective. This technology puts a positive electrical charge on disinfectant droplets, causing them to hunt down and cling to negatively charged surfaces. The result is a complete, 360-degree wrap-around coverage that traditional cleaning methods, such as manual wiping, just can't match.

    What Is an Electrostatic Disinfectant Sprayer?

    Think of an electrostatic disinfectant sprayer less like a simple spray bottle and more like a smart delivery system for germ-killers. It’s a device designed to apply disinfectants and other solutions to surfaces with incredible efficiency. By charging the liquid, it creates a fine mist where every single droplet is magnetically drawn to the surfaces in a room.

    A person uses an electrostatic disinfectant sprayer on a door handle with visible lightning effects.

    This technology isn't just about spraying a chemical; it's about making that chemical work harder. The charged particles actually repel each other in the air, preventing them from clumping together and ensuring they spread out for an even coat. As they get close to a target—like a doorknob, keyboard, or desk chair—they are pulled toward it, coating the front, back, and sides all at once. For routine spot cleaning or smaller tasks where a machine isn't needed, having quality disinfecting wipes on hand is a great complement to this technology.

    The Wraparound Effect

    The biggest advantage of an electrostatic disinfectant sprayer is its signature "wraparound" effect. A normal trigger sprayer or fogger just shoots droplets in a straight line. Gravity takes over, and they settle on top of whatever is in their path. This leaves the undersides and backs of objects completely untouched unless someone takes the time to physically wipe them down.

    Electrostatic application blows past this limitation. The charged mist is actively drawn to all sides of an object, creating a uniform film that envelops it. This makes sure that even complex shapes and hard-to-reach spots get the disinfectant contact they need to neutralize hidden pathogens like Influenza A Virus (H1N1) or Norovirus.

    This process dramatically improves coverage and cuts down on chemical waste, since more of the disinfectant actually lands on the target instead of just drifting away into the air.

    Key Components of the Technology

    So, how does it all work? It comes down to a few key parts working together to create that charged, germ-fighting mist.

    • The Nozzle: This is where the real action is. As the disinfectant liquid flows through the nozzle, an electrode gives each tiny droplet a powerful positive charge.
    • The Disinfectant Solution: You can't just use any chemical. Only specific, approved solutions are formulated to hold an electrical charge and are proven to work against a wide range of pathogens, from Human Coronavirus to Rhinovirus Type 14.
    • The Target Surfaces: It turns out that most surfaces in a building—desks, chairs, and electronics—naturally carry a negative or neutral charge. This creates the perfect magnetic attraction for the positively charged mist.

    To get the most out of your disinfectant, you need to understand how different nozzles affect the spray pattern. Using a sprayer tip chart can help you pick the perfect tip for the coverage and particle size you need. Ultimately, this approach delivers a far more thorough and reliable way to disinfect entire rooms, hitting all the spots that manual wiping often misses.

    How Electrostatic Sprayers Achieve Total Surface Coverage

    To really get why an electrostatic disinfectant sprayer works so well, we have to look past the machine itself and into the actual physics. The secret sauce is a principle called electrostatic induction, and it’s what turns a simple cloud of disinfectant into a targeted, germ-killing force.

    When the sprayer atomizes the disinfectant, it gives each tiny droplet a positive electrical charge. As this charged mist travels through the air, it heads toward surfaces like desks, chairs, and equipment—most of which have a neutral or negative charge. As the cloud gets close, something really cool happens.

    The strong positive charge from the droplets forces the electrons on a neutral surface to shift away. This momentary shift gives the surface an opposite, negative charge, creating an electrical attraction. It’s like turning every object in the room into a magnet for the disinfectant.

    The "Wraparound" Effect Explained

    This magnetic-like pull is what creates the famous "wraparound" coating. Unlike a trigger sprayer or fogger that just hits whatever is directly in its path, the charged droplets are actively drawn to cover every single side of an object.

    Think about spraying a doorknob. With a regular spray bottle, you'd only get the front wet. But the charged mist is pulled to the front, sides, top, bottom, and even the back of the knob all at once. The particles also repel each other in mid-air, which stops them from clumping together and helps them spread out into a perfectly uniform, thin layer over the entire surface.

    This isn't just about being efficient; it's a game-changer for killing germs. This complete coverage ensures that every nook and cranny—where tough viruses like non-enveloped Norovirus or enveloped Influenza A (H1N1) might hide—gets the disinfectant it needs to be neutralized.

    This process sidesteps the usual problems you see with other methods. You don’t get puddles from using too much liquid, you don’t have missed spots from a sloppy application, and you waste far less chemical.

    Microscopic Warfare: Why Uniform Disinfection Matters

    On a microscopic level, the fight against viruses is won or lost on contact. A single missed spot can become a safe harbor for pathogens like SARS-CoV-2 or Herpes Simplex Virus 1 (HSV-1), giving them a chance to survive and spread. Electrostatic technology makes sure a consistent film of disinfectant coats the entire target area.

    This comprehensive approach is why the technology is catching on so fast. The electrostatic disinfectant sprayer market was valued at US$351.2 million and is expected to hit US$791 million because of this proven efficiency. By giving disinfectant droplets a positive charge, these sprayers get 2-3 times better coverage than you could ever get by hand, effectively making entire rooms hostile territory for pathogens. You can discover more insights about this growing market and its public health impact.

    This uniform application allows the disinfectant to do its job right. The key benefits are:

    • Total Saturation: Every single square inch of a surface gets coated, even in hard-to-reach cracks and crevices.
    • Optimal Dwell Time: The even layer ensures the disinfectant stays wet for its required contact time—a must for killing stubborn viruses like Feline Calicivirus.
    • Reduced Human Error: The technology takes the guesswork out of the job, removing the inconsistency that comes with manual wiping.

    At the end of the day, the science behind electrostatic sprayers isn't just about covering surfaces. It’s about creating a scientifically-backed, seamless shield of protection that leaves no place for dangerous viruses to hide, raising the bar for environmental safety.

    Comparing Disinfection Methods for Complete Protection

    When you’re up against viruses like Influenza A (H1N1) or SARS-CoV-2, choosing the right disinfection tool is critical. While a simple wipe-down has its place, it often falls short of the comprehensive coverage needed to truly neutralize threats. Putting different techniques side-by-side shows exactly why an electrostatic disinfectant sprayer has a clear edge.

    The real goal isn't just to slop some chemicals around. It's to make sure that disinfectant reaches every single surface where pathogens might be hiding. Traditional methods can easily miss the undersides of desks, the backs of chairs, or the nooks and crannies of equipment. Those gaps are a welcome mat for viruses.

    Manual Wiping and Trigger Sprayers

    The old-school approach is a spray bottle and a cloth, or even more conveniently, disinfecting wipes. This is fine for spot-cleaning a spill or wiping down a flat countertop. But it’s completely dependent on human effort, which means it’s prone to huge inconsistencies.

    Manual wiping is incredibly slow and labor-intensive, making it a nightmare for large areas. Worse, it comes with a high risk of cross-contamination—a single cloth used across multiple surfaces can just as easily spread viruses like Norovirus from one spot to another. Trigger sprayers are a small step up, but they only cover what's directly in their path, leaving most surfaces untouched.

    The illustration below shows how electrostatic technology blows past these limitations, with charged droplets actively wrapping around all sides of an object.

    Concept map illustrating surface coverage: charged droplet adheres to surface, leading to encapsulation and maximized contact.

    As you can see, the charged particles don't just land where they're aimed. They’re pulled toward the entire object, creating a true 360-degree shield of disinfectant.

    ULV Foggers

    Ultra Low Volume (ULV) foggers look impressive because they can fill a big room with mist very quickly. These machines create a fine, uncharged cloud that eventually settles on horizontal surfaces, thanks to gravity. But while they’re faster than wiping, ULV foggers have their own problems.

    The mist from a fogger doesn't actively stick to surfaces. It just falls. This means it almost always misses the sides and undersides of objects, creating the same coverage gaps you get with a basic trigger sprayer. It also leads to uneven application, leaving some areas drenched and others completely dry. That's a big problem when a disinfectant needs to stay wet for a specific dwell time to kill viruses like Rhinovirus Type 39.

    For more on keeping the whole environment clean, this Air Duct Cleaning Sanitizing Guide offers some great related insights.

    A Comparison of Disinfection Application Methods

    To really see the difference, let’s put these methods head-to-head. The table below evaluates each technology based on coverage, efficiency, and the labor required to get the job done right.

    Method Coverage Chemical Efficiency Labor Intensity Best For
    Electrostatic Sprayer Excellent: 360-degree "wraparound" coverage on complex objects. High: Charged droplets stick to targets, minimizing waste. Low: Quickly covers large, complex areas with minimal effort. Comprehensive disinfection of entire rooms, high-touch areas, and complex equipment.
    Manual Wiping Poor: Inconsistent, misses spots, and high risk of cross-contamination. Low: Often results in overuse of chemicals and wasteful drips. Very High: Slow, physically demanding, and tedious for large spaces. Quick spot-cleaning of small, flat, easily accessible surfaces.
    Trigger Sprayer Poor: Only coats what's in the direct line of spray. Low: Lots of overspray and chemical drift into the air. High: Requires constant pumping and is very slow for anything but tiny areas. Applying a small amount of product to a very specific target.
    ULV Fogger Fair: Coats horizontal surfaces but misses vertical sides and undersides. Moderate: Chemical is lost as mist drifts before settling. Low: Fast application, but the room must be empty during and after. Rapidly treating the air and horizontal surfaces in large, open spaces.

    The takeaway here is clear: for situations that demand thorough, reliable disinfection, electrostatic technology is in a class of its own. It combines the speed of fogging with a level of coverage that even the most careful manual wiping can't match, all while using less chemical.

    In the end, while every method has a niche, only an electrostatic disinfectant sprayer truly solves the problem of total surface contact. By turning every object into a magnet for germ-killing solution, it closes the dangerous gaps left by other techniques. If you're looking to explore other tools, our guide on choosing the right surface cleaning machine can help you weigh your options.

    Real-World Applications in Virus Hotspots

    The science behind an electrostatic sprayer is cool, but where the technology really proves its worth is in the real world—in the high-traffic places where stopping viruses is a daily fight. From crowded school hallways to sterile hospital rooms, this is where electrostatic disinfection provides a practical, powerful way to improve safety.

    It’s all about getting comprehensive disinfection done quickly and efficiently, making these sprayers a go-to tool for modern public health.

    Person in protective suit and mask using an electrostatic sprayer to disinfect a classroom.

    This technology has exploded in popularity, largely driven by the global focus on hygiene. The U.S. Environmental Protection Agency (EPA) reports that a staggering 62% of facilities have now adopted electrostatic sprayers to level up their disinfection game. The financial upside is just as compelling as the health benefits—hotels, for example, have cut their chemical use by 30-40% because the sprayers are so precise.

    If you want a deeper look at the numbers, you can discover more about the market's projected 9.3% growth over the next decade.

    Defending Healthcare Settings

    Hospitals and clinics are ground zero in the battle against germs. An electrostatic disinfectant sprayer is a game-changer here, helping to fight healthcare-associated infections (HAIs) by making sure complex medical gear, bed rails, and entire patient rooms are fully coated with disinfectants that kill nasty viruses like Hepatitis B Virus (HBV) and Human Immunodeficiency Virus Type 1 (HIV-1).

    That "wraparound" effect we talked about is especially crucial in a hospital. It ensures that the charged disinfectant mist covers all the awkward shapes of IV poles, wheelchairs, and monitors—all the spots that are a nightmare to disinfect by hand. This 360-degree coverage is key to breaking the chain of infection where patients are most vulnerable. For quick, targeted disinfection of high-touch patient surfaces, staff often supplement this process with high-quality disinfecting wipes.

    Creating Safer Educational Environments

    Schools, daycares, and universities are petri dishes for viruses like Influenza and Rhinovirus to spread like wildfire. Facility managers rely on electrostatic sprayers to treat whole classrooms in minutes, either between classes or overnight. Every desk, chair, locker, and piece of playground equipment gets coated on all sides—something that would be nearly impossible with traditional spray-and-wipe methods in the same amount of time.

    This approach is simply a more reliable way to create healthier learning spaces. It guarantees that every surface a student might touch, from the back of a chair to the leg of a desk, has been treated. This drastically cuts down the environmental viral load and helps keep both students and staff healthy and in school.

    This level of thoroughness is just as critical in other shared spaces. You can see similar challenges in our guide on cleaning public bathrooms to protect public health.

    Protecting Travelers and the Public

    Public transit systems, airports, and gyms are major hubs for spreading viruses. An electrostatic disinfectant sprayer lets staff quickly treat bus seats, handrails, subway cars, and gym equipment between uses. Speed and efficiency are everything here, allowing for minimal downtime while maximizing safety for everyone.

    Think about it: transit crews can disinfect an entire bus or train car in just a few minutes, hitting every single grab bar, seatback, and window ledge. In the same way, gyms can offer a much safer environment by treating weights, cardio machines, and locker rooms with a system that covers every angle.

    Time and again, this technology has proven itself to be a powerful, evidence-backed tool. By solving the very practical problem of getting complete surface coverage in complex, real-world settings, electrostatic sprayers help build healthier communities. They’re a major leap forward in our ability to control the spread of infectious diseases, from the common cold to much more serious viral threats.

    Safety Protocols and Best Practices for Operation

    Getting the most out of an electrostatic disinfectant sprayer is about more than just flipping a switch. Like any professional tool, its real power comes from using it correctly and safely. Following the right steps ensures you’re actually knocking out viruses while protecting yourself and others from chemical exposure.

    Tabletop display of PPE and disinfecting tools: gloves, goggles, mask, disinfectant spray, and an electrostatic sprayer.

    Before you even start, think about personal protection. The fine mist these sprayers create can easily be inhaled or get into your eyes and on your skin. That's why Personal Protective Equipment (PPE) is non-negotiable.

    Prioritizing Personal Protective Equipment

    Always gear up before you handle disinfectants or turn on the sprayer. This simple barrier between you and the chemicals is your best defense against exposure. Your go-to safety kit should include:

    • Gloves: Grab a pair of chemical-resistant gloves to keep disinfectant off your hands when you're filling, spraying, and cleaning the unit.
    • Eye Protection: Safety goggles or a full face shield are essential. You do not want these fine droplets splashing into your eyes.
    • Respiratory Mask: A proper respirator or mask is crucial for preventing you from breathing in the aerosolized mist. Check the disinfectant label for specific recommendations.

    This is the bare minimum for staying safe. For a deeper dive, our guide on how to use Personal Protective Equipment covers the essentials for all sorts of jobs.

    Selecting the Right Disinfectant

    Not all chemicals are created equal. Using the wrong one can wreck your sprayer, prove useless against viruses, or even create a safety hazard. It is absolutely critical to only use disinfectants that are approved by the EPA (or your local regulatory body) and are specifically labeled as safe for electrostatic sprayers.

    Look at the product label to see if it’s effective against the specific viruses you’re worried about, like Influenza A2/305/57 (H2N2) or Human Rotavirus.

    The right chemical is the foundation of effective disinfection. An electrostatic sprayer is simply the delivery system; the real work of inactivating viruses is done by a proven, compatible disinfectant. Mismatched chemicals and equipment can render the entire process useless.

    Mastering Application and Dwell Time

    To get that "wraparound" effect to work its magic, your technique matters. Try to keep a consistent distance from surfaces—usually between two and six feet—and use a steady, sweeping motion. The goal is a thin, even film, not a soaked, dripping mess.

    But the single most important part of any disinfection job is dwell time. This is the amount of time a disinfectant needs to stay wet on a surface to actually kill the germs.

    1. Read the Label: The manufacturer will tell you the required dwell time. It can be anywhere from 30 seconds to 10 minutes.
    2. Apply Evenly: Make sure the whole surface is visibly wet but not pooling.
    3. Let It Sit: This is the key. Don't wipe the surface dry. Let the disinfectant do its job and air dry on its own.

    If you ignore the dwell time, even the best sprayer in the world won’t be effective. Viruses like Norovirus or Hepatitis C Virus (HCV) need that contact time to be fully inactivated.

    Finally, make sure the area has good ventilation. Open windows or turn on an air system to help clear the mist after you’re done. And don’t forget to follow the manufacturer's instructions for routine cleaning to keep your sprayer working safely for the long haul.

    What’s Next for Electrostatic Disinfection?

    Electrostatic spraying wasn't born in a hospital. Its roots are actually in places like car factories and farm fields, where a perfect, even coat of paint or pesticide was essential. The technology made the leap into public health when global health scares created an urgent need for better, faster, and more complete ways to disinfect large spaces. It quickly became a go-to tool in our modern hygiene playbook.

    This explosion in demand pushed the technology forward at a breakneck pace. The adoption numbers tell the story perfectly. Before recent health crises, fewer than 10% of healthcare facilities were using electrostatic sprayers. Today, that figure has jumped to 62%, according to EPA statistics. This boom is fueling a market expected to hit USD 743.49 million by 2034, with some studies showing daily use on public transit can slash surface contamination by up to 50%. You can dig deeper into these market findings to see the full scope of its growth.

    Innovations on the Horizon

    So, where is this technology headed? The focus is on making it smarter, more efficient, and easier for everyone to use. Manufacturers are rolling out lighter, cordless, and more ergonomic models, which means powerful disinfection is no longer just for large facilities. Small businesses and even homeowners are now able to get their hands on this tech.

    The next big leap will likely be integrating smart technology, like sensors and data tracking. Imagine a sprayer that maps its own coverage in real-time, flagging missed spots on a tablet and automatically logging disinfection cycles for compliance reports. This would eliminate the guesswork and ensure a scientifically validated clean, every single time.

    Advancements in Sprayer Technology

    Engineers and chemists are refining the hardware and the formulas to make them even more effective. A few key areas are seeing major progress.

    • Better Battery Life: Longer-lasting, quick-charging batteries are on the way. This means crews can disinfect larger areas like schools or airports without stopping to recharge, a huge win for operational efficiency.
    • Smarter Nozzle Engineering: New nozzle designs are giving users much finer control over droplet size. This allows them to tailor the spray for different surfaces and disinfectants, which cuts down on chemical waste and improves compatibility.
    • Next-Gen Disinfectants: Chemical companies are busy creating new formulas specifically for electrostatic application. These disinfectants promise faster kill times against a wider range of germs—including tough-to-kill non-enveloped viruses like Human Rotavirus—all while being safer for people and gentler on surfaces.

    It's clear the field isn't standing still. As the technology gets smaller, smarter, and more powerful, it will keep changing how we create healthier and safer spaces for years to come.

    Got Questions? We’ve Got Answers.

    When you're considering a new piece of disinfection tech, it’s natural to have a few questions. Getting a handle on the specifics of electrostatic sprayers is the best way to figure out if they’re the right tool for your space.

    Let’s clear up some of the most common questions and give you the straightforward, practical insights you need.

    Are Electrostatic Sprayers Safe Around Electronics?

    Yes, they are—when you use them the right way. The whole point of the technology is to create an incredibly fine mist that wraps around surfaces without soaking them. This lets you disinfect things like keyboards, office phones, and monitors without worrying about puddles of liquid causing damage.

    That said, a good rule of thumb is to avoid spraying directly into open vents or ports on any device. Always give the manufacturer's guide a quick read for any specific advice on treating areas with sensitive electronics.

    What Kind of Disinfectant Do I Use?

    This is a big one. You can't just pour any old disinfectant into these machines. You absolutely must use a chemical that is not only approved by the EPA but is also explicitly labeled for use in an electrostatic disinfectant sprayer.

    Using the wrong chemical is a bad idea for a few reasons. It can gunk up or corrode the sprayer's internal parts, mess with its ability to charge the droplets, and even create a safety hazard.

    Always check the disinfectant label for two key things: that it’s compatible with electrostatic equipment and that it’s effective against the specific germs you’re targeting, like Human Coronavirus or Norovirus.

    How Is This Different From a Fogger?

    The magic is in the electrical charge. A standard ULV (Ultra Low Volume) fogger just pumps out a cloud of fine, neutral droplets. Gravity takes over, and the mist slowly settles on whatever is underneath it—mostly horizontal surfaces. It's a passive approach that often misses the sides and bottoms of objects.

    An electrostatic sprayer, on the other hand, gives a positive charge to every single droplet as it leaves the nozzle. Because most surfaces have a neutral or negative charge, the droplets are actively pulled toward them, wrapping around and sticking to all sides. This "wraparound" coverage is something a fogger just can't do, giving you a much more thorough and reliable disinfection.

    Does Electrostatic Spraying Replace Regular Cleaning?

    Nope. Think of it as the second step in a one-two punch. Disinfection works best on a surface that’s already clean. If you try to spray over a layer of dust, dirt, or grime, that gunk acts like a shield, preventing the disinfectant from ever reaching the viruses and bacteria underneath.

    For the best results, you always need to do your normal cleaning first to get rid of any visible soil. This can be done with soap and water or by using disinfecting wipes designed for cleaning and disinfecting in one step. Once the surface is clean, you can apply the electrostatic spray. That two-step process—clean first, then disinfect—is the only way to make sure the chemical can do its job properly.

  • 8 Unmistakable Signs Your Immune System Is Weak in 2026

    Your immune system works around the clock, a silent guardian protecting you from a constant barrage of pathogens, from common rhinoviruses to more severe threats like Influenza A and SARS-CoV-2. But what happens when this internal defense network is strained? While catching an occasional cold is a normal part of life, a persistent pattern of illness, unusual fatigue, or other recurring issues can be your body’s way of signaling that its defenses are struggling. Recognizing these subtle warnings is the first step toward strengthening your body’s resilience.

    This article is designed to help you interpret those signals. We will explore eight key signs your immune system is weak, detailing what they mean and why they occur. From frequent infections to wounds that just won't heal, we'll break down the science behind each symptom. Understanding these indicators is crucial for taking proactive steps, knowing when to consult a healthcare professional, and ultimately, reinforcing your body’s ability to fight off invaders. Paying attention to these messages is not just about avoiding the next cold; it’s about supporting your long-term health and well-being. Let's examine the evidence your body might be sending you.

    1. Frequent and Prolonged Infections

    One of the most direct signs your immune system is weak is a noticeable increase in the frequency and duration of illnesses. A robust immune system quickly identifies and neutralizes pathogens, but a compromised one struggles, leading to more sickness. While catching a couple of colds per year is typical for a healthy adult, experiencing four or more, or finding that a simple illness lingers for well over a week, can signal that your body’s defenses are not performing optimally.

    A calendar with red X's on dates, a crumpled tissue, and a thermometer showing 37.0 degrees.

    This pattern of recurrent sickness isn’t limited to just the common cold. It can manifest as repeated bouts of strep throat, persistent urinary tract infections (UTIs), or stubborn fungal infections. For readers of VirusFAQ.com, this is particularly significant because it highlights how easily viral pathogens—from Rhinovirus Type 14 to more aggressive strains like Influenza A (H1N1)—can exploit weakened immune defenses. If you find yourself frequently battling illnesses, you might wonder about remedies that also support your immune health, such as whether saunas good for a cold.

    Actionable Steps for Tracking and Prevention

    If you suspect your infection rate is too high, proactive steps are essential.

    • Keep a Health Journal: Document each illness, noting the start date, duration, symptoms, and severity. This log provides concrete data to discuss with a healthcare provider.
    • Prioritize Hand Hygiene: Frequent and thorough handwashing with soap and water is a primary defense against viral and bacterial transmission.
    • Stay Current on Vaccinations: Immunizations are a key tool for training your immune system to recognize and fight specific pathogens before they can cause a serious infection.
    • Control Your Environment: During peak illness seasons, using air purifiers with HEPA filters and regularly disinfecting high-touch surfaces can significantly reduce your exposure to circulating viruses.

    A pattern of four or more infections per year, or illnesses that consistently last longer than 10 days, warrants a conversation with a healthcare professional to investigate potential underlying causes.

    Understanding these patterns is the first step toward taking control. If you're concerned about recurring sickness, you can explore proven strategies for strengthening your immune response and building more resilient defenses.

    2. Slow Wound Healing

    The speed at which your body repairs itself is another key indicator of immune function. When you get a cut or scrape, your immune system orchestrates the healing process, managing inflammation, fighting off invaders, and signaling for tissue regeneration. If minor wounds take an unusually long time to heal, it can be one of the more subtle signs your immune system is weak, as it struggles to perform these essential repair tasks efficiently.

    This delayed response creates a window of opportunity for pathogens. A compromised immune system not only slows down tissue reconstruction but also increases the risk of infection at the wound site. For VirusFAQ.com readers, this is especially relevant in cases like Herpes Simplex Virus 1 (HSV-1), where viral lesions can become susceptible to secondary bacterial infections if the immune response is lagging. The same principle applies to surgical incisions in immunocompromised patients or common foot ulcers in individuals with diabetes.

    Actionable Steps for Wound Care and Support

    If you notice wounds are lingering, careful management is crucial to prevent complications.

    • Practice Meticulous Wound Care: Keep the area clean using antiseptic protocols to reduce the microbial load. Proper care is your first line of defense against infection.
    • Use Protective Barriers: Always cover wounds with appropriate bandages or dressings. This protects the site from environmental contamination, especially from viruses and bacteria on surfaces.
    • Boost Nutrient Intake: Ensure you are consuming adequate protein and key micronutrients like Vitamin C, Zinc, and Vitamin D, which are all vital for tissue repair and immune function.
    • Monitor for Infection: Regularly check wounds for signs of infection, such as increased redness, warmth, swelling, or discharge, and seek medical attention if they appear.

    If a minor wound shows little to no improvement after two to three weeks, it is important to consult a healthcare provider to assess your immune function and rule out other underlying health issues.

    Proper wound management is critical when your defenses are low. You can learn more about how to protect your environment from pathogens to minimize the risk of wound contamination.

    3. Persistent or Recurring Fatigue

    Feeling tired is normal, but profound exhaustion that doesn't improve with a good night's sleep is one of the more subtle signs your immune system is weak. When your immune system is in a constant state of high alert, fighting off low-grade infections or managing chronic inflammation, it consumes a tremendous amount of energy. This depletion leaves you feeling drained, a condition far beyond simple tiredness, often accompanied by brain fog, muscle weakness, or a general feeling of malaise.

    A sad young man on a couch, with a laptop and coffee, in a sunlit room.

    This phenomenon is especially relevant for the VirusFAQ.com community, as persistent fatigue is a hallmark of post-viral syndromes. For example, individuals recovering from SARS-CoV-2 or those with chronic Epstein-Barr virus (EBV) infections often report debilitating fatigue that lingers for months. This exhaustion is a direct signal of ongoing immune activation as the body works to clear the pathogen and repair damage. Understanding the link between cough and fatigue with no fever can help differentiate between a standard illness and a sign of deeper immune struggle.

    Actionable Steps for Managing Fatigue

    If unexplained fatigue is disrupting your life, a systematic approach can help identify the cause and support your recovery.

    • Track Your Energy Levels: Keep a daily log noting your fatigue on a scale of 1-10, what you ate, your sleep quality, and physical activity. This can reveal patterns to share with your doctor.
    • Prioritize Restorative Sleep: Aim for a consistent 7-9 hours of sleep per night. Create a dark, cool, and quiet environment to maximize immune system repair that happens during deep sleep.
    • Pace Yourself After Illness: Avoid jumping back into strenuous activity immediately after a viral infection. Overexertion can trigger a relapse of fatigue by further stressing an already taxed immune system.
    • Fuel Your Defenses: Ensure your diet includes adequate calories and micronutrients. Nutrient deficiencies can worsen fatigue and impair immune function, creating a vicious cycle.

    Persistent, unexplained fatigue lasting more than two weeks, especially after an infection, is a clear signal to consult a healthcare provider. It's not just "being tired"; it's a symptom of your body's ongoing battle.

    By recognizing this type of exhaustion as a potential immune signal, you can take more informed steps toward recovery and support your body's defenses more effectively.

    4. Frequent Oral Thrush or Candida Infections

    Another serious indicator that points to a weakened immune system is the recurrence of fungal infections, particularly oral thrush. This condition, caused by an overgrowth of Candida albicans, presents as white patches in the mouth and throat. While candida is a normal inhabitant of our bodies, a healthy immune system keeps it in check. When it repeatedly proliferates, it often signals significant T-cell dysfunction.

    For the VirusFAQ.com audience, understanding the role of T-cells is vital. These cells are not only critical for managing fungal populations but are also essential for controlling viral replication. A decline in T-cell function can lead to the reactivation of dormant viruses, such as those in the herpes family. For instance, cancer patients undergoing chemotherapy or individuals with advanced HIV-1 often experience oral thrush, which serves as a visible sign of their profound immune compromise. This makes managing environmental pathogens even more important, highlighting the need for effective hygiene practices like using EPA-registered disinfecting wipes on surfaces.

    Actionable Steps for Management and Evaluation

    If you are experiencing recurrent candida infections, it is crucial to take both immediate and long-term actions.

    • Maintain Rigorous Oral Hygiene: Brush twice daily, floss regularly, and consider using an antifungal mouthwash to help control the local yeast population.
    • Avoid Oral Irritants: Acidic foods, excessive sugar, and hard candies can worsen irritation and encourage candida growth.
    • Seek Immediate Medical Evaluation: Persistent oral symptoms require a professional diagnosis to rule out or identify underlying immune deficiencies.
    • Address the Root Cause: Work with your healthcare provider to investigate and manage the primary cause of the immune suppression.

    Frequent or persistent oral thrush is not a minor inconvenience; it is a significant clinical sign that demands prompt medical investigation to address potentially severe underlying immune system weakness.

    Understanding this symptom is key, as it provides a clear window into the functional status of your cellular immunity. You can learn more about how different pathogens interact with a compromised host by exploring our resources on viruses that affect immunocompromised individuals.

    5. Frequent Cold Sores or Herpes Outbreaks

    A sudden increase in cold sores or other herpes simplex virus (HSV) outbreaks is a classic sign your immune system is weak. The herpes virus remains dormant in nerve cells after an initial infection, and a healthy immune system, particularly T-cell mediated immunity, typically keeps it suppressed. When these defenses are compromised, the virus can reactivate, leading to the painful blisters characteristic of an outbreak. Experiencing multiple reactivations per year suggests your immune system isn't effectively keeping the virus in check.

    Close-up of a person's mouth with a finger touching a lower lip showing a red, bleeding sore.

    This connection is highly relevant to the mission of VirusFAQ.com because HSV-1 and HSV-2 reactivation provides a direct, visible indicator of weakened viral immunity. The frequency and severity of these outbreaks often correlate directly with the strength of your body's defenses. For instance, individuals undergoing immunosuppressive therapy, experiencing extreme stress, or with conditions like advanced HIV-1 often report more frequent and severe herpes lesions.

    Actionable Steps for Management and Prevention

    If you notice an uptick in herpes outbreaks, taking steps to manage them and support your immune system is crucial.

    • Identify and Avoid Triggers: Keep a log to pinpoint personal triggers like stress, sun exposure, or fatigue. Simple actions, such as using an SPF 30+ sunscreen on your lips, can prevent UV-triggered reactivations.
    • Practice Good Hygiene: To prevent spreading the virus, avoid touching lesions and wash your hands frequently. Keeping the area clean and dry promotes faster healing. It's also wise to not share items like lip balms, utensils, or towels during an outbreak.
    • Consider Antiviral Medication: If you experience four or more outbreaks annually, a healthcare provider might recommend prophylactic (preventive) antiviral medications like acyclovir or valacyclovir.
    • Manage Stress: Since stress is a major trigger for HSV reactivation, incorporating stress-reduction techniques such as meditation, regular exercise, or counseling can help reduce outbreak frequency.

    An increasing frequency or severity of herpes outbreaks is a significant signal that warrants a discussion with a healthcare provider to assess your underlying immune function and rule out other health issues.

    Understanding this direct viral sign empowers you to take action. If frequent outbreaks are a concern, you can learn more about the Herpes Simplex Virus and how to manage it effectively.

    6. Enlarged Lymph Nodes or Spleen (Persistent Lymphadenopathy)

    Your lymph nodes and spleen are central components of your immune system, acting as filters that trap pathogens and house immune cells. While temporary swelling is a normal and healthy response to an active infection, persistent enlargement that lasts for weeks signifies that your immune system is under chronic stress. This condition, known as lymphadenopathy, suggests your body is struggling to clear a persistent threat, such as an ongoing infection or abnormal cells.

    For readers of VirusFAQ.com, this is a critical symptom because it can indicate a sustained battle against chronic viral infections like Epstein-Barr (EBV), Cytomegalovirus (CMV), or even HIV-1. These viruses can place immense pressure on the body’s defenses, leading to noticeable changes in immune infrastructure. Understanding this link is vital, especially when considering how to protect yourself and others. For instance, knowing how long the flu virus lives on surfaces can help you take better preventative measures in your environment.

    Actionable Steps for Monitoring and Response

    If you notice persistently swollen glands, a structured approach is necessary.

    • Perform Regular Self-Checks: Gently palpate the sides of your neck, under your jaw, in your armpits, and in your groin for any firm, pea-sized or larger lumps that don't go away.
    • Document Associated Symptoms: Keep a log of other signs that appear alongside the swelling, such as fever, night sweats, unexplained weight loss, or persistent fatigue.
    • Seek Medical Evaluation: If any lymph node remains enlarged for more than three weeks, schedule an appointment with a healthcare provider for a thorough examination.
    • Clean High-Contact Areas: Since persistent lymphadenopathy can be a sign of a transmissible chronic viral infection, it reinforces the need to keep your environment sanitary. Regularly using high-quality disinfecting wipes on surfaces can reduce the potential for viral spread.

    A swollen lymph node that persists for longer than three weeks, especially when accompanied by other systemic symptoms like fever or weight loss, requires immediate medical attention to rule out serious conditions.

    Observing your body's signals is key. If you are dealing with this or other signs your immune system is weak, you can learn more about common viral infections to better understand potential causes.

    7. Frequent or Severe Shingles Outbreaks

    A shingles outbreak is more than just a painful rash; it can be a direct indicator of a struggling immune system. Shingles, or herpes zoster, is caused by the reactivation of the varicella-zoster virus (VZV), the same virus that causes chickenpox. After a chickenpox infection, the virus lies dormant in nerve roots. A strong immune system, specifically T-cell mediated immunity, keeps it in check. When these defenses falter, the virus can reawaken, causing a shingles outbreak.

    While a single shingles episode can occur in healthy adults, particularly after age 50, recurrent or unusually severe cases are clear signs your immune system is weak. For the audience of VirusFAQ.com, this link between a latent virus and immune competence is critical. It shows how a previously encountered pathogen can exploit even a temporary dip in your body's defenses. For example, individuals with compromised immunity, such as those undergoing chemotherapy or living with unmanaged HIV-1, often experience more frequent and aggressive shingles episodes.

    Actionable Steps for Management and Prevention

    Taking proactive measures is crucial if you experience shingles, especially if it's recurrent.

    • Seek Early Antiviral Treatment: Medications like acyclovir or valacyclovir are most effective when started within 72 hours of the first rash appearing. Prompt treatment can reduce the severity and duration of the outbreak.
    • Get Vaccinated: The Shingrix vaccine is highly effective at preventing shingles. If you are over 50 or are over 18 and immunocompromised, talk to your doctor about this two-dose series.
    • Maintain Scrupulous Hygiene: Keep the rash clean and covered to prevent secondary bacterial infections. This also reduces the risk of spreading VZV to individuals who are not immune to chickenpox. Using effective disinfecting products on surfaces in your home can help contain viral spread.
    • Discuss Your Immune Health: Report any shingles outbreak, especially repeat episodes, to your healthcare provider. This can prompt an investigation into underlying conditions that may be weakening your immune system.

    A second shingles outbreak, or a single severe case with widespread rash or facial involvement, is a significant medical event that points to underlying immune compromise and requires immediate medical evaluation.

    Understanding the connection between this viral reactivation and immunity is key. For a deeper dive into how your body fights off such threats, you can learn more about the specific cells involved in the immune response.

    8. Recurring Pneumonia or Respiratory Tract Infections

    While upper respiratory infections are common, experiencing repeated lower respiratory infections like pneumonia is a significant red flag. Pneumonia that occurs more than once within a year, especially if it follows a minor viral illness, suggests a serious breakdown in your body's specialized respiratory defenses. A healthy respiratory system is armed with mechanisms like mucus clearance and specialized immune cells (alveolar macrophages) to fight off invaders, but a compromised system struggles to prevent pathogens from taking hold in the lungs.

    This pattern is a critical concern because a simple viral infection, such as Influenza A2/305/57 Virus (H2N2), can often pave the way for a more severe secondary bacterial pneumonia in someone with a weakened immune system. For instance, individuals with conditions like hypogammaglobulinemia may suffer from recurrent sinusitis that progresses to pneumonia. This highlights a severe immune dysfunction and one of the clearest signs your immune system is weak, demanding immediate medical attention. To understand the initial trigger, you can explore the details of what causes viral pneumonia and how it can lead to complications.

    Actionable Steps for Protection and Diagnosis

    If you are facing recurrent respiratory infections, protecting your lungs and investigating the root cause is paramount.

    • Prioritize Vaccinations: Stay current with all recommended vaccines, including the annual flu shot, pneumococcal vaccines as advised by your doctor, and COVID-19 boosters.
    • Practice Respiratory Hygiene: Make it a habit to cough or sneeze into your elbow and wash your hands frequently. On shared surfaces where pathogens linger, using disinfecting wipes can reduce the risk of transmission.
    • Avoid Environmental Triggers: Minimize exposure to smoke, air pollution, and other occupational irritants that can damage your respiratory tract and make it more vulnerable to infection.
    • Seek Prompt Evaluation: Do not dismiss a persistent cough, shortness of breath, or fever. Early medical evaluation can prevent a mild infection from becoming severe pneumonia.

    Recurrent pneumonia is not a sign to be ignored. If you experience two or more cases of pneumonia in a single year, it is essential to ask your doctor about immune function testing, which may include immunoglobulin levels and T-cell counts.

    Comparison of 8 Signs of Weak Immunity

    Symptom 🔄 Implementation complexity ⚡ Resource requirements 📊 Expected outcomes Ideal use cases ⭐ Key advantages
    Frequent and Prolonged Infections Medium — requires pattern tracking and differential diagnosis Moderate — symptom logs, primary care visits, cultures, CBC/immunoglobulins if recurrent Early detection of immune dysfunction; guides prevention and workup Recurrent bacterial/viral infections (4+ per year) or infections lasting 10+ days Recognizable pattern that prompts timely evaluation and preventive action
    Slow Wound Healing Low–Medium — observable but multifactorial causes Moderate — wound care supplies, nutritional assessment, possible specialist referral and labs Identifies infection risk and need for enhanced wound management Minor cuts/surgical wounds taking 2–3× longer than expected or repeatedly infected Measurable sign that motivates targeted wound care and nutrition correction
    Persistent or Recurring Fatigue Medium — subjective; needs exclusion of other causes Low–Moderate — sleep hygiene, basic labs (CBC, thyroid), clinician assessment May reveal chronic/post-viral fatigue or ongoing immune activation Ongoing tiredness despite adequate sleep, brain fog after infections Often an early-detected symptom encouraging rest and medical evaluation
    Frequent Oral Thrush or Candida Infections Low — visible clinical signs but needs confirmation Moderate — antifungal therapy, oral exam, immune testing (e.g., T‑cell counts) Strong indicator of T‑cell dysfunction; triggers immune workup and treatment Recurrent oral/vaginal thrush or persistent mucosal fungal lesions Clear clinical marker prompting urgent evaluation of cell‑mediated immunity
    Frequent Cold Sores or Herpes Outbreaks Low–Medium — observable recurrence though triggers vary Low–Moderate — antivirals, trigger management, possible immune testing Signals HSV reactivation and potential immune suppression; may prompt prophylaxis ≥4 HSV outbreaks/year or severe/prolonged lesions Direct viral indicator of immune status with established management pathways
    Enlarged Lymph Nodes or Spleen High — requires professional assessment and broad differential High — physical exam, imaging (US/CT), blood tests, possible biopsy Can reveal chronic viral infection or malignancy; necessitates urgent workup Nodes persisting >3 weeks, multiple groups affected, systemic symptoms Objective physical sign that reliably prompts definitive diagnostic evaluation
    Frequent or Severe Shingles Outbreaks Medium — visible but recurrence is uncommon; implies T‑cell decline Moderate — antivirals, pain control, Shingrix vaccination where appropriate Indicates cell‑mediated immune decline; vaccination and early antivirals reduce complications Early‑onset shingles, recurrent episodes, severe pain or ophthalmic involvement Specific, preventable indicator of immune weakness with effective prophylaxis
    Recurring Pneumonia or Respiratory Infections High — serious presentations needing multisystem assessment High — imaging, hospitalization, specialist testing, vaccines/prophylaxis Urgent identification of severe immune defects; reduces morbidity if addressed ≥2 pneumonias/year, atypical organisms, or pneumonia after minor viral illness Clear clinical emergency that drives immediate immune testing and preventive measures

    Taking Proactive Steps for a Resilient Immune System

    Recognizing the subtle yet persistent signals your body sends is the first crucial step toward reinforcing your natural defenses. The issues we've explored, from frequent infections and slow-healing wounds to persistent fatigue and recurring cold sores, are more than just isolated annoyances. They are important communications from your body’s complex defense network, pointing toward potential vulnerabilities. Viewing these patterns not as failures but as data points allows you to take informed, decisive action.

    If several of the signs your immune system is weak resonate with your personal health experience, the most important next step is to consult a healthcare professional. They can conduct a thorough evaluation, potentially including blood tests, to identify underlying causes and rule out more serious conditions. A proper diagnosis is the foundation of an effective, personalized plan to restore your immune function.

    Your Action Plan for Immune Resilience

    Beyond professional medical guidance, you hold significant power to fortify your immune system through deliberate daily habits. This isn't about a single quick fix but rather building a consistent, supportive lifestyle.

    • Strategic Nutrition: Focus on a diet rich in vitamins C, D, and zinc. This includes incorporating citrus fruits, leafy greens, lean proteins, and fortified foods. A well-nourished body is a well-defended body.
    • Prioritize Restorative Sleep: Aim for 7-9 hours of quality sleep per night. During sleep, your body produces and releases cytokines, a type of protein that targets infection and inflammation, creating an effective immune response.
    • Mindful Stress Management: Chronic stress elevates cortisol levels, which can suppress immune function over time. Incorporate stress-reducing practices like mindfulness, moderate exercise, or engaging in hobbies that bring you joy.
    • Advanced Support: For those seeking a more direct method to replenish essential nutrients and support their body's defenses, therapies such as IV Immunity Boosters can provide a concentrated dose of vitamins and antioxidants directly into the bloodstream for maximum absorption and effect.

    Creating a Safer Environment

    A key component of immune support involves reducing the daily burden placed upon it. This means actively minimizing your exposure to common pathogens. Viruses like norovirus, influenza, and various coronaviruses are opportunistic and spread easily via contaminated surfaces. Rigorous hygiene is a non-negotiable part of a strong defense strategy.

    Making a habit of using quality disinfecting wipes on high-touch surfaces in your home and workplace can dramatically reduce your risk. Focus on doorknobs, light switches, keyboards, mobile phones, and kitchen countertops. This simple, proactive measure helps create a safer personal environment, giving your immune system the breathing room it needs to repair and strengthen.

    Ultimately, building a resilient immune system is a partnership between you and your body. By listening to its signals, seeking expert advice when needed, and adopting practical, preventive habits, you can transition from a reactive state of fighting illness to a proactive one of maintaining robust, long-term health.

  • Top 10 Evidence-Based Best Ways to Prevent Colds in 2026

    The common cold, primarily caused by various rhinoviruses such as Rhinovirus Type 14 and Rhinovirus Type 39, is one of the most persistent and frequent human illnesses. It's responsible for millions of missed work and school days each year, creating significant disruption despite its typically mild nature. In an age where viral transmission of pathogens like influenza, norovirus, and coronaviruses is a prominent public health concern, understanding the most effective prevention strategies has become more critical than ever before. Traditional advice, while often well-intentioned, can sometimes lack the specific, evidence-backed details needed for maximum effectiveness, from the mechanics of droplet spread to the science of immune support.

    This comprehensive guide moves beyond generic tips to provide a detailed, evidence-based roundup of the 10 best ways to prevent colds. We will explore foundational hygiene practices, such as meticulous handwashing and respiratory etiquette, which form the first line of defense. Additionally, we'll cover crucial environmental controls, like improving ventilation and maintaining surface hygiene, which are essential for reducing the viral load of non-enveloped viruses like rhinoviruses and enveloped viruses like influenza in your immediate surroundings. We’ll also examine the powerful lifestyle adjustments that fortify your immune system from within, including nutrition, stress management, and adequate sleep.

    Drawing on insights from our deep dives into virology, this listicle will equip you with specific, actionable strategies to build a robust defense against common seasonal viruses. You will learn not just what to do, but why each method works and how to implement it effectively in real-world scenarios, whether at home, school, or the workplace. By the end of this article, you will have a clear, practical roadmap to minimize your risk of catching a cold and maintain your health throughout the year.

    1. Hand Hygiene and Proper Handwashing

    One of the most powerful and evidence-based methods for preventing colds is a simple, low-cost habit: diligent handwashing. Cold viruses, such as rhinoviruses and human coronaviruses, often spread when an infected person's respiratory droplets land on surfaces like doorknobs, keyboards, or railings. When you touch these contaminated surfaces and then touch your eyes, nose, or mouth, you introduce the virus to your system. Handwashing with soap and water physically removes these germs, interrupting this critical transmission pathway.

    This practice is far from a mere suggestion; it's a cornerstone of public health and one of the best ways to prevent colds. Soap acts as a surfactant, lifting dirt and microbes—including both non-enveloped viruses like Rhinovirus and enveloped viruses like Influenza A—from your skin, while the friction of scrubbing and the flow of rinsing water wash them away. It’s a mechanical process that is incredibly effective at reducing the viral load on your hands, thereby lowering your risk of infection.

    Close-up of a person thoroughly washing their hands with foamy soap under running water in a white sink.

    Actionable Handwashing Tips

    To maximize effectiveness, it's essential to wash your hands correctly and at key moments. The CDC and WHO recommend a specific, easy-to-follow protocol.

    • Timing is Everything: Wash hands before preparing or eating food, after using the restroom, after blowing your nose, coughing, or sneezing, and after being in a public space.
    • The 20-Second Rule: Lather soap and scrub all surfaces of your hands, including the backs, between your fingers, and under your nails, for at least 20 seconds. A helpful timer is humming the "Happy Birthday" song twice.
    • Technique Matters: Use clean, running water. After scrubbing, rinse thoroughly and dry your hands with a clean towel or an air dryer to avoid re-contamination. For a detailed guide, you can review the steps for proper hand washing technique.

    When soap and water are not available, an alcohol-based hand sanitizer with at least 60% alcohol is a reliable alternative for many enveloped viruses like influenza. However, it's important to remember that sanitizers are less effective on visibly dirty hands and may be less effective against certain hardy non-enveloped viruses like norovirus. Regular cleaning of frequently touched surfaces with disinfecting wipes also complements hand hygiene by reducing the initial source of contamination.

    2. Respiratory Etiquette and Proper Coughing/Sneezing Technique

    While handwashing cleans germs from your hands, proper respiratory etiquette stops them at the source. Cold viruses are primarily spread through tiny respiratory droplets expelled when an infected person coughs, sneezes, or talks. Containing these droplets is a fundamental strategy for preventing transmission to others and is one of the best ways to prevent colds in community settings. When you cough or sneeze into your elbow instead of your hands, you prevent the virus from contaminating your hands and, subsequently, every surface you touch.

    This simple behavioral change significantly reduces the number of viral particles, whether from a common Rhinovirus or a more severe Influenza A virus, released into the air and onto surfaces. Research has shown that containing sneezes can decrease airborne viral particles by up to 80%. This is crucial, as respiratory droplets from a single sneeze can travel several feet, landing on people and objects. Campaigns promoting this practice, such as the CDC’s "Cover Your Cough" initiatives, have proven effective in settings like schools and workplaces by normalizing this vital public health habit.

    A man feeling unwell, coughing into his elbow, with a trash can and tissues nearby.

    Actionable Respiratory Etiquette Tips

    Adopting correct etiquette is a powerful act of community care that protects those around you. Follow these guidelines recommended by public health organizations like the WHO and CDC.

    • Cover with Your Elbow or a Tissue: Always cough or sneeze into your inner elbow or a disposable tissue, never into your bare hands. This prevents your hands from becoming vectors for germs.
    • Dispose of Tissues Immediately: If you use a tissue, discard it in a trash bin right away. Do not leave used tissues on desks, tables, or in your pocket where they can contaminate other items.
    • Wash Hands Afterward: After coughing, sneezing, or blowing your nose, wash your hands with soap and water or use an alcohol-based hand sanitizer to remove any lingering germs.
    • Avoid Touching Your Face: Make a conscious effort to avoid touching your eyes, nose, and mouth, especially after a respiratory event, to prevent self-inoculation.

    Practicing this etiquette is most critical when you are actively symptomatic. However, since you can be contagious before symptoms appear, making it a year-round habit is a wise preventative measure. It complements other strategies by ensuring that even if you are unknowingly sick, you are minimizing the risk to others. Combining this with the regular use of disinfecting wipes on shared surfaces can create a much safer environment.

    3. Social Distancing and Isolation When Symptomatic

    A highly effective strategy for preventing colds involves creating physical space between yourself and others, especially when someone is sick. Cold viruses are primarily transmitted through respiratory droplets expelled when an infected person coughs, sneezes, or talks. These droplets typically travel about three to six feet before falling. By maintaining a safe distance, you significantly reduce the chance of inhaling these infectious particles or having them land on you.

    This principle extends to the crucial practice of isolation when you are the one feeling unwell. Staying home at the first sign of symptoms is a cornerstone of community health and one of the best ways to prevent colds from spreading. This single action can dramatically cut down transmission chains, protecting your family, colleagues, and the wider public from not just rhinoviruses but also more impactful viruses like SARS-CoV-2. Research shows that isolating for the first 24-48 hours after symptoms begin can reduce secondary infections by 50-80%, making it a powerful public health tool.

    Actionable Distancing and Isolation Tips

    Adopting these habits not only protects you but also demonstrates a commitment to collective well-being. The guidance from public health authorities like the CDC is clear and straightforward.

    • Isolate Immediately: At the very first sign of cold symptoms like a sore throat or runny nose, stay home from work, school, and social gatherings.
    • Maintain Distance: When you must be in public spaces, especially during peak cold season, try to maintain a distance of at least six feet from others. This is particularly important in high-risk settings like clinics or nursing homes.
    • Embrace Virtual Options: If you feel unwell but need to participate in meetings or classes, opt for virtual attendance whenever possible to prevent exposing others.
    • Inform and Protect: Let close contacts know you are feeling sick so they can monitor their own health. In shared living spaces, try to stay in a separate room and be extra diligent about cleaning shared surfaces with disinfecting wipes.

    4. Vaccination Against Related Viruses

    While a specific vaccine for the common cold doesn't exist due to the vast number of responsible viruses (over 200 strains of Rhinovirus alone), strengthening your immune system against other major respiratory pathogens is a crucial and strategic way to prevent cold-like illnesses. Vaccinations against influenza (like H1N1 or H2N2) and SARS-CoV-2 prepare your body's adaptive immune defenses, which can reduce the frequency, severity, and complications of seasonal respiratory infections that are often mistaken for or can co-occur with a common cold.

    This proactive approach works by training your immune system to recognize and fight specific viral invaders. An annual flu shot, for instance, not only prevents influenza but also significantly lowers the risk of secondary bacterial infections like pneumonia that can follow a viral illness. Similarly, COVID-19 vaccines reduce the likelihood of symptomatic respiratory disease, which helps keep your immune system from being compromised and more susceptible to other opportunistic viruses. This strategy aligns with vaccines available for other viruses, from Hepatitis B Virus (HBV) to Herpes Simplex Virus (HSV).

    Actionable Vaccination Tips

    Staying current on recommended immunizations is a key component of a comprehensive prevention strategy, particularly for vulnerable populations.

    • Schedule Annual Flu Shots: The CDC recommends getting the influenza vaccine each year, ideally before the flu season begins in the fall. This is one of the most effective ways to prevent colds and more severe respiratory illnesses.
    • Stay Up-to-Date on COVID-19 Boosters: Follow public health recommendations for COVID-19 boosters to maintain protection against current variants and reduce the risk of severe respiratory symptoms.
    • Prioritize if High-Risk: Vaccination is especially critical for immunocompromised individuals, the elderly, and those with chronic health conditions, as they are more susceptible to severe complications from respiratory viruses.

    While no vaccine offers 100% protection, combining immunization with other preventive measures creates a powerful defense. Maintaining a robust immunization status is a cornerstone of modern disease prevention. You can learn more about the recommended immunization schedule for adults to ensure your protection is comprehensive.

    5. Maintaining Adequate Sleep and Rest

    While often overlooked, prioritizing sleep is one of the most effective and scientifically-backed best ways to prevent colds. Sleep is not a passive state of rest; it is a critical period when your immune system performs essential maintenance and production. During deep sleep, your body releases proteins called cytokines, some of which help promote sleep while others are needed to fight infection and inflammation. Without sufficient rest, your body produces fewer of these protective cytokines and infection-fighting antibodies.

    This direct link between sleep and immunity is well-documented. Research consistently shows that sleep deprivation significantly impairs immune function, making you more vulnerable to viruses you encounter. Studies have demonstrated that individuals who sleep fewer than six or seven hours a night are considerably more likely to develop a cold after being exposed to a rhinovirus compared to those who get eight hours or more. It is a powerful, restorative process that directly fortifies your body's front-line defenses.

    Actionable Sleep Hygiene Tips

    To harness the immune-boosting power of sleep, focus on building consistent and healthy sleep habits. Aim for the recommended 7-9 hours per night for adults and implement these strategies to improve sleep quality.

    • Create a Strict Schedule: Go to bed and wake up at the same time every day, even on weekends. This reinforces your body's natural sleep-wake cycle, or circadian rhythm.
    • Optimize Your Environment: Ensure your bedroom is dark, quiet, and cool. Blackout curtains, earplugs, or a white noise machine can help eliminate environmental disruptions.
    • Implement a Digital Curfew: Avoid screens from phones, tablets, and computers for at least 30-60 minutes before bedtime. The blue light they emit can suppress melatonin production and interfere with sleep.
    • Mind Your Intake: Limit caffeine and large meals close to bedtime. Regular exercise can promote better sleep, but try to avoid vigorous workouts within three hours of your planned bedtime.

    If persistent sleep issues exist, it's crucial to address them directly. Beyond simply getting enough hours, actively working on alleviating sleep disorders can profoundly impact your immune function and overall well-being. Good sleep hygiene, combined with regular cleaning of your personal spaces with disinfecting wipes to reduce germ exposure, creates a powerful two-pronged defense against cold viruses.

    6. Nutritional Support and Immune-Boosting Diet

    While no single food can act as a magic shield against illness, a consistently nutrient-dense diet is a foundational pillar for a resilient immune system. Your immune cells require a steady supply of vitamins, minerals, and other essential compounds to function optimally. A diet rich in fruits, vegetables, lean proteins, and whole grains provides the building blocks for producing antibodies and natural killer cells, which are critical for identifying and neutralizing invading cold viruses.

    This approach is one of the best ways to prevent colds because nutritional deficiencies directly impair your body's ability to mount an effective defense. Micronutrients like zinc, selenium, and vitamins C and D are particularly crucial for regulating immune responses. A well-nourished immune system is quicker to react and more effective at clearing infections, often reducing the likelihood of getting sick in the first place or shortening the duration if you do.

    Actionable Nutritional Tips

    Incorporating immune-supportive habits into your daily routine is simpler than it sounds. Focus on whole foods and consistency rather than searching for a single "superfood."

    • Eat the Rainbow: Aim for at least two servings of colorful fruits and vegetables with every meal. These foods are packed with antioxidants and vitamins that support immune cell function.
    • Prioritize Protein: Include a source of lean protein (like chicken, fish, beans, or tofu) at each meal. The amino acids in protein are essential for building antibodies and immune cells.
    • Consider Key Supplements: If you live in a region with limited winter sunlight, a vitamin D supplement (1000-2000 IU) may be beneficial. If you feel a cold coming on, studies suggest zinc lozenges taken within 24 hours can reduce its duration. You can learn more about the best vitamins for immune support.
    • Stay Hydrated: Drink at least eight glasses of water daily. Proper hydration helps your body flush out toxins and allows your cells to function efficiently.

    Supporting your gut health through essential gut friendly food choices is another crucial aspect of a strong immune system, as a significant portion of your immune cells reside in the gut. By focusing on a balanced, nutrient-rich diet, you provide your body with the tools it needs to defend itself against common cold viruses.

    7. Environmental Hygiene and Surface Disinfection

    While we often focus on personal habits, the environment around us plays a crucial role in the spread of illness. Diligent surface disinfection is a proactive strategy that directly attacks cold viruses where they linger. Respiratory droplets from a cough or sneeze can contaminate common objects, and these viruses can survive on surfaces for minutes to hours. By touching a contaminated doorknob, keyboard, or light switch and then your face, you complete the chain of infection.

    Cleaning and disinfecting these high-touch surfaces physically removes or inactivates viral particles, breaking this critical pathway of indirect transmission. This is a fundamental component of infection control and one of the best ways to prevent colds, especially in shared spaces. This method complements handwashing by reducing the likelihood that your hands will become contaminated in the first place, creating a safer environment for everyone. Effective disinfecting wipes are a scientifically sound solution for eliminating both enveloped viruses like Influenza and non-enveloped viruses like Rhinovirus from fomites.

    Actionable Disinfection Tips

    To effectively reduce viral presence on surfaces, a systematic and correct approach is necessary. Following guidelines from agencies like the EPA and CDC ensures you are truly disinfecting, not just wiping away dust.

    • Prioritize High-Touch Zones: Focus your efforts on surfaces that are touched frequently by multiple people. This includes doorknobs, light switches, faucet handles, remote controls, countertops, and especially personal devices like smartphones and keyboards.
    • Use the Right Product: Not all cleaners are disinfectants. Use an EPA-approved disinfectant effective against common viruses like rhinovirus. Products containing at least 60% alcohol, or convenient, pre-moistened disinfecting wipes, are excellent options for ensuring you eliminate germs.
    • Respect Contact Time: A disinfectant needs to remain wet on a surface for a specific duration to kill viruses. This “contact time” can range from 10 seconds to several minutes and will be specified on the product label. Wiping it dry too soon can render it ineffective.

    Regularly disinfecting shared spaces is a proven intervention. For instance, office buildings that implement enhanced surface cleaning protocols often report fewer sick days among employees. Similarly, schools that clean high-touch areas multiple times a day during cold season can show measurable reductions in illness transmission.

    8. Improving Indoor Air Quality and Ventilation

    While handwashing targets surface transmission, addressing the air we breathe is another critical frontier in cold prevention. Cold viruses, particularly rhinoviruses, can spread through respiratory droplets and smaller aerosol particles that linger in the air. Improving indoor air quality through proper ventilation and filtration dilutes the concentration of these airborne viral particles, significantly reducing the risk of inhalation and subsequent infection in shared spaces.

    This strategy is one of the best ways to prevent colds in enclosed environments like offices, schools, and homes where people congregate. The core principle is simple: replace contaminated indoor air with cleaner air. This is achieved by increasing the rate of air exchange with the outdoors or by using high-efficiency filters to physically remove viral aerosols from circulation. Organizations like ASHRAE and the CDC now emphasize environmental controls as a key layer of defense against respiratory illnesses.

    A modern air purifier in a bright room with an open window, showing purified air flowing.

    Actionable Air Quality Tips

    Implementing effective air quality improvements doesn't have to be complex. Simple, consistent actions can make a substantial difference in reducing airborne virus levels.

    • Introduce Fresh Air: When weather permits, open windows and doors for 10-15 minutes several times a day to flush out stale indoor air and dilute airborne contaminants.
    • Upgrade Your Filters: Check your HVAC system's filter and upgrade to one with a MERV-13 rating or higher if your system can handle it. Remember to change these filters regularly, especially during peak cold and flu season.
    • Use Portable Air Purifiers: Place a standalone air purifier with a HEPA filter in high-traffic areas like living rooms, bedrooms, or personal office spaces. This is especially effective for removing fine aerosol particles.
    • Maintain Humidity Levels: Use a humidifier to keep indoor humidity between 40% and 60%. This range can impair virus survival and also supports your respiratory system's natural defense mechanisms, like mucociliary clearance.

    In conjunction with these air quality measures, maintaining clean surfaces remains essential. Regular use of disinfecting wipes on high-touch points complements air purification by eliminating another major route of virus transmission, creating a more comprehensive defensive strategy.

    9. Stress Management and Psychological Wellness

    Beyond physical barriers and hygiene, your mental state plays a profound role in your body's ability to fend off infections. Chronic psychological stress significantly impairs immune function, making you more susceptible to the common cold. When you're stressed, your body releases hormones like cortisol, which can suppress the activity of key immune cells like T-cells and interfere with antibody production. This neuroendocrine response leaves your defenses weakened and creates an open invitation for viruses to take hold.

    This connection isn't just theoretical; it's one of the most well-documented lifestyle factors in cold prevention. Landmark research by psychologist Sheldon Cohen demonstrated that individuals with high-stress scores were significantly more likely to develop cold symptoms after being exposed to a rhinovirus. Effectively managing stress is therefore a crucial component of a robust strategy for preventing colds, enhancing your natural resilience from the inside out.

    Actionable Stress Reduction Tips

    Integrating stress management into your daily routine can fortify your immune system. These practices help regulate cortisol levels and support a balanced immune response, making them one of the best ways to prevent colds.

    • Practice Mindfulness: Dedicate 10-20 minutes daily to meditation or mindfulness exercises. Apps like Headspace or Calm can provide guided sessions to help lower stress hormone levels.
    • Stay Active: Aim for at least 150 minutes of moderate-intensity exercise per week. Activities like brisk walking, cycling, or yoga are excellent for reducing stress and boosting immune cell circulation.
    • Nurture Social Connections: Maintaining strong relationships with friends and family provides a crucial buffer against stress. Meaningful social interaction has been shown to have a positive effect on health.
    • Establish Boundaries: Protect your personal time by setting clear boundaries between work and home life. Taking scheduled vacations and disconnecting from work-related tasks is essential for long-term psychological wellness.

    By actively managing your stress, you are not just improving your mental health; you are directly investing in your physical ability to fight off infections. This internal defense strategy works hand-in-hand with external hygiene practices, such as regularly cleaning high-touch surfaces with disinfecting wipes to minimize viral exposure in your environment.

    10. Avoiding Sick Individuals and High-Risk Crowded Settings

    One of the most intuitive yet effective ways to prevent colds is to strategically limit your exposure to the virus in the first place. This means consciously avoiding close contact with people who are actively sick and steering clear of high-density indoor environments, especially during peak cold and flu season. Cold viruses, like rhinoviruses, spread efficiently through respiratory droplets in enclosed, poorly ventilated spaces where many people gather, such as on public transit, in crowded offices, or at large indoor events.

    This prevention method is based on a simple principle of probability: reducing the number of potential exposures directly lowers your chance of infection. By being mindful of your surroundings and making deliberate choices about where you go and when, you can significantly interrupt common transmission chains. This approach moves beyond personal hygiene to environmental and situational awareness, making it a critical layer in a comprehensive cold prevention strategy.

    Actionable Avoidance Tips

    To effectively minimize your exposure, you can integrate several practical habits into your routine, particularly when respiratory illnesses are circulating widely in your community.

    • Stay Situationally Aware: Check local public health surveillance data, often provided by health departments, to understand current respiratory virus trends before attending large indoor gatherings.
    • Adjust Your Commute: If you rely on public transportation, try traveling during off-peak hours when trains and buses are less crowded. If driving, ensure your car's ventilation is set to bring in fresh air.
    • Prioritize Outdoor and Well-Ventilated Spaces: When possible, arrange social gatherings or exercise outdoors. In unavoidable indoor settings, try to maintain physical distance from others.
    • Encourage a Healthy Culture: Support workplace policies that encourage colleagues to stay home when they are symptomatic. This collective responsibility is one of the best ways to prevent colds from spreading through an office.

    When you must be in a high-risk crowded setting, consider wearing a high-quality, well-fitting mask (like an N95) for an added layer of personal protection. This is especially important for individuals who are immunocompromised. Furthermore, remember that viruses can linger on surfaces in these busy areas, making regular use of disinfecting wipes on your personal items like phones or desks a valuable complementary practice.

    10-Point Cold Prevention Comparison

    Intervention Implementation Complexity 🔄 Resource Requirements ⚡ Expected Outcomes ⭐📊 Ideal Use Cases 💡 Key Advantages ⭐
    Hand Hygiene and Proper Handwashing Low — behavioral, needs habit formation 🔄 Minimal — soap, water, sanitizer ⚡ High ⭐⭐⭐ — substantial reduction in contact transmission; evidence-backed (e.g., 30–50% in institutions) 📊 Everywhere; hospitals, schools, workplaces 💡 Universal, low-cost, no side effects ⭐
    Respiratory Etiquette (cough/sneeze into elbow) Low — simple behavior change 🔄 Minimal — tissues optional ⚡ Moderate–High ⭐⭐⭐ — reduces droplet spread (up to ~80% in source control) 📊 Public spaces, classrooms, clinical settings 💡 Immediate reduction of airborne droplets; no cost ⭐
    Social Distancing & Isolation When Symptomatic Moderate — policy + behavior; enforcement challenges 🔄 Low–Moderate — requires remote-work/leave options ⚡ High ⭐⭐⭐ — reduces secondary infections (≈50–80% depending on context) 📊 Outbreaks, symptomatic individuals, crowded indoor settings 💡 Strong population-level impact; protects vulnerable groups ⭐
    Vaccination Against Related Viruses Moderate — delivery, scheduling, uptake efforts 🔄 Moderate — vaccine supply, clinics, cold chain ⚡ Moderate–High ⭐⭐⭐ — reduces severity and some transmission for influenza/COVID; population benefits 📊 Elderly, healthcare workers, community seasonal prevention 💡 Lowers severe outcomes and hospitalizations; herd benefits ⭐
    Adequate Sleep and Rest Moderate — lifestyle change & consistency 🔄 Minimal — time, sleep-conducive environment ⚡ Moderate ⭐⭐ — reduces susceptibility (sleep <6 h increases risk 2–3×) 📊 Individuals, shift workers (with protocols) 💡 Broad health benefits; enhances immune function ⭐
    Nutritional Support & Immune-Boosting Diet Moderate — dietary knowledge and habit change 🔄 Variable — food access; possible supplements ⚡ Moderate ⭐⭐ — supports immunity; some supplements shorten duration if used early 📊 Populations with deficiencies; general prevention 💡 Comprehensive health benefits; culturally adaptable ⭐
    Environmental Hygiene & Surface Disinfection Low–Moderate — routines and correct technique 🔄 Low — cleaning supplies, staff time ⚡ Moderate ⭐⭐ — reduces indirect (fomite) transmission when combined with other measures 📊 Offices, schools, healthcare, shared spaces 💡 Targets surface pathways; easy to integrate into routines ⭐
    Improving Indoor Air Quality & Ventilation High — engineering, system design, maintenance 🔄 High — HEPA units, HVAC upgrades, energy ⚡ High ⭐⭐⭐ — lowers airborne viral load in enclosed spaces; scalable impact 📊 Schools, hospitals, offices, crowded indoor areas 💡 Durable reduction of airborne transmission; improves overall IAQ ⭐
    Stress Management & Psychological Wellness Moderate — sustained behavioral programs 🔄 Low–Moderate — time, program resources ⚡ Moderate ⭐⭐ — reduces susceptibility (high stress linked to higher cold incidence) 📊 Individuals, workplaces, student populations 💡 Addresses immune vulnerability root causes; multiple wellness benefits ⭐
    Avoiding Sick People & Crowded Settings Low–Moderate — personal choices; social/economic tradeoffs 🔄 Minimal — behavior change, scheduling ⚡ High ⭐⭐⭐ — substantially reduces exposure probability during peaks 📊 Peak-season activities, immunocompromised individuals, mass events 💡 Highly effective at exposure reduction; no cost ⭐

    Integrating Prevention into Your Daily Routine

    Navigating the landscape of viral prevention can feel overwhelming, but as we've explored, the best ways to prevent colds are not about finding a single, elusive solution. Instead, effective prevention is a dynamic, layered system you build and maintain through conscious daily habits. It’s about creating a personal health shield composed of smart hygiene practices, environmental awareness, and a resilient immune system. The individual strategies discussed, from meticulous handwashing to prioritizing restorative sleep, are powerful on their own. However, their true strength is unlocked when they are integrated into a cohesive, consistent routine.

    Think of it as a multi-layered defense. Your first and most immediate layer is personal hygiene. This includes the foundational practices of proper handwashing and respiratory etiquette. These actions directly interrupt the most common transmission routes for rhinoviruses and other cold-causing pathogens. They are your active, moment-to-moment defense against germs you encounter throughout the day.

    Your second layer involves controlling your environment. This is where you proactively reduce the viral load in the spaces you inhabit. Strategies like improving indoor ventilation by opening a window and systematic surface disinfection work together to create a less hospitable environment for viruses. This layer is crucial because it addresses pathogens before they even have a chance to reach you.

    Key Insight: A truly effective prevention strategy doesn't just protect you; it protects your environment. Cleaning high-touch surfaces like doorknobs, light switches, and electronic devices removes viral reservoirs, breaking the chain of transmission for everyone who shares that space. For a convenient and proven method of eliminating pathogens, consider keeping disinfecting wipes on hand at home, in your car, and at your desk.

    From Knowledge to Action: Building Your Prevention Toolkit

    The final, and perhaps most crucial, layer is long-term resilience. This is built through consistent lifestyle choices that fortify your body's natural defenses. Adequate sleep, a nutrient-rich diet, and effective stress management are not passive activities; they are powerful tools that prime your immune system to fight off invaders more effectively. While a single good night's sleep won't instantly make you immune, a consistent pattern of healthy living creates a robust internal environment where viruses struggle to take hold.

    The path forward is about making these practices second nature. Here are some actionable steps to integrate these concepts into your life starting today:

    • Conduct a Habit Audit: Identify one or two areas from our list that are currently weak points for you. Is it inconsistent handwashing? Do you often touch your face? Do you forget to clean your phone screen? Start by focusing on improving just one habit.
    • Create "Prevention Pockets": Assemble small kits for your car, your desk, and your bag. Include hand sanitizer, tissues, and a small pack of disinfecting wipes. This makes it easy to maintain hygiene standards no matter where you are, ensuring you’re always prepared to handle unexpected sneezes or dirty surfaces.
    • Schedule Your Wellness: Just as you schedule meetings and appointments, block out time for prevention. Schedule 7-8 hours for sleep. Block out 20 minutes for a walk to de-stress. Set a weekly reminder to disinfect high-touch surfaces in your home and workspace.

    At VirusFAQ.com, our goal is to empower you with the knowledge to understand how viruses work and, more importantly, how to stop them. Mastering the best ways to prevent colds is about more than just avoiding a week of sniffles. It's about taking proactive control over your health, protecting your loved ones, and building a foundation of wellness that serves you year-round. By weaving these evidence-based strategies into the fabric of your daily routine, you transform prevention from a chore into a powerful, life-enhancing habit. You build not just a defense against the common cold, but a fortress of well-being.

  • Mastering Vaccine Storage and Handling Guidelines

    Proper vaccine storage and handling isn't just about following a checklist—it's the backbone of public health. This entire process, known as the cold chain, is a temperature-controlled journey that starts at the manufacturing plant and doesn't end until a vaccine is administered. A single break anywhere along that chain can render life-saving vaccines completely useless.

    The Unbreakable Chain Protecting Vaccine Potency

    Healthcare worker in gloves checks vaccine vials in a cold storage box with a thermometer.

    The trip a vaccine takes from a lab to a patient's arm is a delicate, high-stakes relay race. Think of the "cold chain" less like a series of refrigerators and more like a solemn promise to protect the fragile biology inside every single vial.

    One mistake is all it takes. A refrigerator door left ajar overnight, a brief power outage in a busy pharmacy—these seemingly small slip-ups can destroy an entire batch of immunizations. This is exactly why strict adherence to vaccine storage guidelines is non-negotiable for anyone handling these products.

    The consequences of failure are staggering. Globally, it's estimated that 50 percent of vaccines are thrown away each year, often because they were exposed to the wrong temperatures. That waste translates into billions of dollars lost and, more importantly, countless missed opportunities to prevent disease.

    Most refrigerated vaccines, like those for Influenza A virus (H1N1) or Human Rotavirus, must be kept between 2°C and 8°C (36°F to 46°F). It’s a narrow window that demands constant vigilance.

    To put these critical temperature requirements into perspective, here is a quick reference table summarizing the CDC and WHO recommendations for common vaccine types.

    Essential Vaccine Temperature Ranges

    Vaccine Category Required Refrigerator Temperature Required Freezer Temperature
    Live Attenuated (e.g., MMR, Varicella) 2°C to 8°C (36°F to 46°F) -50°C to -15°C (-58°F to 5°F) for Varicella-containing vaccines
    Inactivated/Recombinant (e.g., Tdap, HPV) 2°C to 8°C (36°F to 46°F) DO NOT FREEZE – Freezing destroys potency
    mRNA (e.g., Pfizer, Moderna COVID-19) Varies by formulation; can be refrigerated for short periods. Ultra-Low: -90°C to -60°C (-130°F to -76°F). Standard Freezer: -25°C to -15°C (-13°F to 5°F)
    Adenovirus Vector (e.g., J&J COVID-19) 2°C to 8°C (36°F to 46°F) DO NOT FREEZE

    As you can see, knowing the specific needs of each vaccine is the first step toward preventing a costly temperature excursion.

    Why Temperature Protocols Vary

    Not all vaccines are built the same, so their storage needs differ. Live attenuated or inactivated vaccines, like those for Hepatitis B Virus (HBV), are generally stable in a standard refrigerator. In fact, freezing them can permanently destroy their effectiveness.

    On the other hand, the newer mRNA vaccines, developed to fight viruses like SARS-Related Coronavirus 2 (SARS-CoV-2), brought a new level of complexity. These vaccines are incredibly fragile. The delicate messenger RNA inside them will degrade unless kept at ultra-cold temperatures, sometimes as low as -70°C. This created a huge demand for specialized freezers and thermal shippers, completely changing the game for large-scale immunization campaigns.

    The "unbreakable chain" of vaccine potency depends on a stable environment. This even includes things like enhancing commercial door energy efficiency in your facility. Even minor drafts can affect a room's ambient temperature, making your equipment work harder and increasing the risk of fluctuations.

    Real-World Points of Failure

    Beyond the equipment, people are often the weakest link in the cold chain. These are the kinds of all-too-common scenarios that keep public health officials up at night:

    • The Mobile Clinic: An outreach team heads to a remote town for a flu shot drive. They use a portable cooler, but it wasn't conditioned properly. The internal temperature dips below freezing, and the entire day's supply of vaccines is ruined.
    • The Busy Pharmacy: A new technician is unloading a vaccine shipment during a morning rush. They get distracted and leave the box on the counter for "just a minute"—which turns into an hour. That brief exposure to room temperature is more than enough to compromise potency.
    • The Overlooked Maintenance: A clinic’s refrigerator has a tiny, worn-out door seal. Nobody notices. The compressor starts working overtime to keep things cool, leading to inconsistent temperatures and, eventually, a total equipment failure.

    Each of these examples shows how small oversights can lead to huge problems. Mastering vaccine storage isn't just about following rules; it's about safeguarding public health, one carefully handled vial at a time.

    Setting Up Your Vaccine Storage Environment

    A scientist reviews inventory on a tablet beside an open refrigerator storing medical vials and water.

    The quality of your vaccine storage unit is the absolute bedrock of your immunization program. Think of it less like a cold box and more like a lifeline for your entire vaccine supply. Getting the setup right from day one is non-negotiable for maintaining the cold chain and making sure every dose counts.

    The first big decision is the hardware. It's tempting to grab a standard household or dorm-style fridge, but that’s a rookie mistake. Those units are built for keeping soda cold, not for the pinpoint temperature control vaccines demand. Their temperatures can swing wildly, and those built-in freezer compartments are notorious for accidentally freezing—and ruining—refrigerated vaccines.

    This is where purpose-built pharmaceutical-grade refrigerators and freezers come in. They are the gold standard for a reason. These units are engineered with powerful fans and microprocessor controls to keep the internal environment uniform and stable, which is the cornerstone of any solid vaccine storage and handling plan.

    Configuring Your Storage Unit for Maximum Stability

    Once you've got the right unit, where you put it and how you organize it are just as critical. The unit needs to be in a well-ventilated room, far from direct sunlight or heating vents. Make sure there are at least 2-3 inches of clearance around the back and sides so the air can circulate properly.

    Inside, a little strategic organization goes a long way toward keeping temperatures stable.

    • Add Thermal Mass with Water Bottles: Don't leave shelves and door racks empty. Fill them with water bottles. This creates thermal mass, which acts as a buffer to stabilize the temperature when the door opens and can be a lifesaver during a brief power outage.
    • Central Storage is Key: Always keep vaccines in their original boxes and place them in the middle of the unit. You want to stay away from the walls, floor, and cooling vents—those are the spots where temperatures can get too cold and fluctuate.
    • The Door is a No-Go Zone: Never, ever store vaccines in the refrigerator door. It's the area that experiences the wildest temperature swings every single time it's opened. Don't put your most valuable assets at risk.

    A simple but often-overlooked step is to start with a clean slate. Before you load a single vial, make sure all internal surfaces have been wiped down with a suitable disinfecting wipe. A clean storage space is just good practice and helps prevent any potential contamination from viruses that can persist on surfaces, such as Norovirus or Rhinovirus.

    Implementing Continuous Temperature Monitoring

    How do you know if your storage unit is truly holding steady? You monitor it. And while manual checks are still required, they only give you a snapshot. For a complete picture, a Digital Data Logger (DDL) is an absolute must-have.

    A DDL is a small electronic device that works 24/7, taking temperature readings at set intervals. It creates a detailed log that can show you subtle temperature drifts or excursions you'd otherwise miss completely. It’s your early warning system, helping you spot an equipment issue before it turns into a catastrophic loss of inventory.

    When you set up your DDL, put the probe right in the middle of the unit with the vaccines—that’s how you’ll get the most accurate read on their environment. The display should be mounted on the outside of the door so you can check it at a glance without having to open it.

    A Real-World Setup Scenario

    Let’s say you’re training a new team member, Alex, on setting up a new pharmaceutical fridge. Here’s how you’d walk them through it to avoid common pitfalls:

    1. Placement: Alex shoves the unit right up against the wall. You step in and explain the need for that 2-3 inch gap, showing how it lets the compressor's heat escape and prevents the unit from overworking.
    2. Loading: Next, Alex starts unpacking vials and puts them in the door for easy access. You correct this immediately, explaining the "no-fly zone" rule for doors and showing how to use water bottles to fill those spaces instead. This is also a great time to discuss why different vaccines have different needs, which you can learn more about in our guide on what inactivated vaccines are.
    3. DDL Setup: Alex places the DDL’s probe right next to the cooling vent. You move it to a central tray, explaining that this spot gives a much better reading of the actual temperature the vaccines are experiencing.

    By walking through these hands-on steps, you're not just setting up a piece of equipment; you're building a reliable system and empowering your team to be guardians of the cold chain. This meticulous approach turns your guidelines from words on a page into a practiced reality that protects every single dose.

    The New Frontier: Ultra-Cold Storage for mRNA Vaccines

    The arrival of mRNA vaccines, especially those targeting viruses like SARS-CoV-2, wasn't just a scientific breakthrough—it completely upended the rulebook for vaccine storage. Their incredible effectiveness came with a new, complex logistical challenge. Because messenger RNA is so delicate, it needs to be kept at frigid temperatures to stop it from breaking down, forcing healthcare systems everywhere to adapt on the fly.

    Unlike most vaccines that are perfectly happy in a standard refrigerator, many mRNA formulas require special ultra-low temperature (ULT) freezers. We're not talking about your kitchen freezer; these are sophisticated units that can hold temperatures as cold as an Antarctic winter. This single requirement forced a massive overhaul of the cold chain, demanding new equipment, new protocols, and new training for every person handling these vials. If you want to dive deeper into how these incredible immunizations work, check out our guide on how vaccines work against viruses.

    Why So Cold? The Science Behind It

    So, what’s the deal with the extreme temperatures? It all comes down to the active ingredient: the messenger RNA (mRNA) itself. Think of it as a fragile blueprint that tells our cells how to build a defense against a virus. But on its own, mRNA is notoriously unstable and can be destroyed by common enzymes in a heartbeat.

    To survive the journey into our bodies, the mRNA is wrapped in a protective bubble made of fat particles called lipid nanoparticles. This entire package is extremely sensitive to heat. Storing it at ultra-low temperatures essentially freezes everything in place, locking the molecules down so they can't degrade. This ensures the vaccine is just as potent when it's administered as it was when it left the lab.

    A Real-World Crash Course: The COVID-19 Rollout

    The global rollout of COVID-19 vaccines was a masterclass in adapting to these incredibly strict storage rules. The Pfizer-BioNTech vaccine, for example, needed to be kept at an astonishing –70°C (±10°C), while Moderna's required a more manageable but still very cold –20°C for long-term storage.

    This logistical puzzle sent facilities scrambling to get their hands on ULT freezers and write meticulous procedures for every single step.

    To solve this, Pfizer developed special thermal shipping containers packed with dry ice. They also built in some much-needed flexibility, eventually allowing unopened vials to be stored in a regular refrigerator (2°–8°C) for up to 31 days. You can get the full story on these innovative solutions in the research on mRNA vaccine handling.

    From the moment the doses arrived, the clock was ticking.

    • Handling Shippers: Vaccines would show up in those high-tech coolers. Staff had to be trained to safely handle the dry ice and keep a close eye on the shipper's internal temperature.
    • Thawing Just Right: You couldn't just leave vials on the counter. Thawing had to be a controlled process, either slowly in a fridge over a few hours or quickly at room temperature for a very specific, limited time.
    • Timing is Everything: Once a vial was thawed or punctured, its shelf life dropped dramatically—sometimes to just a few hours. Meticulous tracking was non-negotiable.

    Finding a Balance Between Rules and Reality

    While the ultra-cold requirements seemed impossibly strict at first, both manufacturers and health agencies worked hard to build in practical workarounds.

    The ability to move thawed Pfizer vials into a standard refrigerator for a month was a true game-changer. It meant smaller clinics and pharmacies that couldn't afford a pricey ULT freezer could still be part of the vaccination effort, which massively expanded access for everyone.

    This highlights a key principle of modern vaccine management: the guidelines have to be scientifically sound but also practical enough to work in the real world. Precise temperature monitoring is the backbone of it all, especially with these sensitive mRNA products. Understanding the different temperature sensor types is critical for anyone tasked with protecting these life-saving doses. This built-in adaptability is what ensures even the most advanced vaccines can make it to every community, potent and ready to go.

    Daily Protocols for Handling and Administration

    Excellent vaccine storage is only half the battle. The cold chain's integrity has to extend all the way to the patient's arm, and that's where your daily workflow comes in. These day-to-day routines—from unpacking a new shipment to drawing a single dose—are where meticulous guidelines become practiced reality.

    Think of these protocols as your front line of defense against vaccine waste and compromised immunity.

    When a shipment lands on your dock, the clock starts immediately. Every box needs to be unpacked and stored right away, and you should always prioritize refrigerated vaccines over frozen ones. Before anything goes into a unit, find the temperature monitoring device packed with the shipment and check its readings. Document everything to confirm the cold chain held up perfectly during transit.

    This is especially critical for ultra-cold vaccines, where every stage has its own strict temperature requirement.

    Infographic illustrating the ultra-cold vaccine handling process: ship, store, and thaw at specified temperatures.

    As you can see, the process requires distinct, temperature-controlled environments at each step. There's simply no room for deviation.

    Moving Vaccines Off-Site

    Running an off-site clinic or just moving stock between facilities? This is one of the most vulnerable points in the cold chain. You absolutely must use a qualified container and pack-out system engineered to hold stable temperatures for the entire trip. This is no time to guess with a standard picnic cooler.

    The process involves a few key steps:

    • Conditioning Coolant Packs: You need to prepare your frozen or refrigerated coolant packs by letting them sit at room temperature until they start to "sweat." This crucial step prevents them from being too cold, which could accidentally freeze your vaccines.
    • Creating a Buffer Zone: Always place a layer of bubble wrap or corrugated cardboard between the coolant packs and the vaccine boxes. This insulation is a simple but critical barrier.
    • Including a DDL: A calibrated Digital Data Logger (DDL) must be packed right alongside the vaccines. It's the only way you'll know for sure that temperatures stayed within range during the entire journey.

    The checklist below breaks down the essentials for both short and long-duration transport.

    Vaccine Transport Checklist

    Action Item Short-Duration Transport Off-Site Clinic Transport
    Container Hard-sided cooler or validated container Qualified container and pack-out system
    Coolant Packs Conditioned refrigerated/frozen packs Conditioned packs, sufficient for entire trip
    Insulation Layer of bubble wrap/cardboard Corrugated cardboard or other validated barrier
    Temperature Monitor Calibrated DDL placed with vaccines Calibrated DDL placed with vaccines
    Vaccine Placement Centered, away from direct contact Centered, fully insulated from coolant packs
    Documentation Record time out, time in, and temperatures Maintain detailed transport log per CDC guidelines
    Emergency Plan Plan for delays or unexpected returns Full plan for power loss or container failure

    Whether you're going down the hall or across town, following these steps ensures the cold chain remains unbroken.

    The Nuances of Multi-Dose Vials

    Multi-dose vials are incredibly efficient, but they demand strict management to prevent contamination and waste. The moment a vial is punctured for the first time, its shelf life changes completely.

    You must immediately label it with the Beyond-Use Date (BUD). This is typically 28 days, unless the manufacturer's instructions say otherwise.

    Never combine leftover vaccine from multiple vials to create a full dose. This practice, known as "pooling," dramatically increases the risk of contamination and can lead to incorrect dosing. Every single dose must be drawn from a single, uncompromised vial.

    The BUD is a hard stop. Any vaccine left in the vial after that date must be discarded, even if the vial's original expiration date is months away. Keeping a clear, simple log of when each vial was opened is the key to minimizing waste and protecting patients.

    Keeping Your Prep Space Hygienic

    The final step—preparing the dose in a clean, designated area—is where vaccine handling and infection control truly intersect. The surfaces where you draw up vaccines can easily become contaminated, posing a risk to both the vaccine's integrity and the patient's health.

    Just think about the viruses these vaccines prevent, like Influenza A Virus (H1N1) or Human Rotavirus, which are known to persist on surfaces. A contaminated countertop could easily lead to cross-contamination.

    Your daily routine must include these non-negotiables:

    • A Designated "Clean Space": Set aside an area used exclusively for vaccine preparation, far from any potentially contaminated items like lab specimens or used supplies.
    • Routine Disinfection: Wipe down the preparation surface between patients or after any spill. Using an effective disinfecting wipe ensures the area stays free of pathogens.
    • Proper Hand Hygiene: This one is obvious but critical. Always practice proper hand hygiene before handling any vial or syringe.

    This focus on surface hygiene bridges the gap between proper vaccine storage and broader infection control, ensuring the last step in the immunization process is as safe as all the others.

    Emergency Preparedness and Incident Response

    Even with the best protocols in place, things can—and will—go wrong. A nasty storm could take out the power grid, or a brand-new freezer might decide to fail over a long weekend. This is precisely why a solid emergency response plan isn't just a nice-to-have; it's what separates a controlled, professional reaction from absolute chaos.

    Your emergency plan is arguably the most critical piece of your entire vaccine management system. It’s not just about what to do when disaster strikes, but how you prepare for it before it happens. Think backup generators and solid agreements with alternate storage facilities.

    When a temperature excursion happens, the first few minutes are everything. Panic is your enemy. A calm, methodical approach is your best friend. Your immediate goal is to stop any further damage and meticulously gather the data you'll need to figure out if the vaccines are still viable.

    Responding to a Temperature Excursion

    Picture this: you walk in on a Monday morning and the refrigerator’s Digital Data Logger (DDL) is flashing a high-temp alert. The unit feels warm to the touch. Don't panic. Here’s how you handle it.

    • Isolate and Label: First things first, do not throw anything away. Immediately move the affected vaccines into a separate container inside a working refrigerator or freezer. Then, slap a big, clear label on it: "DO NOT USE — AWAITING GUIDANCE." This simple step is crucial to prevent anyone from accidentally administering compromised doses.
    • Document Everything: This is where the real work begins, and you can't cut corners. Grab your logbook and record the current temperature inside the failed unit. Then, get the minimum and maximum temperatures reached during the excursion from your DDL. Don't forget to note the exact date, time, and your name.
    • Contact Key Personnel: With the vaccines secured and initial data recorded, it's time to escalate. Notify your designated vaccine coordinator immediately. They will take the lead on contacting the vaccine manufacturer and your local or state immunization program for the final word.

    This detailed documentation is non-negotiable. Without it, manufacturers have no way to determine if the vaccine’s potency was compromised. You'll likely be forced to discard the entire, very expensive, stock.

    You can't tell if a vaccine has lost its potency just by looking at it. Always treat a temperature excursion as a serious event until you get the official all-clear from the manufacturer or public health authorities. Never, ever guess.

    Developing a Robust Emergency Plan

    A strong response is always built on a foundation of solid preparation. We've seen how strategic investments in the cold chain make a real difference. For example, a WHO-backed effort in Azerbaijan to upgrade its infrastructure with 476 vaccine-specific refrigerators and 25 freezers between 2021 and 2024 achieved 100% reliable storage capacity at the subnational level. This project is a perfect case study, proving that success comes from having the right equipment, well-trained staff, and meticulous planning. You can read more about these insights on boosting vaccine storage and management.

    Your emergency plan needs to be a physical, written document that everyone can access and has been trained on. Make sure it includes:

    • Up-to-date contact info for key staff, equipment repair services, and your backup storage locations.
    • Clear protocols for transporting vaccines to a backup site, including having pre-conditioned transport coolers ready to go at a moment's notice.
    • Step-by-step instructions for documenting a temperature excursion, just like we walked through above.

    Proper Disposal of Compromised Vaccines

    So, what happens if the manufacturer or health department confirms your fears? The vaccines are no longer viable and must be destroyed. You can't just toss them in the regular trash with the coffee grounds.

    Compromised vaccines are considered medical waste. That means they require specific disposal procedures to keep you compliant and protect the environment. You'll need to work with a licensed medical waste management company to ensure they are handled correctly. Part of this process also involves thoroughly cleaning and disinfecting your workspace, especially after handling compromised materials, with appropriate disinfecting wipes. To learn more, our guide on public health emergency preparedness covers this in greater detail. Taking this final step closes the loop on the incident and ensures safety from start to finish.

    Common Questions on Vaccine Storage and Handling

    Even with perfect protocols on paper, real-world questions pop up all the time when you're managing vaccines day in and day out. Here are some clear, no-nonsense answers to the queries I hear most often, reinforcing the best practices we've covered.

    What Is the Most Common Mistake in Vaccine Storage?

    Hands down, the single most frequent—and costly—mistake is inconsistent temperature monitoring. It’s a quiet failure that can put your entire vaccine inventory at risk, and it usually happens in a couple of sneaky ways.

    Many clinics still get by with a basic thermometer, maybe checking temps once when they open up. That gives you a single snapshot in time, completely missing dangerous temperature swings that can happen overnight or during a long weekend. Your best defense, and the modern standard of care, is a Digital Data Logger (DDL) that keeps a vigilant, 24/7 watch on your inventory.

    Another classic error is putting the monitoring probe in the wrong spot, like on the door shelf or right next to a cooling vent. For a true reading of what your vaccines are experiencing, the probe needs to be right in the middle of the unit, nestled in with the vials themselves.

    Can I Use a Dormitory-Style Refrigerator for Vaccines?

    Absolutely not. You should never, ever use a dorm-style or bar-style combination refrigerator for storing vaccines. These units are built for convenience, not for the rock-solid temperature stability that vaccines demand.

    Their temperatures can fluctuate wildly. Worse, their built-in freezer compartments create an extreme risk of accidentally freezing refrigerated vaccines. Once a liquid vaccine like one for Hepatitis B Virus (HBV) freezes, its potency is gone forever and it must be thrown out. Always invest in a purpose-built pharmaceutical unit or, at the very least, a carefully vetted standalone household model.

    The cost of a proper storage unit is a tiny investment compared to the potential loss of thousands of dollars in ruined vaccines—not to mention the erosion of public trust that comes with it.

    What Should I Do If a Vaccine Is Left at Room Temperature?

    First thing's first: stay calm and be methodical. Whatever you do, don't just discard the vaccine.

    • Isolate and Label: Immediately move the vaccine away from your other stock. Slap a clear label on it that says something like, "DO NOT USE – POSSIBLE TEMPERATURE EXCURSION."
    • Document Everything: Grab a log sheet and note the exact time the vaccine was found, your best estimate of how long it was out, and the room's ambient temperature.
    • Contact the Experts: With your notes in hand, call your state or local immunization program or the vaccine's manufacturer directly. They are the only ones who can give you the green light.

    Some vaccines have a bit of a grace period at room temperature, but you must get official guidance before even thinking about using it. Never, ever guess.

    How Often Should I Record Vaccine Temperatures?

    According to CDC guidelines, you need to manually check and record the minimum and maximum temperatures from your DDL at the start of every workday. This creates a documented, human-verified paper trail.

    But your real safety net is the continuous data from the DDL itself. I always tell my teams to make it a habit to review the full DDL data logs at least once a week. This is how you spot subtle temperature trends or slight shifts that could signal a failing compressor or a bad door seal, giving you a chance to fix the problem before it becomes a full-blown emergency.

  • Viral culture: A Comprehensive Guide to Viral Culture

    When you need to know if someone is shedding live, infectious virus particles, you turn to viral culture. It’s the classic, time-tested method for growing viruses in a laboratory, and it remains the gold standard for confirming an active infection.

    Think of it this way: other tests might find fragments of a virus’s genetic material, like finding a tire track in the mud. But viral culture is like catching the actual vehicle in motion. It proves that live, replicating virus is present—the kind that can actually make someone sick and spread from person to person.

    Understanding Viral Culture

    At its heart, viral culture is a bit like farming. Since viruses are obligate intracellular parasites, they can't reproduce on their own. They need living host cells to hijack and multiply. In the lab, we provide the "soil" (a layer of living cells in a petri dish or vial) and the right conditions for a viral "seed" from a patient's sample to grow.

    This process is absolutely fundamental to virology. It allows scientists and clinicians to move beyond just detecting a virus’s genetic footprint and actually observe its biological behavior. Being able to grow viruses like Influenza A Virus (H1N1), Herpes Simplex Virus 1 (HSV-1), or SARS-Related Coronavirus 2 (SARS-CoV-2) in a controlled setting is what makes so much of modern medicine possible.

    Why Go to All the Trouble?

    So, why do we bother with this meticulous process? The applications are incredibly important for diagnostics, research, and public health.

    Culturing a virus gives us the definitive answer to the most critical question: is the patient actively shedding infectious virus?

    This is crucial for:

    • Definitive Diagnosis: It confirms an active infection by isolating a live, replicating virus. This is especially vital for diagnosing viruses like Herpes Simplex Virus 2 (HSV-2) or Human Coronavirus, where knowing if the virus is active versus latent is key.
    • Vaccine Development: You can't make a vaccine without the virus itself. The annual flu shot, for instance, relies on growing massive quantities of influenza virus, such as Influenza A2/305/57 Virus (H2N2), often in chicken eggs or specialized cell lines.
    • Antiviral Drug Testing: Before a new antiviral drug hits the market, researchers have to prove it works. Viral culture is how they test a drug’s ability to stop a live virus, like Hepatitis C Virus (HCV) or Human Immunodeficiency Virus Type 1 (HIV-1), from replicating in a controlled lab setting.

    By allowing scientists to isolate and grow a virus, viral culture provides the raw material needed for everything from creating diagnostic tools to developing life-saving vaccines and treatments. It’s the bedrock upon which much of our defense against viral diseases is built.

    The ability to grow and study viruses in the lab has been central to nearly every major virological breakthrough. The table below highlights some of the key areas where this technique is indispensable.

    Key Applications of Viral Culture

    Application Area Primary Purpose Example Viruses Studied
    Clinical Diagnostics To confirm active viral infections and guide treatment decisions. Herpes Simplex Virus 1 (HSV-1), Herpes Simplex Virus 2 (HSV-2), Human Rotavirus, Rhinovirus Type 14
    Vaccine Production To grow large quantities of virus for use in inactivated or live-attenuated vaccines. Influenza A Virus (H1N1), Avian Influenza Virus (H5N1), Measles, Mumps, Rubella (MMR)
    Antiviral Research To test the effectiveness of new drugs against live, replicating viruses. HIV-1, Hepatitis B Virus (HBV), Hepatitis C Virus (HCV), SARS-CoV-2
    Public Health Surveillance To isolate new or emerging viral strains for characterization and tracking. Influenza (for seasonal strain monitoring), Norovirus (Norwalk Virus), Rhinovirus Type 39
    Basic Virology Research To study viral replication cycles, host-cell interactions, and pathogenesis. Duck Hepatitis B Virus (DHBV), Bovine Viral Diarrhea Virus (BVDV), Feline Calicivirus

    From confirming a diagnosis in a single patient to developing a vaccine for millions, viral culture provides the essential foundation for understanding and combating viral threats.

    From the Lab Bench to Your Kitchen Counter

    The principles behind viral culture also give us a powerful real-world lesson in hygiene. The technique shows us, in no uncertain terms, that viruses absolutely need a viable environment—living cells—to thrive and spread.

    This isn't just a lab-based concept. When we understand that a virus must be "live" to pose a threat, the value of proper disinfection becomes crystal clear. Just as virologists work to contain viruses in a Biosafety Level 2 lab, using disinfecting wipes on high-touch surfaces helps break the chain of transmission in our homes and offices.

    The goal is the same in both settings: prevent infectious viral particles from finding a new host. It's a great reminder that controlling viral spread is a team effort, connecting the work in advanced labs with the simple, smart actions we take every day.

    Understanding the Core Methods for Culturing Viruses

    To get a virus to grow in the lab, you have to give it what it wants: living cells. Unlike bacteria that can grow on a nutrient-rich agar plate, viruses are microscopic hijackers. They need to get inside a host cell to make copies of themselves. This is the entire foundation of diagnostic virology.

    The most tried-and-true method starts with cell lines—specialized cells grown in a lab that can divide over and over again. We spread these cells across the bottom of a flask, where they form a thin, single layer called a monolayer. Think of this monolayer as the "fertile soil" where we plant a patient sample, hoping a virus will take root and multiply.

    This simple workflow shows the whole process from start to finish.

    Flow diagram showing the three steps of viral culture: sample collection, cell preparation, and virus growth.

    As you can see, it boils down to three key steps: getting the sample, introducing it to the prepared cells, and then waiting for the virus to grow. It’s a straightforward but incredibly powerful diagnostic tool.

    Identifying the Cytopathic Effect

    Once we’ve introduced the sample to the cell monolayer, the waiting game begins. Lab scientists regularly check the cells under a microscope, looking for any tell-tale signs of infection. This visible damage to the host cells is called the cytopathic effect (CPE), and it’s our first solid clue that a virus is actively growing.

    Different viruses leave behind different "fingerprints." For example, Herpes Simplex Virus 1 (HSV-1) often causes cells to swell up and fuse together into clumps. A virus like Rhinovirus Type 14, on the other hand, might make the cells shrink, pull away from the flask, and float off. For a seasoned virologist, these signature patterns not only confirm the presence of a live virus but can even hint at its identity.

    To see how these classic techniques fit into the bigger picture, you can learn more about the laboratory diagnosis of viral infections in our detailed guide.

    Quantifying Viruses with Plaque Assays

    Sometimes, just knowing a virus is there isn't enough. Researchers often need to know how much infectious virus is in a sample. That’s where a clever technique called the plaque assay comes in. It builds on the same principle of growing viruses on a cell monolayer, but with a twist.

    After adding the virus, we cover the cell layer with a semi-solid gel, like agar. This gel acts like a fence, preventing new virus particles from spreading randomly through the liquid. Instead, the infection can only creep outward to the cells immediately next door.

    As the virus replicates and kills the cells around it, it creates a circular zone of dead or dying cells. This clearing is called a plaque. By staining all the living cells with a dye, these plaques show up as clear, unstained spots against a colorful background of healthy cells.

    To figure out the virus concentration, scientists simply count the number of plaques. Each plaque, in theory, started from a single infectious viral particle. This lets us get a precise measurement of the viral titer, which is absolutely critical for work like:

    • Vaccine Production: Making sure every dose has exactly the right amount of virus.
    • Antiviral Drug Testing: Measuring how well a new drug stops the virus from spreading.
    • Basic Research: Quantifying viral loads to understand how a disease progresses.

    These fundamental methods—cell lines, CPE observation, and plaque assays—are the bedrock of classical virology. They allow scientists to not only confirm an active infection but also measure its strength, providing priceless data for both clinical diagnostics and research.

    Proper Specimen Handling and Essential Biosafety Protocols

    A successful viral culture doesn't start under a microscope. It begins the moment a sample is collected. The entire process hinges on one critical factor: keeping the virus alive and kicking until it reaches the lab.

    Think of it like transporting a live fish from the ocean back to an aquarium. You need the right container, the right water, and the right temperature. Any misstep, and you end up with a useless specimen.

    The journey starts with the right tools. We use specific swabs, often made of Dacron or rayon, because materials like cotton can actually inhibit some viruses. That swab is then immediately plunged into a special liquid called viral transport media (VTM). VTM is essentially a life-support system for the virus, packed with nutrients and buffers to keep it stable.

    From there, maintaining the cold chain is non-negotiable. The sample has to stay refrigerated or frozen, depending on the virus we suspect and how long it'll take to get to the lab. Heat is the ultimate enemy; a sample left on a counter at room temperature can quickly become junk as the delicate viral particles fall apart.

    A gloved hand removes a viral sample vial from a cooler with ice packs in a lab.

    Entering the High-Stakes Lab Environment

    Once the specimen arrives, the mission shifts from preserving the virus to containing it. Virologists handle infectious agents that pose a very real risk, so safety isn't just a suggestion—it's everything. Every single action is governed by strict biosafety protocols designed to protect the scientist, the community, and the sample itself.

    The bedrock of this safety system is the concept of Biosafety Levels (BSL), a ranking from 1 to 4 based on how dangerous the microbe is.

    • BSL-1: For agents not known to cause disease in healthy adults. Think non-pathogenic E. coli.
    • BSL-2: This is where most routine viral culture work happens. It’s for agents that pose a moderate hazard, like Herpes Simplex Virus 2 (HSV-2) or Influenza A Virus (H1N1).
    • BSL-3: For serious or potentially lethal diseases transmitted through the air, like SARS-Related Coronavirus 2 (SARS-CoV-2).
    • BSL-4: The maximum-containment zone. This is for deadly, exotic agents with no available vaccines or treatments, like Ebola.

    These levels dictate everything from lab practices and safety gear to how the facility itself is built, ensuring the containment matches the danger.

    The Tools of Containment

    Working safely in a BSL-2 lab means more than just wearing a lab coat. We rely on specialized gear and practices to keep exposure risks at bay. The most important piece of equipment is the biological safety cabinet (BSC), which is an enclosed, ventilated workspace that keeps the air sterile and protects the user from any infectious aerosols.

    A biological safety cabinet is like a protective bubble. It uses carefully controlled airflow and powerful filters to ensure what’s inside the cabinet stays inside, and what’s outside stays outside.

    On top of that, Personal Protective Equipment (PPE) is our non-negotiable first line of defense. This always includes gloves and a lab coat or gown, and often eye protection or a face shield. Using PPE correctly is a fundamental skill for any lab professional, creating a physical wall between the scientist and the pathogen. For a closer look at this crucial part of lab safety, check out our guide on how to use Personal Protective Equipment.

    Ultimately, both meticulous specimen handling and rigorous biosafety protocols are two sides of the same coin: controlling the virus. Whether it’s preserving its viability for a diagnosis or containing its spread to prevent an outbreak, these procedures all point to the same truth. Infectious viruses demand respect.

    Viral Culture Versus Modern Molecular Tests

    A petri dish with microbial colonies next to laboratory equipment and a rack of test tubes.

    In any virology lab, the big question is usually simple: is the virus actually there? For decades, viral culture was the undisputed heavyweight champion for getting an answer. It became the "gold standard" because it directly proves the presence of a live, replicating virus—one that’s capable of causing a real infection.

    But the game has changed. The lab world was turned on its head with the rise of molecular tests, with the most famous being Polymerase Chain Reaction (PCR). Instead of patiently growing a virus, these methods hunt for its genetic fingerprints—its DNA or RNA. This sets up a fundamental difference between two powerful, but very distinct, diagnostic tools.

    Think of it like a detective at a crime scene. Viral culture is like catching the suspect red-handed, in the act. Molecular testing is like finding the suspect's DNA on a discarded coffee cup. Both are powerful pieces of evidence, but they tell slightly different stories.

    Why Viral Culture is Still Irreplaceable

    Even with all the speedy new tech, viral culture holds a unique and vital spot in the lab. Its biggest strength is proving infectivity. When you get a positive culture, it doesn't just mean the virus was there; it confirms a live, functional, and potentially contagious virus is there right now.

    This is a massive deal. For instance, culture is the only way to:

    • Discover brand-new viruses. When a novel pathogen like SARS-Related Coronavirus 2 (SARS-CoV-2) emerges, you can't design a PCR test for it because you don't know what genetic sequence to look for yet. Culture is the critical first step to isolating that unknown enemy.
    • See if antiviral drugs actually work. To test a new drug, you need to watch it stop a live virus from multiplying in its tracks. Culture provides that living battlefield.
    • Make vaccines. The production of many vaccines, from influenza to measles, depends on growing massive amounts of the virus. That’s only possible using classic culture techniques.

    Viral culture answers the biological question: "Is there a living, infectious virus here?" Molecular tests answer the genetic question: "Is the virus's genetic blueprint here?" They are not the same thing.

    This distinction is absolutely critical, both for treating a single patient and for tracking public health threats. Knowing if someone is shedding infectious viral particles helps guide decisions on isolation and stops an outbreak from spreading further.

    The Rise of Rapid Molecular Diagnostics

    While culture is definitive, it has one major flaw: it's slow. Growing a virus can take days, sometimes even weeks. In a busy clinic where doctors need to make fast decisions, that kind of wait just isn't practical. This is where molecular tests steal the show.

    Methods like PCR are incredibly fast and ridiculously sensitive. They can pick up even the tiniest fragments of viral genetic material, often delivering a result in just a few hours. This speed completely changed the game for diagnosing viruses like Influenza A Virus (H1N1), Human Immunodeficiency Virus Type 1 (HIV-1), and Hepatitis C Virus (HCV). If a doctor needs to decide whether to start antiviral treatment today, PCR is the go-to. If you want to dive deeper into this, you can learn more about the fundamentals of molecular diagnostics in our dedicated article.

    But that extreme sensitivity comes with a catch. A PCR test can come back positive even if it's just detecting dead viral debris from an infection that’s already been cleared. It can’t tell the difference between a live, dangerous pathogen and its harmless genetic leftovers.

    A Head-to-Head Comparison

    So, how do you choose? Understanding when to use each test means taking a hard look at their strengths and weaknesses. Both give us vital information, but they’re built to answer different questions.

    To make it simple, here’s a direct comparison of how these two approaches stack up.

    Viral Culture vs. Molecular Tests (PCR)

    Feature Viral Culture Molecular Tests (e.g., PCR)
    What It Detects Live, replicating virus particles. Viral genetic material (DNA or RNA).
    Primary Question Is the virus infectious? Is the virus present?
    Turnaround Time Slow (days to weeks). Fast (hours).
    Sensitivity Lower; needs enough live virus to grow. Extremely high; can detect tiny fragments.
    Best For Novel virus discovery, antiviral testing, vaccine production, confirming infectivity. Rapid diagnosis, screening, monitoring viral load (e.g., in HIV-1 treatment).

    At the end of the day, these two techniques aren't rivals—they're partners. A rapid PCR test can give a doctor a quick, preliminary diagnosis. A follow-up viral culture can then confirm if the patient is contagious, help track outbreaks of common culprits like Norovirus (Norwalk Virus) or Rhinovirus Type 39, and provide the live isolates researchers need for their next breakthrough.

    Together, they give clinicians and scientists the complete story of a viral infection.

    Where Viral Culture Shines—and Where It Stumbles

    Theory is one thing, but the real test of any lab technique is how it performs out in the world. Viral culture isn't just a fascinating academic exercise; it's a foundational tool that has a direct impact on everything from diagnosing a single patient's mysterious illness to building global vaccination campaigns.

    By actually growing a virus, we can do some incredible things—confirm an active infection, see if a new drug works, or even produce the very vaccines that keep millions of us safe. But the road from a patient’s sample to a clear answer is rarely simple. Viral culture is as much an art as it is a science, and it demands patience, precision, and a sharp eye. Let's break down where it's a game-changer and what challenges keep lab techs on their toes.

    Diagnosing Active Infections

    The most straightforward use for viral culture is figuring out if a patient is shedding live, infectious virus. When a doctor needs to know if someone is actively contagious, culture gives a definitive yes or no answer. This is especially critical for viruses that can lie dormant and then flare up.

    Take Herpes Simplex Virus 1 (HSV-1) and Herpes Simplex Virus 2 (HSV-2). A culture can confirm whether a painful lesion is an active outbreak, which helps guide treatment and conversations about preventing transmission. It’s also used to isolate influenza from a respiratory swab, particularly during flu season when public health officials are tracking which strains are making people sick.

    The Engine Behind Antivirals and Vaccines

    The entire fight against viral diseases is built on our ability to grow these tiny invaders in a controlled setting. Viral culture is the main event for testing new antiviral drugs. Researchers can take a batch of infected cells, treat them with a new compound, and literally watch to see if it stops the virus in its tracks.

    Vaccine development is another area where viral culture is absolutely essential. Many of the vaccines we rely on, like the one for measles, mumps, and rubella (MMR), are made by growing huge quantities of live but weakened (attenuated) or completely inactivated virus. This requires culturing massive batches of virus with painstaking care to create the safe, effective vaccines that prevent disease from spreading like wildfire.

    Viral culture pulls double duty for public health. It’s both the confirmation of a threat in one person and the factory that builds the shield to protect entire populations.

    The impact here is staggering. Viral hepatitis, for instance, remains a massive global health problem. As of 2022, an estimated 254 million people were living with chronic hepatitis B and 50 million with chronic hepatitis C. But thanks to decades of research grounded in techniques like viral culture, we've made incredible progress in both preventing and treating it. You can read more about the latest developments in recent progress reports on this global health challenge.

    The Inherent Challenges of Growing Viruses

    For all its power, viral culture can be a frustrating and finicky process. It’s often riddled with challenges that can delay results or, worse, ruin an experiment entirely. It takes a skilled technician to navigate the common pitfalls.

    Here are a few of the biggest headaches:

    • Picky Viruses: Some viruses are incredibly fussy. They refuse to grow unless they have the exact right cell line, specific nutrients, or a certain temperature. Norovirus (Norwalk Virus), a type of small non-enveloped virus, is famously difficult to culture, which for years made it incredibly hard to study.
    • Contamination: The rich, nutrient-filled media that our cells love is also a five-star buffet for bacteria and fungi. A single stray spore can land in a dish and quickly overrun the entire culture, making it impossible to see if a virus is growing. Game over.
    • The Waiting Game: Viruses work on their own schedule. A fast-replicating virus like Herpes Simplex Virus 2 (HSV-2) might show visible damage to cells in just 1-3 days. But a slow-grower like Cytomegalovirus (CMV) can take weeks to make its presence known. In a clinical setting where a doctor needs an answer now, that kind of turnaround time is a major drawback.

    Reading Between the Lines: Interpreting Results

    Even when a culture works perfectly, the job isn't done. Reading the results requires a trained eye and years of experience. Spotting the subtle signs of a cytopathic effect—the "fingerprint" a virus leaves on cells—is a skill.

    Sometimes, the changes are ambiguous, or cells die off for other reasons, like something toxic in the original patient sample. This is where the virologist’s expertise is crucial. They have to tell the difference between true viral damage and a false alarm, correctly identify the virus, and know when the test just isn't giving a clear answer. These challenges are exactly why, despite its importance, viral culture is now often used alongside faster, more modern molecular tests.

    Viral Culture FAQs

    When you're trying to wrap your head around virology, a lot of questions pop up, especially when comparing old-school methods to newer tech. Let's tackle some of the most common ones to clear things up.

    How Long Does It Take to Get Viral Culture Results?

    This is one of the most practical questions out there, and the honest answer is: it really depends on the virus. Some are sprinters, while others are running a marathon in the lab.

    A fast-growing virus like Herpes Simplex Virus 1 (HSV-1), for example, can show visible damage to a cell monolayer in just 1 to 3 days. But a slowpoke like Cytomegalovirus (CMV)? That could take several weeks before you see any cytopathic effect. This delay is a huge reason why doctors often lean on faster molecular tests when time is critical.

    It all comes down to a crucial trade-off. Clinicians have to weigh the need for speed, which molecular tests absolutely deliver, against the definitive proof of an active, infectious virus that only a successful culture can provide.

    Why Can't Some Viruses Be Grown in the Lab?

    This is a fantastic question because it gets at the heart of how tricky viruses can be. The truth is, many are incredibly picky about where they'll grow, and some have requirements we haven't even figured out yet.

    Take Norovirus (Norwalk Virus)—the infamous "stomach flu" bug. It's notoriously difficult to culture because it needs very specific host cells and conditions that are nearly impossible to mimic in a petri dish. Other viruses, like large non-enveloped viruses such as Human Rotavirus, might depend on unique co-factors or complex cellular handshakes that scientists are still trying to understand.

    When we can't culture a virus, it's a major roadblock. It makes it incredibly difficult to study its life cycle, develop a good vaccine, or test new antiviral drugs. That's why figuring out how to grow a stubborn virus is often a massive scientific breakthrough.

    What’s the Difference Between a Positive Culture and a Positive PCR Test?

    This is probably one of the most important concepts to get right in diagnostic virology. Both tests can tell you if a virus is present, but they're offering up very different kinds of proof.

    A positive viral culture confirms biological infectivity. It proves that live, infectious virus particles were in the sample and were capable of replicating and destroying host cells.

    On the other hand, a positive PCR test confirms genetic presence. It's brilliant at detecting the virus's DNA or RNA, but it can't tell you if that genetic material came from a live, replicating virus or just dead fragments left over from an old infection. Someone could test positive on a PCR long after they're no longer contagious.

    So, think of it this way: a culture gives you proof of an active, transmissible infection, while PCR simply tells you the virus's genetic fingerprint is at the scene. This difference is vital for making real-world decisions about patient isolation and public health.

    How Does Viral Culture Help Find New Viral Threats?

    When a brand-new illness starts spreading, viral culture becomes an absolutely essential tool for discovery. At the beginning of an outbreak, molecular tests are basically useless because you don't know the genetic sequence you're supposed to be looking for.

    Culture gives us a way to isolate and grow the mystery pathogen straight from a patient. Once scientists have a pure stock of the new virus, they can get to work:

    • Sequencing its entire genome to figure out what it is.
    • Studying its behavior and how it attacks cells.
    • Building the tools to fight back, like specific diagnostic tests (including PCR), treatments, and vaccines.

    This process is the bedrock of global disease surveillance. It was a critical first step in identifying and understanding emerging threats like SARS-Related Coronavirus 2 (SARS-CoV-2). The ability to isolate and grow a novel pathogen is truly the starting line for mounting an effective public health response. It highlights why containing infectious particles is so important—a principle that scales from a high-tech BSL-4 lab all the way down to using disinfecting wipes on doorknobs to stop germs from spreading in our own communities.

  • Is Benzalkonium Chloride in Hand Sanitizer an Effective Choice?

    When you reach for hand sanitizer, that sharp, familiar scent of alcohol is what most of us expect. But there's another powerful, alcohol-free player in the world of hand hygiene: benzalkonium chloride (BAC).

    This antimicrobial compound is the active ingredient in many modern sanitizers, and it works by literally breaking down the protective outer layer of microbes. It's a different approach, but a highly effective one, particularly against a wide range of viruses from Influenza A to SARS-CoV-2.

    The Rise of Alcohol-Free Hand Sanitizers

    Alcohol-free benzalkonium chloride hand sanitizer pump bottle with a falling drop on a wooden shelf.

    While alcohol-based sanitizers are everywhere, the growing presence of benzalkonium chloride in hand sanitizer signals a major shift toward options that are both effective and non-drying.

    Also known as BZK or BKC, this compound is far from new. It's been a trusted antimicrobial in the healthcare world for over 60 years, used in everything from high-level surface cleaners to preservatives in medications.

    Its recent surge onto store shelves is a direct answer to a common problem: dry, cracked, and irritated skin from constant hand washing and sanitizing. This is where BAC-based formulas really shine.

    What’s Driving the Switch?

    For many people, the move to alcohol-free sanitizers is all about the practical, day-to-day benefits. If you sanitize your hands frequently—think teachers, healthcare workers, or parents—the advantages become obvious pretty quickly.

    • Gentle on Skin: These formulas are much less likely to cause the dryness and irritation that alcohol is known for, making them a great fit for people with sensitive skin or conditions like eczema.
    • Persistent Activity: Alcohol evaporates in seconds, and its germ-killing action stops. BAC, on the other hand, can remain on the skin, offering a longer-lasting protective effect after you've applied it.
    • Non-Flammable: With no alcohol, these sanitizers are a safer choice for places like schools, long-term care facilities, and correctional institutions where flammability is a serious concern.

    The real-world impact is pretty compelling. Some studies in school settings found that using non-alcohol, leave-on hand sanitizers helped reduce illness-related absenteeism by 30-40% compared to just hand washing.

    So, how does BAC stack up against the old standby, alcohol? Here's a quick side-by-side look.

    Quick Comparison Benzalkonium Chloride vs Alcohol Sanitizers

    This table breaks down the key features of BAC and alcohol-based hand sanitizers to help you see the differences at a glance and choose the right one for your needs.

    Feature Benzalkonium Chloride (BAC) Alcohol (Ethanol/Isopropanol)
    Mechanism of Action Disrupts the outer membrane of microbes, causing them to leak and die. Denatures proteins in microbes, essentially scrambling their internal structure.
    Gentleness on Skin Generally non-drying and non-irritating. Often formulated with moisturizers. Can be very drying and irritating with frequent use, stripping natural oils.
    Persistence Leaves a residual protective layer on the skin, offering longer-lasting effects. Evaporates very quickly, so its antimicrobial action is short-lived.
    Flammability Non-flammable and water-based, making it safer for storage and use in various settings. Highly flammable, requiring special storage and handling considerations.
    Effectiveness Effective against many bacteria and enveloped viruses (like SARS-CoV-2, H1N1, and HSV-1). Broad-spectrum effectiveness against bacteria, fungi, and many viruses.
    Common Concentration Typically 0.1% to 0.13%. Recommended at 60-95% concentration for maximum effectiveness.

    Ultimately, both types of sanitizers have their place. But for daily, repeated use, the skin-friendly and persistent nature of BAC is a huge plus.

    This guide will dive deeper into the science behind benzalkonium chloride, its performance against viruses like SARS-CoV-2 and Human Coronavirus, and how it really compares to traditional alcohol sanitizers. As you keep reading, you'll get a clearer understanding of why these formulas are more than just a trend.

    If you're curious for more background, you can explore our detailed article on how alcohol-free hand sanitizers work. Knowing the details helps you make smarter choices to protect your health and the health of those around you.

    How Benzalkonium Chloride Actually Fights Germs

    To really get how benzalkonium chloride works, it's helpful to picture it as a tiny, targeted magnetic attack. Unlike alcohol, which basically scrambles a germ's internal machinery, BAC takes a more direct, physical approach. It’s a fascinatingly effective process that happens at a microscopic level.

    The whole thing comes down to simple chemistry. Every single BAC molecule has a positive electrical charge. On the flip side, the outer layer of germs—like bacteria and many viruses—carries a negative charge. This difference creates an irresistible attraction, pulling the BAC molecules straight to the germ's surface.

    The Magnetic Takedown of Germs

    Once it’s attached, the BAC molecule doesn't just hang around. It starts acting like a tiny drill. The molecule’s long tail forces its way right into the germ's protective membrane, destabilizing it, creating weak spots, and eventually punching holes all the way through.

    Think of it like poking a hole in a water balloon. Once that outer layer is compromised, all the germ’s insides start leaking out. This loss of essential cellular material is catastrophic for the microbe, leading to its quick inactivation and death.

    This is exactly why BAC is considered a germicidal agent—it actively kills germs instead of just slowing them down. You can learn more about this in our guide on what it means to be germicidal.

    A Persistent Protective Shield

    One of the biggest upsides to using benzalkonium chloride in a hand sanitizer is its staying power. Alcohol-based sanitizers stop working the second they evaporate, which is usually just a few seconds. BAC is a different story.

    After the sanitizer dries on your skin, a thin, imperceptible layer of BAC molecules stays behind. This residual layer creates a persistent barrier that continues to fight germs for a while, offering an extended window of protection that alcohol just can't match.

    This feature is incredibly valuable in places where hands are constantly being re-exposed to germs. For example:

    • In Schools: Kids are always touching desks, doorknobs, and shared supplies, so longer-lasting protection is a huge benefit.
    • In Healthcare: Medical staff moving between patients and equipment need that persistent action to help cut down on cross-contamination risks.
    • During Travel: A BAC sanitizer can provide a lasting shield against germs you might pick up from armrests and tray tables on a plane or train.

    The power of BAC isn't just theoretical. Its persistent nature and potent mechanism make it a fantastic choice not just for hands, but also for disinfecting high-touch surfaces where germs like Avian Influenza Virus (H5N1) or Human Immunodeficiency Virus (HIV-1) can linger.

    Proven Performance in Real-World Settings

    The antibacterial strength of BAC is well-documented. Study after study shows it's far more than just a gentle alternative to alcohol; it's a powerful germ-killer in its own right. Its performance against specific bacteria really highlights why it’s trusted in so many products.

    For instance, research has shown that BAC-based hand sanitizers can significantly reduce bacterial counts. One evaluation found a BAC-based gel reduced Staphylococcus aureus on the fingertips of healthcare workers more effectively than 70% ethanol in some tests. This antibacterial prowess was backed up in lab assessments where a formulated BAC sanitizer stopped nine out of eleven common bacterial strains, with a minimum killing concentration as low as 2% v/v. You can explore more about the hand sanitizer market by reviewing the latest market research.

    Understanding Its Effectiveness Against Viruses

    When it comes to hand sanitizers, the big question is always the same: does it actually work against viruses? With benzalkonium chloride, the answer really depends on the type of virus you’re up against. Viruses aren't a single, uniform enemy. They come in different structures, and that structural difference is the key to BAC's effectiveness.

    To get a handle on how BAC works, you first need to know about the two major categories of viruses. The first group is enveloped viruses. These guys, which include familiar names like SARS-Related Coronavirus 2 (SARS-CoV-2), Influenza A Virus (H1N1), and Hepatitis C Virus (HCV), are surrounded by a fragile, fatty outer layer called a lipid envelope. This envelope is their Achilles' heel.

    The second group is non-enveloped viruses. These are much tougher customers. They lack that delicate fatty layer and are instead protected by a rugged, resilient protein shell called a capsid. Viruses like Norovirus, Human Rotavirus, and Rhinovirus fall into this category, and their tough exterior makes them notoriously difficult to inactivate.

    The Attack on Enveloped Viruses

    Benzalkonium chloride is exceptionally good at destroying enveloped viruses. Its whole mechanism of action—disrupting membranes—is perfectly suited to attack that soft, fatty lipid envelope these viruses rely on to survive and infect.

    Think of the lipid envelope as a soap bubble. It’s essential for protecting the virus, but it's also incredibly fragile. The positively charged BAC molecules are drawn to this negatively charged envelope and literally tear it apart, effectively "popping" the bubble. Once that protective layer is gone, the virus quickly falls apart and can no longer infect our cells.

    Diagram illustrating a bacteria-fighting molecule attacking and neutralizing a germ.

    This is precisely why BAC-based sanitizers are considered a reliable choice against many common viruses, including:

    • Coronaviruses (like SARS-CoV-2 and Human Coronavirus)
    • Influenza Viruses (like Influenza A strains H1N1, H2N2, and H5N1)
    • Herpes Simplex Viruses (HSV-1, HSV-2)
    • Hepatitis B and C Viruses (HBV, HCV)

    If you want to go deeper on this, check out our guide that answers the question, "Does hand sanitizer kill viruses?" It gives more context on how different sanitizers stack up against various viral threats.

    The Challenge of Non-Enveloped Viruses

    The story completely changes when BAC comes up against a non-enveloped virus. Without a lipid envelope to attack, BAC has a much harder time breaking through the tough protein capsid that shields viruses like Norovirus (the infamous "stomach flu"), Human Rotavirus, and Rhinovirus.

    This tough protein shell is more like a solid wall than a fragile bubble, and BAC's primary weapon just isn't as effective against it. While some studies suggest BAC might have a limited effect on certain small non-enveloped viruses like Feline Calicivirus, it is generally not the first line of defense against them.

    For this reason, in situations where non-enveloped viruses like Norovirus or Rhinovirus Type 14 are a major concern—think cruise ships or daycare centers—health authorities often emphasize rigorous hand washing with soap and water as the most effective prevention method.

    Understanding this distinction is crucial for making smart hygiene choices. A benzalkonium chloride hand sanitizer is a fantastic tool for everyday use, especially when enveloped viruses are rampant. But it’s not a magic bullet for every single virus out there. This is why a multi-faceted approach, combining hand sanitizing with thorough hand washing and surface disinfection, offers the most complete protection against the widest range of germs.

    The Safety and Regulation of Benzalkonium Chloride

    Whenever you’re talking about an active ingredient in a hygiene product, safety is the first thing that comes to mind. Benzalkonium chloride has been around for a long time, but understanding its safety profile and how health agencies view it is key to making smart choices about the products you use. This means looking at everything from skin sensitivity to its official status with major regulators.

    The concentration of benzalkonium chloride in hand sanitizer is a huge factor. In consumer products, it’s carefully formulated at very low levels—typically between 0.1% and 0.13%. This specific range hits a critical sweet spot: it’s strong enough to knock out germs but gentle enough for repeated use on the skin without causing major irritation.

    Navigating Skin Sensitivity

    For most people, BAC-based sanitizers are a great fit, especially when compared to the notoriously drying effects of alcohol. Many are even designed for sensitive skin, packed with emollients and moisturizers that leave hands feeling soft, not stripped. This makes them a go-to option in places that demand constant hand hygiene, like schools and healthcare facilities.

    That said, like any active ingredient, a small number of people might experience skin sensitivity or a mild allergic reaction called contact dermatitis. This is pretty uncommon at the low concentrations found in hand sanitizers, but it’s something to keep in mind if you have a history of skin allergies.

    The Stance of Regulatory Agencies

    The rules around benzalkonium chloride in hand sanitizer vary around the world, but the goal is always the same: ensure products are both safe and effective.

    In the United States, the Food and Drug Administration (FDA) is the one in charge. While the FDA has long favored alcohol-based sanitizers for clinical settings, it continues to permit BAC in consumer hand sanitizers. The agency is still reviewing additional data on BAC to finalize its official stance for over-the-counter antiseptic rubs.

    Meanwhile, the Centers for Disease Control and Prevention (CDC) primarily recommends hand sanitizers with at least 60% alcohol. This is especially true in hospitals where you need the broadest possible germ-killing power. Still, the CDC agrees that alcohol-free sanitizers with BAC can be a solid alternative when alcohol isn’t available or practical.

    A Global Perspective on Safety

    Regulators in other parts of the world are also keeping a close eye on BAC. For instance, in July 2024, the European Chemicals Agency noted that BKC could cause severe skin burns and eye damage at higher concentrations. This has pushed formulators to stick with lower doses and add skin-conditioning ingredients to personal care products.

    But efficacy studies help balance the picture. One trial of a BAC hand gel showed no irritation among 10 participants, and the product was active against 9 out of 11 bacterial strains. It even outperformed ethanol against S. aureus in fingertip tests on 40 workers. You can dig deeper into this by exploring the global market insights for benzalkonium chloride.

    This brings up a crucial point: formulation is everything. The safety and feel of a product don't just depend on the active ingredient, but on the entire mix of components working together to protect your health and your skin.

    At the end of the day, a long history of safe everyday use, combined with smart formulation, allows benzalkonium chloride to remain a trusted active ingredient. It offers a non-drying, persistent way to keep hands clean—which is vital for maintaining healthy skin as your body's first line of defense.

    Why Are People Switching to Alcohol-Free Hand Sanitizer?

    If you've browsed the hand sanitizer aisle lately, you’ve probably noticed a lot more alcohol-free options on the shelves. This isn't just a passing trend—it's a direct response from people who want hygiene products that are effective but still practical enough for constant, daily use. And the powerhouse ingredient behind many of these formulas is benzalkonium chloride.

    Let's be honest: while alcohol-based sanitizers are great at killing germs, they can be incredibly harsh on your skin. Regular use strips away natural oils, leaving hands dry, cracked, and irritated. This is a huge problem for anyone who needs to clean their hands constantly—think teachers, healthcare workers, and parents chasing around little kids.

    A Gentler Approach to Staying Clean

    This is where benzalkonium chloride (BAC) formulas really shine. They solve the harshness problem by offering a gentler alternative that still gets the job done. That makes them perfect for any situation where you’re sanitizing your hands dozens of times a day.

    Think about these real-world scenarios:

    • Schools: Kids are way more likely to use a sanitizer that doesn't sting or have a strong, overwhelming smell. Better compliance means better hygiene all around.
    • Offices: When you're constantly sanitizing between meetings or after touching the shared coffee pot, a non-drying formula makes it feel less like a chore.
    • Healthcare: For both patients and staff, especially those with sensitive skin, a gentler option helps keep the skin intact. That’s a critical first line of defense against infection.

    By tackling the common complaints of dryness and irritation, benzalkonium chloride sanitizers have become the go-to choice for anyone building a sustainable, long-term hygiene routine. It’s proof that you don’t have to sacrifice your skin to kill germs effectively.

    The Market Doesn't Lie

    This shift isn't just something we're seeing anecdotally; the numbers back it up. The global demand for benzalkonium chloride is booming as more people discover its benefits in disinfectants and personal care products.

    The market for benzalkonium chloride has seen some serious growth. It was valued at USD 4.05 billion in 2024 and is expected to rocket to USD 9.62 billion by 2032, growing at a solid 11.4% each year. Disinfectants, the category that includes hand sanitizers, make up the biggest piece of that pie, at 36.7% of all revenue.

    With North America leading the charge at a 38.5% market share and the Asia-Pacific region growing the fastest, it's clear this is a global movement. You can dig into more of the market trends and projections yourself.

    This data paints a very clear picture: the rise of BAC-based products is a direct reflection of what people want—hygiene solutions that are tough on germs but gentle and practical enough for modern life. As health remains a top priority, these effective alcohol-free options are becoming a fundamental part of our collective hygiene strategy.

    Choosing the Right Hygiene Strategy for You

    Hands washing with soap and water in a sink, next to hands applying alcohol-free hand sanitizer.

    Once you understand the science, you can build a much smarter and more effective hygiene plan. The goal isn’t just to use a product—it's to use the right product at the right time. That means knowing when to reach for a sanitizer and when nothing can replace a good old-fashioned hand wash.

    While a benzalkonium chloride in hand sanitizer is a fantastic tool against many germs, especially enveloped viruses like Human Coronavirus and influenza, it’s just one part of your overall strategy. Think of it as your first line of defense when you can't get to a sink.

    But let's be clear: the gold standard for hand hygiene has always been thorough hand washing with soap and water for at least 20 seconds. The physical friction of washing is incredibly effective at lifting and removing a huge range of pathogens, including tough non-enveloped viruses like Norovirus that sanitizers often struggle with.

    When to Choose Your Sanitizer

    So, BAC or alcohol? The best choice really depends on the situation. Each has its own strengths that make it a better fit for certain environments and needs.

    • For Frequent, Everyday Use: If you're constantly sanitizing your hands—think teachers, office workers, or parents at home—a benzalkonium chloride hand sanitizer is the clear winner. Its non-drying formula is much gentler on the skin, helping you avoid the cracking and irritation that often comes with repeated alcohol use.
    • For Broad-Spectrum Clinical Needs: In high-risk settings like hospitals or clinics, an alcohol-based sanitizer is typically the go-to. Its rapid, aggressive action against an extremely wide array of germs, including some stubborn non-enveloped viruses and fungi, meets the strict demands of clinical hygiene.

    For a deeper dive into home health and hygiene, a good medical equipment news and blog can offer some valuable perspectives to help you fine-tune your personal health strategies.

    Extending Hygiene Beyond Your Hands

    Real protection isn't just about clean hands; it's about a clean environment. Viruses and bacteria don’t just jump from person to person—they hang out on the surfaces we touch all day long. A truly complete hygiene strategy has to bridge the gap between personal care and environmental cleanliness.

    Just think about all the high-touch surfaces you encounter daily:

    • Doorknobs and light switches
    • Kitchen counters and faucets
    • Phones, keyboards, and remote controls
    • Steering wheels and shopping cart handles

    These spots are basically germ reservoirs, making it incredibly easy for pathogens to spread. This is why regularly cleaning these surfaces is just as crucial as washing your hands. Disinfecting wipes become an essential part of your defense here, breaking the chain of transmission right where it often starts.

    Ultimately, the most robust protection for you and your family comes from a combination of diligent hand washing, smart sanitizer use, and consistent surface disinfection.

    Got Questions About Benzalkonium Chloride?

    When you’re trying to pick the right hygiene products for your family or workplace, the details can get a little confusing. We’ve pulled together some clear, straightforward answers to the most common questions we hear about benzalkonium chloride sanitizers. The goal is to give you solid, evidence-based info so you can feel good about the choices you make.

    Is Benzalkonium Chloride Safe for My Kids to Use?

    Yes, sanitizers made with benzalkonium chloride are generally considered safe for children to use as directed. In fact, their alcohol-free, non-drying formula is a big reason why many schools and parents prefer them. You don't get the harsh vapor that comes with alcohol sanitizers, and they're much less likely to sting or irritate sensitive skin.

    Of course, with any sanitizer, it's always a good idea for an adult to be present to make sure kids use the right amount and don't try to taste it. The fact that BAC-based products are non-flammable adds another layer of safety, making them a great fit for classrooms and homes.

    Does BAC Contribute to Antibiotic Resistance?

    That's a really important question, especially with all the talk about superbugs. While it's true that we need to be careful with any antimicrobial agent, the risk from consumer hand sanitizers is considered very low. The real problem with resistance comes from the misuse of antibiotics, which work in a completely different way than a topical antiseptic like BAC.

    Benzalkonium chloride works fast by physically destroying a germ's outer membrane—it's more like a wrecking ball than a targeted weapon. This rapid, disruptive action makes it incredibly difficult for microbes to develop resistance, unlike the very specific mechanisms of most antibiotics. Regulatory bodies are always keeping an eye on this, but the current consensus is that using BAC in hygiene products as intended doesn't pose a significant threat.

    Can I Use a BAC Sanitizer on Surfaces?

    It’s tempting to grab your hand sanitizer to wipe down your phone or countertop, but you're better off using a dedicated surface cleaner. While the active ingredient, benzalkonium chloride, is a powerful disinfectant used in many surface wipes and sprays, the formula for hand sanitizer is designed specifically for skin.

    Hand sanitizers contain extra ingredients like emollients and moisturizers to keep your hands from drying out. These ingredients are great for your skin but can leave a sticky film on hard surfaces like phone screens, doorknobs, or tables, which might just attract more grime.

    For disinfecting surfaces, your best bet is to use a product made for the job. Disinfecting wipes or sprays will give you the germ-killing power you need without leaving behind a sticky residue. Think of it as a complete hygiene strategy: the right product for your hands, and the right product for your environment.

  • Why Hand Sanitizer 60 Alcohol Is Your Strongest Defense

    When you see hand sanitizer 60 alcohol on a label, you're looking at a number backed by science. It's the minimum concentration recommended by public health giants like the CDC and WHO because it's strong enough to take out most common germs when you can't get to a sink. This isn't just some random number—it’s the baseline for effective on-the-go protection.

    Why 60 Percent Alcohol Is the Magic Number

    You’ve probably heard the "at least 60% alcohol" rule a thousand times. So what's so special about that specific number? It all comes down to how alcohol wages war on germs at a microscopic level. It's a chemical takedown that needs the right balance to work.

    Think of a virus like Influenza A Virus (H1N1) or a coronavirus as a fragile package. It’s protected by an outer layer—a fatty envelope—that keeps it intact and ready to infect our cells. Alcohol acts like a powerful solvent that dissolves this essential protective shell.

    The Science of Viral Destruction

    The real power of an alcohol-based sanitizer comes from a process called denaturation. Alcohol molecules swarm the proteins on a virus and break apart the delicate bonds holding them together. Once a protein unravels and loses its shape, it's useless. The virus becomes inactive and can no longer harm you.

    But here’s the interesting part: a little bit of water is essential for this to work. Water actually helps the alcohol penetrate the virus’s outer defenses and slows down its evaporation, giving it more time to do its job. This is why a hand sanitizer 60 alcohol formula is far more effective than, say, 99% alcohol, which would evaporate off your skin too quickly to neutralize anything.

    This mechanism is especially effective against enveloped viruses that have that fatty outer layer, such as Hepatitis B Virus (HBV) and Human Immunodeficiency Virus Type 1 (HIV-1). If you want to get into the weeds, you can learn more about the viral envelope in our detailed article to see why it's such a critical weak spot.

    Key Takeaway: The 60% alcohol threshold isn't just a suggestion. It’s the minimum concentration proven by science to dissolve a virus's protective envelope and denature its proteins, effectively stopping the threat on your hands.

    Balancing Efficacy and Practicality

    While you might think more is always better, the 60% mark hits a sweet spot. It’s potent enough to kill most dangerous pathogens but not so harsh that it completely dries out your skin with frequent use. This makes it a practical choice for everyday life, whether in hospitals, schools, or just running errands.

    Ultimately, understanding this "magic number" brings us to a bigger point about hygiene. Clean hands are a great start, but they can get contaminated again the second you touch another surface. This reality is why a broader prevention strategy—one that cleans both your hands and the environment around you with tools like disinfecting wipes—is so critical.

    How Alcohol Sanitizer Wrecks Viruses

    To get why a 60% alcohol hand sanitizer works, you have to think small—microscopically small. The way alcohol kills germs isn't just a happy accident; it's a direct chemical assault designed to take down certain viruses with brutal efficiency. And it all boils down to how those viruses are built.

    Think of a virus like Influenza A2/305/57 Virus (H2N2) or SARS-Related Coronavirus 2 (SARS-CoV-2) as a tiny invader wearing a suit of armor. This armor isn't metal, though—it's a greasy, fatty outer layer called a lipid envelope. This envelope holds the virus together and is the key it uses to unlock and infect our cells.

    Targeting the Viral Armor

    Alcohol, especially ethanol and isopropanol, is a powerful solvent. The moment it touches that fatty envelope, it gets to work. It’s a lot like how soap cuts through grease on a dinner plate; the alcohol in your sanitizer simply dissolves the lipid layer.

    Once that protective armor is gone, the virus literally falls apart. All its internal components—the genetic material and machinery it needs to replicate—spill out. It’s left completely useless and unable to infect you. The best part? This whole process is incredibly fast, wiping out most viruses in well under a minute.

    The Achilles' Heel of Enveloped Viruses

    This direct attack on the lipid envelope is precisely why alcohol-based sanitizers are so good at killing a specific class of germs known as enveloped viruses. This group happens to include many of the viruses that make us sick.

    A hand sanitizer with 60% alcohol is more than enough to knock out:

    • Influenza Viruses (like Influenza A Virus (H1N1) and Avian Influenza Virus (H5N1))
    • Coronaviruses (including Human Coronavirus and SARS-CoV-2)
    • Herpes Simplex Viruses (HSV-1 and HSV-2)
    • Hepatitis B Virus (HBV) and Hepatitis C Virus (HCV)
    • Human Immunodeficiency Virus Type 1 (HIV-1)

    For these particular enemies, a 60% alcohol concentration is strong enough to breach their main defense and stop them in their tracks.

    Why Some Viruses Are Tougher to Kill

    But alcohol sanitizer isn't a silver bullet. Its entire game plan is based on dissolving that fatty envelope. That means it has a major blind spot when it comes to viruses small non-enveloped—pathogens that don't have this vulnerable outer layer.

    Tougher germs like Norovirus (Norwalk Virus) and some Rhinoviruses (like Rhinovirus Type 14 and Rhinovirus Type 39) are protected by a hard protein shell called a capsid. This protein-based armor isn't easily dissolved by alcohol, making these viruses far more resistant to sanitizers.

    This is exactly why even the best hand sanitizer can't solve every problem. It’s a rockstar against threats like Bovine Viral Diarrhea Virus (BVDV), but its effectiveness plummets against something like Norovirus.

    This is why health authorities like the CDC and WHO have rallied behind sanitizers with at least 60% alcohol. At this concentration, studies show it can denature proteins and destroy viral envelopes within 15-30 seconds, achieving a 99.9% reduction in many common pathogens. The global adoption of this standard has been a game-changer for public health, fueling massive growth in the hand sanitizer market.

    Understanding this key difference helps you build a smarter hygiene routine. A 60% alcohol hand sanitizer is an essential tool for on-the-go protection, but it’s just one piece of the puzzle. For comprehensive cleanliness, pairing hand sanitizer with surface cleaning tools, like disinfecting wipes, creates a more robust defense against pathogens.

    Is More Alcohol Always Better in Hand Sanitizer?

    When you're standing in the hand sanitizer aisle, it's natural to think "more is better." If 60% alcohol is good, then 70%, 80%, or even 90% must be an unstoppable germ-killing machine, right?

    Not exactly. The science behind how alcohol destroys viruses is a bit more complex, and surprisingly, the most effective concentration isn't always the highest.

    While it might seem counterintuitive, pushing the alcohol content too high can actually make a sanitizer less effective. The sweet spot for alcohol-based sanitizers is a specific range: 60% to 95%. The reason for this comes down to a crucial partnership between alcohol and water.

    Why Water Is a Secret Ingredient

    Pure alcohol evaporates almost instantly. If you were to use it on your hands, it would disappear before it had enough time to actually penetrate and destroy a virus. It’s like trying to cook with a quick flash of intense heat—you might scorch the outside, but the inside remains untouched.

    Water is the unsung hero in any good sanitizer formula. It does two critical things:

    • It acts as a catalyst, helping the alcohol break down the essential proteins that hold viruses like Duck Hepatitis B Virus (DHBV) together.
    • It slows evaporation, giving the alcohol the precious few seconds it needs to do its job across your entire hands.

    This is exactly why you'll never see a 100% alcohol hand sanitizer on the shelf. Without water, the alcohol simply can’t complete its mission.

    Finding the Sweet Spot for Efficacy

    So what’s the ideal balance? A 60% alcohol solution hits that mark perfectly. It’s potent enough to neutralize most of the nasty enveloped viruses we worry about, like influenza viruses and coronaviruses, without evaporating too quickly or being overly harsh on your skin.

    And the data backs this up. When properly formulated, sanitizers with at least 60% alcohol can inactivate 99.9% of enveloped viruses. In contrast, concentrations below this critical threshold just don't cut it. For a deeper dive into the numbers and market trends, MarketsandMarkets offers more insights on the hand sanitizer industry.

    This chart shows just how well alcohol-based sanitizers work against different types of viruses.

    As you can see, they’re incredibly effective against enveloped viruses but have a tougher time with the more rugged, non-enveloped ones.

    Comparing Alcohol Concentrations Head-to-Head

    Choosing the right sanitizer often means balancing speed, skin comfort, and germ-killing power. A higher percentage isn't always the best choice, especially if you’re using it all day long.

    To make it easier, here’s a quick comparison of the different alcohol levels you’ll find on the market.

    Alcohol Sanitizer Concentration Efficacy Comparison

    Alcohol Concentration Effectiveness Pros Cons
    Below 60% Not effective. Fails to meet public health standards for killing most germs. Gentle on skin, but that's about it. Offers a false sense of security. It might slow germs down but won't reliably kill them.
    60% – 70% Highly effective. The gold standard recommended by the CDC and WHO. A great balance of power and skin tolerance, making it perfect for frequent, everyday use. Might be slightly slower to act than higher concentrations, but the difference is minimal.
    70% – 80% Very effective. Kills germs quickly and is often preferred in clinical settings. Excellent for high-risk environments like hospitals where speed is critical. Can be very drying and irritating, especially with repeated use on sensitive skin.
    Above 90% Less effective. Paradoxically, the high concentration works against it. There are no real pros here, as the reduced effectiveness outweighs any perceived benefit. Evaporates too fast to work properly and is extremely harsh, damaging the skin’s moisture barrier.

    The takeaway is clear: for most of us, a sanitizer with 60% to 70% alcohol is the sweet spot. It delivers the powerful germ-killing action you need without wrecking your skin. For complete protection, you must also consider cleaning the surfaces you touch. A convenient option like disinfecting wipes can address this environmental component of hygiene.

    Of course, alcohol isn't the only option out there. If you're curious about the alternatives, we have a whole guide that explores whether alcohol-free hand sanitizers work. But when it comes to proven, reliable defense against viruses, the 60% alcohol baseline remains the trusted standard for a reason.

    Using Hand Sanitizer the Right Way

    Having a bottle of hand sanitizer 60 alcohol is a good start, but just having it isn't enough. It's how you use it that really counts. Even the best formula won't do its job if your technique is sloppy.

    The real magic of hand sanitizer depends on three things: how much you use, how long you rub, and how well you cover every nook and cranny. A quick dab and a brief swipe between your palms just won't cut it against serious germs.

    A Step-by-Step Guide to Proper Application

    Think of it like painting a fence—a quick, careless job leaves patches exposed. You have to be deliberate to get full coverage.

    1. Use a Generous Amount: Squeeze out enough to coat both of your hands completely. A good rule of thumb is a dollop about the size of a quarter. If you use too little, it will evaporate before you can get the job done.

    2. Rub for at Least 20 Seconds: This is non-negotiable. Rub your hands together vigorously for at least 20 seconds—about the time it takes to sing "Happy Birthday" twice. Keep rubbing until your hands are totally dry. That contact time is what gives the alcohol a chance to break down viruses.

    3. Cover Every Single Spot: This is where most people fall short. Make sure the sanitizer gets everywhere, not just on your palms.

    Crucial Tip: Pay close attention to the spots people almost always miss: the backs of your hands, in between your fingers, all around your thumbs, and especially under your nails. Viruses love to hide in these areas.

    When to Sanitize—and When to Wash Instead

    A hand sanitizer 60 alcohol formula is your best friend when you can't get to a sink. It’s perfect for those moments right after you’ve touched something sketchy and need to clean your hands on the spot.

    Grab the sanitizer after:

    • Touching doorknobs, elevator buttons, or grocery carts.
    • Handling cash or credit cards.
    • Using shared equipment at the office or gym.
    • Shaking hands or after being in a crowded space.

    But sanitizer isn't a cure-all. It has its limits.

    If your hands are visibly dirty, greasy, or covered in grime, sanitizer is practically useless. All that gunk creates a physical barrier that stops the alcohol from reaching the germs underneath. In those cases, nothing beats a good old-fashioned handwashing with soap and water.

    Want to learn more about how sanitizer tackles viruses? Check out our deep-dive guide on whether hand sanitizer kills viruses.

    Ultimately, using sanitizer correctly is a key part of staying healthy. But remember, your hands are only clean until the next surface you touch. This is why a complete hygiene strategy involves cleaning your hands and the high-touch surfaces around you, often with products like disinfecting wipes.

    When to Choose Soap and Water Instead

    While hand sanitizer 60 alcohol is a fantastic tool to have in your hygiene arsenal, it’s not a magic bullet. To really build a solid virus-prevention strategy, you need to know its limits and understand when good old-fashioned soap and water is the clear winner.

    Think of it this way: sanitizer is great at killing germs on the spot, but it doesn't actually remove anything. It’s like neutralizing a threat but leaving the mess behind. Soap and water, on the other hand, is the cleanup crew—it physically carries the germs away.

    The Power of Mechanical Removal

    The real magic behind handwashing is the physical action itself. When you lather up and scrub your hands under running water, you’re creating friction that lifts dirt, grime, and microbes right off your skin. The soap then traps those particles, and the water rinses them straight down the drain.

    That mechanical removal is something even the best hand sanitizer 60 alcohol just can't do. This makes a huge difference in a few key situations:

    • When Hands Are Visibly Dirty or Greasy: If your hands are covered in dirt, food, or oil, that gunk forms a physical barrier. The alcohol in sanitizer can’t get through it to reach the germs, making it pretty much useless.
    • After Handling Chemicals: Pesticides, heavy metals, and other nasty chemicals aren't neutralized by alcohol. Washing with soap and water is the only way to get those substances off your hands safely.
    • Before Preparing or Eating Food: Physically removing potential contaminants is absolutely crucial for preventing foodborne illnesses.

    Key Insight: Hand sanitizer kills germs but leaves them on your skin. Soap and water physically lifts germs, dirt, and chemicals and washes them away completely.

    Fighting Tough Non-Enveloped Viruses

    This physical action is even more critical when you're up against stubborn, non-enveloped viruses. As we’ve covered, alcohol sanitizers have a tougher time with germs like Norovirus (Norwalk Virus) and Human Rotavirus, which are protected by a tough protein shell. Feline Calicivirus is another example of a hearty, non-enveloped virus where sanitizer is less effective.

    The CDC is crystal clear on this: they specifically recommend washing hands with soap and water to fight norovirus outbreaks. The scrubbing action physically dislodges these tough viral particles, a job that sanitizer struggles to do with chemistry alone.

    Of course, hand sanitizer 60 alcohol plays a huge role in public health, especially with bottled formats that use pumps and flip-tops to minimize contamination. These products are invaluable in places like schools where viruses can spread like wildfire. But they should always be seen as the next-best-thing when soap isn't an option, not a total replacement. You can discover more insights about the hand sanitizer market's role in public health to see its broader impact.

    Knowing these limits doesn’t make hand sanitizer any less valuable. It just puts it in its proper place: an essential tool for on-the-go protection. But whenever you have the choice, nothing beats a thorough wash. This understanding is key to a complete hygiene routine—one that also includes cleaning the surfaces your newly cleaned hands will touch, for which disinfecting wipes are an excellent solution.

    Building Your Complete Virus Prevention Strategy

    Using a hand sanitizer with 60% alcohol is a smart move for personal defense, but it’s just one piece of a much larger puzzle. Real protection comes from a complete system that defends not just your hands, but also the environment you live and work in every day.

    Clean hands are a great start, but that protection only lasts until you touch the next surface. Think about it: the moment you grab your phone, a shopping cart, or a doorknob, your hands can be re-contaminated. This constant cycle is exactly how viruses like Human Rotavirus spread so easily—from a surface, to your hands, and then to your eyes, nose, or mouth.

    Expanding Beyond Personal Hygiene

    To truly break that chain of transmission, you have to think beyond your own skin. This means adopting a two-pillar strategy: keeping your hands clean and ensuring the high-touch surfaces around you are disinfected, too.

    This proactive approach is non-negotiable for preventing common respiratory illnesses. Just as hand sanitizer is your go-to when you can't get to a sink, cleaning surfaces is the critical backup that removes germs before they even have a chance to get on your hands. Disinfecting wipes are a convenient and highly effective tool for this purpose.

    What surfaces do you touch without even thinking about it?

    • At Home: Kitchen counters, light switches, TV remotes, and doorknobs.
    • In Public: Gas pump handles, ATM keypads, and checkout counters.
    • At Work: Shared keyboards, office phones, and conference room tables.

    By disinfecting these high-touch points, you are effectively creating a safer environment for yourself and others. It’s a simple but incredibly effective way to lower your risk of getting sick.

    The Role of Surface Disinfection

    Just as a hand sanitizer with 60% alcohol is formulated specifically for skin, other tools are designed for the world around you. This is where surface disinfection becomes the second pillar of your health strategy. Routinely wiping down the items you touch most often removes the viral threats lying in wait.

    In public health, this layered approach is standard practice. A complete strategy integrates personal hygiene with broader environmental controls, like specialized swab booths for virus testing that help with early detection and containment.

    This all leads to a logical question: what’s the right tool for the job? To keep your environment as clean as your hands, you need something just as convenient and effective. This is where disinfecting wipes become an indispensable part of your toolkit, perfectly complementing the role of your hand sanitizer. They allow you to quickly and easily eliminate germs from the surfaces that pose the greatest risk for transmission.

    Got Questions? We've Got Answers

    Even after getting the basics down, you probably have a few practical questions about using hand sanitizer with 60% alcohol. Let's clear up some of the most common ones so you can use your sanitizer confidently and effectively.

    Does 60 Percent Alcohol Kill Norovirus?

    This is a big one. While hand sanitizer has some effect, it’s not your best weapon against tough, non-enveloped viruses like Norovirus (Norwalk Virus). Think of this type of virus, also classified as a virus large non-enveloped, as an armored tank; it doesn't have that fragile outer layer that alcohol easily breaks down, so it’s much harder to kill.

    The CDC is crystal clear on this: the best defense is thoroughly washing your hands with soap and water. The friction and soap physically lift and rinse the virus particles right off your skin. Only use sanitizer as a backup when a sink is nowhere in sight. For surfaces, however, specific disinfecting wipes are formulated to be effective against tough pathogens like Norovirus.

    Does Hand Sanitizer Expire?

    Yes, it absolutely does. Most hand sanitizers have a shelf life of about 2-3 years from the date they were made. Over time, the alcohol starts to evaporate, especially once you've opened the bottle. As the alcohol escapes, the concentration can drop below that crucial 60% mark, leaving it too weak to reliably kill germs.

    To get the most out of your bottle:

    • Always screw the cap on tightly.
    • Store it in a cool, dry spot away from direct sunlight (so, not on your car’s dashboard).

    Pro Tip: If you find an old bottle and the sanitizer feels thin, watery, or doesn't have that strong alcohol smell, it's a good sign the good stuff has evaporated. Time to toss it and get a new one.

    Is Hand Sanitizer Safe For Children?

    When used the right way—with an adult watching—alcohol-based hand sanitizer is safe for kids. The key is supervision. Make sure they use just a pea-sized drop and rub their hands together until they're completely dry. This prevents them from accidentally licking it off their hands or getting it in their eyes.

    And, of course, always store the bottle far out of their reach.

    Can I Make My Own Hand Sanitizer?

    It might look easy on a blog or social media video, but health experts at the WHO and CDC strongly advise against it. Getting the alcohol concentration just right—to that effective 60-70% sweet spot—is incredibly difficult to do in a home kitchen.

    If you mix it too weak, it won't kill germs. If you mix it too strong, you could seriously irritate or damage your skin. It’s much safer and more effective to stick with products that are properly formulated and regulated, like commercially available hand sanitizers and disinfecting wipes.

    For larger facilities like hospitals and clinics, a full-circle approach to virus prevention also includes responsible waste management, like proper medical equipment recycling.

  • The Definitive Guide to Using Acid for Warts Removal

    When you're dealing with a stubborn wart, using an acid-based treatment is often the most effective, common-sense first step. The most popular choice you'll find on pharmacy shelves is salicylic acid, which works by slowly but surely breaking down the tough keratin protein that makes up the wart's structure.

    This process is called keratolysis, and you can think of it as carefully peeling away the wart, one microscopic layer at a time.

    Understanding the Role of Acid in Wart Removal

    Warts are harmless skin growths caused by different strains of the Human Papillomavirus (HPV). The virus, a small non-enveloped type similar in structure to viruses like Rhinovirus or Norovirus, sneaks into your body through tiny cuts or scrapes in the skin, triggering an infection that causes skin cells to grow way faster than normal. Using a targeted acid treatment is one of the most reliable ways to tackle these growths head-on.

    The whole point of applying acid is to kick off a controlled destruction of the infected skin cells. This isn't a harsh, immediate burn; it's a gradual, methodical process. Imagine it as a super-targeted chemical exfoliant designed specifically for the tough, callused tissue of a wart. Over time, this repeated application weakens the wart's defenses, giving your body a chance to finally clear the virus from that spot.

    There are two main types of acid treatments you'll encounter:

    • First-Line Treatments: These are the over-the-counter products you can buy yourself, usually containing salicylic acid. They're widely available, affordable, and perfectly safe for home use when you follow the directions.
    • Second-Line Treatments: This category includes much stronger acids, like bichloroacetic or trichloroacetic acid. Because they're so potent, they are only ever applied by a healthcare professional in a clinic, usually for warts that just won't go away.

    This chart shows the typical path people take, starting with at-home care before moving on to professional help if needed.

    Diagram showing wart acid treatment hierarchy: first-line treatments with a bottle, then second-line with a doctor.

    As you can see, salicylic acid is the standard starting point. The stronger, professionally applied acids are reserved for cases that don't respond to the first round of treatment.

    The Science Behind the Treatment

    The power of using an acid for warts really comes down to its keratolytic properties. Keratin is the tough, fibrous protein that gives your skin, hair, and nails their strength. When you have a wart, HPV hijacks your cells and forces them to overproduce keratin, creating that signature rough, raised bump.

    Salicylic acid gets to work by softening and dissolving the bonds holding all that extra keratin together.

    By consistently breaking down the wart's tough exterior, acid treatments not only remove the physical growth but also expose the underlying virus to the body's immune system, prompting a natural defensive response.

    This two-pronged attack is what makes acid such a gold-standard therapy. It physically removes the wart from the outside while also helping your immune system fight the viral cause from the inside. Understanding this is key to using these products safely and getting the best possible results.

    How Acids Actually Eradicate Warts

    To get why an acid for warts works, you have to know what you’re up against. A wart isn't just a random bump on your skin. It’s a tiny, localized infection caused by a strain of the Human Papillomavirus (HPV), a resilient, non-enveloped virus that can persist on surfaces. It’s smarter than it looks.

    The virus tricks your skin into working overtime, churning out excess cells and a tough protein called keratin. All that extra material piles up, creating the wart’s classic rough, dense surface. It's like a tiny, self-contained fortress.

    Acid treatments launch a strategic, two-pronged attack to dismantle this viral stronghold.

    The Primary Action: Keratolysis

    The main weapon in an acid’s arsenal is a process called keratolysis. It’s a technical term, but the concept is simple: it breaks down all that tough keratin.

    The acid—usually salicylic acid in over-the-counter products—gets to work by dissolving the "glue" holding the infected skin cells together.

    Think of it like gently sanding down a block of wood, layer by layer. Each application softens and destroys the outermost surface of the wart. Over days and weeks of consistent treatment, you’re gradually peeling away the entire growth until you get back down to healthy skin. This slow, controlled removal is precisely what makes it a safe option for at-home use.

    This process is a targeted form of chemical exfoliation. While the principle is the same—dissolving the bonds between cells—here it’s focused with pinpoint accuracy on destroying just the wart tissue.

    The Secondary Action: Immune System Stimulation

    While the physical destruction is happening on the surface, something just as important is going on underneath. The mild, controlled irritation from the acid acts like a signal flare for your body's immune system.

    The acid's gentle irritation alerts your immune system to the presence of the HPV infection, which has been hiding from detection. This prompts your body to send immune cells to the area to fight the virus from the inside out.

    Warts are masters of disguise, often flying under the immune system's radar. The acid essentially rips off the mask, drawing attention to the infection site. This dual-action approach is what makes acid treatment so effective. It doesn't just chip away at the wart; it helps your body build a defense against the virus causing it.

    This combination delivers a powerful one-two punch:

    • External Destruction: The acid physically dissolves the wart tissue from the outside in.
    • Internal Defense: It triggers an immune response to attack the HPV virus from the inside out.

    This comprehensive strategy tackles both the symptom (the wart) and the cause (the virus), which is critical for preventing it from coming back. Since HPV is a non-enveloped virus, preventing its spread starts with diligent hygiene. While you're treating the wart, remember the virus can linger on surfaces. Keeping tools like nail files or pumice stones separate and using effective disinfecting wipes on surfaces can help stop the virus from spreading to other parts of your body or to other people.

    This methodical process explains why consistency and patience are absolutely essential when using an acid for warts. Each application builds on the last, gradually weakening the wart’s structure and giving your immune system the upper hand.

    Salicylic Acid: The Gold Standard for Home Treatment

    When it comes to treating warts at home, salicylic acid is the undisputed champion. It’s accessible, affordable, and backed by a mountain of clinical evidence. This gentle but persistent acid for warts has become the go-to first-line therapy for a reason.

    Unlike stronger acids used in a doctor's office that cause rapid tissue destruction, salicylic acid works through a slow, controlled process called keratolysis. It systematically breaks down the keratin protein that holds the wart together, letting you peel away the growth layer by layer. Think of it as a targeted chemical exfoliant designed specifically for that tough, abnormal skin.

    A brown dropper bottle of salicylic acid, band-aid, cotton flower, swabs, and a nail file on a white surface.

    Finding the Right Formulation for You

    One of the biggest advantages of salicylic acid is that it comes in all sorts of formulations. This lets you pick the best format for your specific needs, making treatment more convenient and effective depending on where the wart is.

    You'll typically find these options on pharmacy shelves:

    • Liquids and Gels: These are perfect for common warts on hands and fingers. They usually come with a small brush that allows you to paint the acid precisely onto the wart tissue. Concentrations typically range from 17% to 40%.
    • Medicated Pads and Plasters: Ideal for plantar warts on the soles of your feet. The adhesive pads keep the acid in direct, constant contact with the wart while also providing a bit of cushioning from the pressure of walking.
    • Patches: Similar to pads, these adhesive patches deliver a steady dose of salicylic acid over a set time, often 48 hours, before you need to replace them.

    The choice really comes down to the wart’s location and what you find easiest to use. A liquid offers precision for a wart on your finger, but a cushioned pad is far more practical for one on the bottom of your foot.

    A Step-by-Step Guide to Safe Application

    Getting this right is crucial for success and for protecting the healthy skin around the wart. Your most powerful tool here is consistency. A regular, daily routine will maximize the acid's effectiveness and get you faster results.

    Here’s a simple, effective four-step process:

    1. Prepare the Area: Start by soaking the wart in warm water for about 5-10 minutes. This softens up the tough outer layers, making the skin more receptive to the acid.
    2. Debride the Surface: After soaking, gently file the surface of the wart with a pumice stone or emery board. This sloughs off the top layer of dead tissue and helps the acid penetrate deeper.
    3. Apply the Acid: Carefully apply your salicylic acid product directly onto the wart. Be as precise as you can to avoid getting it on the surrounding healthy skin.
    4. Cover the Wart: Cover the treated area with a bandage or the medicated pad itself. This helps lock in the treatment and keeps it from rubbing off.

    It is essential to dedicate any tools used for wart treatment, like a nail file or pumice stone, for that purpose only. The Human Papillomavirus (HPV) that causes warts can spread via contaminated surfaces, so never use these tools on healthy skin or share them with others. Regularly disinfecting these tools and nearby surfaces with a product effective against non-enveloped viruses is a smart preventative measure.

    Understanding Treatment Duration and Efficacy

    Patience is a virtue when using salicylic acid. While some small warts might disappear in a few weeks, more stubborn ones can take up to 12 weeks of consistent, daily treatment to fully resolve. It's a marathon, not a sprint.

    The good news is that this approach is incredibly well-documented. Salicylic acid is one of the most studied and effective treatments available over the counter. In fact, a major review of multiple clinical trials showed an impressive 75% cure rate in patients using salicylic acid, compared to just 48% in those using a placebo.

    To get the best results while avoiding side effects, it's critical to understand how often to use salicylic acid based on the product’s instructions. Overdoing it can lead to skin irritation, while not applying it enough will just drag out the process. Finding that balance is the key to successfully using this gold-standard acid for warts.

    When Stubborn Warts Won't Budge: Exploring Stronger Acids

    So, you’ve tried over-the-counter salicylic acid, and that stubborn wart is still hanging around. What's next? This is usually when it’s time to call in a professional. For these tough, or recalcitrant, warts, dermatologists have a few stronger acids up their sleeve designed to get the job done.

    These treatments are a significant step up from what you can buy at the pharmacy. Unlike salicylic acid’s slow-and-steady approach of peeling away layers, these more potent acids work by causing necrosis—basically, the controlled death of the wart tissue. It’s a more direct attack that can get you faster results, but it also comes with a higher risk of side effects like stinging, burning, or some temporary skin discoloration.

    Monochloroacetic Acid and Formic Acid

    Two of the go-to options for hard-to-treat warts are monochloroacetic acid (MCA) and formic acid. Both are highly corrosive, which is why they must be applied with extreme precision by a healthcare professional who can target only the wart.

    • Monochloroacetic Acid (MCA): This powerful acid is a favorite for plantar warts. It essentially cauterizes the wart tissue chemically, destroying it in just a few applications.
    • Formic Acid: While still quite strong, formic acid is another great option for stubborn common warts. It often comes in a specialized pen-like applicator to ensure the dose is controlled and precise.

    There’s good clinical data backing these up. For instance, one key study on plantar warts found that MCA achieved a 46% cure rate, which was slightly better than a combination salicylic acid therapy. Another study showed that formic acid, when applied with a proprietary pen for just 30 seconds twice a week, cleared up treatment-resistant warts in 42.8% of adults. You can dig into more details on these destructive therapies for cutaneous warts to see how they stack up.

    A huge part of professional wart treatment is stopping the spread of the Human Papillomavirus (HPV). Warts are contagious, and any surface they touch—from the floor to your towel—can get contaminated with this non-enveloped virus. This is why clinics are so strict about hygiene, often using powerful disinfecting wipes to sanitize everything between patients, ensuring a sterile environment.

    Bichloroacetic and Trichloroacetic Acids

    If even MCA and formic acid don't do the trick, dermatologists might escalate to bichloroacetic acid (BCA) or trichloroacetic acid (TCA). These are even stronger compounds, typically reserved for the most difficult cases.

    TCA, for example, is a well-known peeling agent that can be carefully painted on to burn away the wart. BCA works pretty much the same way. Both require meticulous application, often with a tiny wooden stick, to coat the wart without touching any of the surrounding healthy skin. The clinician can tailor the strength, using concentrations anywhere from 30% to over 80%, depending on the wart's size and location.

    Why You Absolutely Need a Professional for This

    Using a potent acid for warts is a delicate balancing act. The whole point is to obliterate the viral tissue without creating a new problem, like a nasty scar. This is where a medical expert is non-negotiable.

    1. Precision: A dermatologist can apply the acid down to the millimeter, often protecting the surrounding area with a barrier like petroleum jelly.
    2. Dosage Control: They know exactly what concentration to use and how much to apply for different types of warts. A wart on your foot can handle more than one on your finger.
    3. Safety Monitoring: If things get painful or a blister forms, they know how to manage it and make sure the area heals properly.

    Trying to use these chemicals at home is a recipe for disaster. You're far more likely to end up with a chemical burn, a deep scar, or a nasty infection than you are to get rid of the wart. When a wart just won’t quit, escalating to a stronger, professionally applied acid is the smartest and safest next move.

    Specialized and Historical Acid Treatments

    When the usual over-the-counter acids don't cut it, where do we turn? The quest to get rid of stubborn warts has led clinicians down some fascinating paths, exploring compounds far beyond the typical pharmacy shelf. This journey gives us a cool look at both the history and the future of dermatology.

    These advanced options aren't just about peeling away skin layers. They use more complex, targeted attacks on the wart and the HPV causing it. They're typically reserved for cases where everything else has failed, which brings up a key point in wart treatment: you have to match the tool to the challenge.

    Podophyllin: A Plant-Based Predecessor

    Long before we had today’s refined formulas, dermatologists relied on podophyllin, a potent resin pulled from the Mayapple plant. It works very differently from salicylic acid. Instead of just dissolving skin, podophyllin is a cytotoxic agent—it literally poisons the wart cells, stopping them from dividing and multiplying. For decades, it was a go-to treatment.

    This old-school acid for warts actually paved the way for many modern treatments. Studies from the late 60s and early 70s showed podophyllin had an impressive 81% cure rate for simple plantar warts. That was nearly as good as the salicylic-lactic acid combos popular at the time. You can dig deeper into these historical wart treatment outcomes to see how things have evolved.

    Working with powerful compounds like these also highlights how crucial a clean environment is. Viruses like HPV can stick around on surfaces, so good hygiene is key to preventing spread. For a closer look at modern disinfecting agents, you can explore the various uses of hypochlorous acid in our other guide.

    Bleomycin: The Injectable Solution

    For the most difficult, treatment-resistant warts—what doctors call "recalcitrant"—clinicians might pull out an even bigger gun: bleomycin. This is a chemotherapy drug that works by directly damaging the DNA inside the wart's rapidly dividing cells, forcing them to self-destruct.

    This isn't a cream you rub on top. Bleomycin is injected directly into the base of the wart. It sounds intense, but for warts that have shrugged off every other attack, it's remarkably effective.

    Bleomycin is reserved for the most stubborn warts due to its potency. Clinical data has shown it can achieve up to a 92% clearance rate in these challenging cases, with many patients achieving success after a single treatment.

    That high success rate makes it an invaluable last resort. The evolution from a plant-based resin like podophyllin to a powerful injectable like bleomycin really shows the ongoing effort to find a solution for every kind of wart, from the simple to the seemingly invincible.

    Safety Precautions and When to See a Doctor

    While using an acid for warts can be incredibly effective, the goal is always to get rid of the wart safely, not to create a bigger problem. Knowing what to expect in terms of side effects—and more importantly, recognizing when to stop—is just as crucial as the application itself. Following a few simple guidelines can help you remove the wart without any unnecessary drama.

    With most over-the-counter acid treatments, the side effects are usually minor and totally manageable. You might notice some mild skin irritation, a bit of redness, or a slight stinging feeling right after you apply it. These are actually good signs, telling you the acid is getting to work breaking down that stubborn wart tissue.

    Close-up of hands applying clear gel with a white applicator to a finger with a silver ring.

    Minimizing Common Side Effects

    A few simple steps can protect the healthy skin around the wart and keep irritation to a minimum during the process.

    • Create a Protective Barrier: Before you put the acid on, trace a thin layer of petroleum jelly around the border of the wart. This little trick creates a seal that stops the acid from spreading and bothering the healthy skin next to it.
    • Apply Precisely: Use the applicator to dab the product only on the wart itself. Don't go overboard; a tiny, targeted amount is all you need for each treatment.
    • Keep It Clean and Dry: Good hygiene is a must. Because HPV is a persistent virus, consider using virucidal wipes on bathroom counters or floors where you perform treatment. You can learn more about which cleaning agents work best in our guide covering hydrogen peroxide and rubbing alcohol.

    These precautions are easy to follow and can make the whole treatment process much more comfortable while preventing skin damage.

    Red Flags That Signal a Doctor's Visit

    Let's be clear: at-home acid treatment isn't for every wart or every person. It's vital to recognize the signs that mean it's time to stop what you're doing and call a healthcare professional.

    Your health always comes first. While at-home treatments are convenient, they’re only meant for simple, uncomplicated warts. Any sign of a potential complication is a clear signal to get professional medical advice.

    Stop treatment and see a doctor if you notice any of these issues:

    • Significant Pain or Bleeding: The wart becomes intensely painful, starts bleeding on its own, or develops open sores.
    • Signs of Infection: The area gets increasingly red, swollen, feels warm to the touch, or starts oozing pus.
    • Rapid Changes: The wart suddenly changes color, grows quickly, or takes on a strange new shape.
    • Sensitive Locations: Never use over-the-counter wart acids on delicate areas like your face, nostrils, mouth, or genitals. Those spots need specialized care from a doctor.

    On top of that, people with certain health conditions should skip at-home acid treatments altogether. If you have diabetes, poor circulation, or a weakened immune system, you're at a much higher risk for complications like infection and slow healing. In these cases, a doctor must manage any and all wart treatments.

    Your Questions About Wart Acid, Answered

    Wart treatment can feel like a guessing game, so let’s clear up some of the most common questions people have. Here’s what you need to know to handle wart acid safely and effectively.

    How Long Does It Take for Acid to Remove a Wart?

    This is where patience really pays off. If you’re using a daily over-the-counter salicylic acid treatment, you should start seeing some improvement in 2 to 4 weeks. Getting rid of a stubborn wart completely, though, can take as long as 12 weeks.

    Stronger, professionally applied acids tend to work much faster. These might only require a few sessions, spaced several weeks apart. If you've been treating a wart at home for weeks with no change, that’s a clear sign it's time to see a doctor.

    Can I Use Wart Acid on My Face or Genitals?

    The short answer is absolutely not. Over-the-counter wart acids are designed for the thick, tough skin on your hands and feet. They are far too harsh for the delicate skin on your face, inside your nose or mouth, or in the genital area.

    Using these products in sensitive spots can cause serious chemical burns, intense pain, and even permanent scarring. Warts in these areas need a professional's touch—a healthcare provider can offer much safer and more appropriate treatments.

    Warts are caused by HPV, a virus that can spread just by touching it and then touching another part of your body. Always wash your hands thoroughly after treating a wart and consider using a disinfecting wipe on your hands to avoid spreading the virus to more sensitive areas.

    What Should I Do If Acid Gets on Healthy Skin?

    It’s easy for this to happen. If you accidentally get some of the acid on the healthy skin around the wart and it starts to sting or burn, wash the area right away with soap and warm water. A good, thorough rinse will neutralize the acid and wash it off.

    Once the area is clean and dry, dab a little petroleum jelly on it. This will soothe the irritation and create a protective barrier while it heals. To avoid this problem in the first place, always put a ring of petroleum jelly around the wart before you apply the acid.

  • What Is Reverse Transcription and How Does It Work

    For decades, the rules of molecular biology seemed simple and absolute. Genetic information was supposed to flow in one direction only: from DNA to RNA, and then from RNA to proteins. This was the "central dogma," the undisputed blueprint for life as we knew it.

    But in 1970, that fundamental rule was shattered.

    Scientists discovered a process that could turn the whole system on its head, a biological loophole that allowed genetic information to flow backward. This process, known as reverse transcription, uses a strand of RNA as a template to build a brand-new strand of DNA.

    Think of it this way: a construction crew normally works from a master blueprint (DNA) to build a structure. Reverse transcription is like finding a finished building (RNA) and using it to perfectly recreate the original, long-lost blueprint.

    This remarkable trick is all thanks to a specialized enzyme called reverse transcriptase. Its discovery wasn't just a minor update to the textbooks—it completely changed our understanding of viruses, genetics, and even our own DNA.

    The Discovery That Broke the Central Dogma

    Before the 1970s, the idea of RNA creating DNA was pure science fiction. The central dogma was considered law. But two scientists, working independently, were about to prove it wrong.

    In a landmark moment for science, Howard Temin and David Baltimore each published papers back-to-back in the journal Nature on June 27, 1970. They had both discovered the enzyme reverse transcriptase, proving that RNA could, in fact, be used to synthesize DNA. This groundbreaking work earned them the 1975 Nobel Prize in Physiology or Medicine, which they shared with Renato Dulbecco. You can learn more about their foundational research and its incredible impact.

    This discovery blew the doors open on how certain viruses, like Human Immunodeficiency Virus (HIV-1) and Hepatitis B Virus (HBV), manage to be so persistent. These viruses, called retroviruses, carry their genetic code as RNA. Once inside a host cell, they use reverse transcriptase to convert their RNA into DNA.

    This newly made viral DNA is then stitched directly into the host's own genome, creating a permanent infection. The host cell is hijacked, tricked into becoming a factory that churns out more viruses. Understanding this isn't just an academic exercise; it's the key to developing the antiviral drugs that fight these diseases and the diagnostic tools, like RT-PCR tests, that we rely on for public health.

    To help clarify just how different this is from the "standard" biological process, let's break it down.

    Central Dogma vs. Reverse Transcription at a Glance

    This table offers a quick side-by-side comparison, highlighting how reverse transcription flips the script on the traditional flow of genetic information.

    Process Starting Material End Product Key Enzyme Common Example
    Standard Transcription DNA RNA RNA Polymerase Gene expression in human cells
    Reverse Transcription RNA DNA Reverse Transcriptase HIV infecting a human cell

    As you can see, the starting and ending points are swapped, and a completely different enzyme is required to get the job done. It's this unique mechanism that makes retroviruses so challenging to treat and so fascinating to study.

    How Reverse Transcriptase Builds DNA from an RNA Blueprint

    To really get what reverse transcription is, you have to zoom in on the star of the show: the reverse transcriptase enzyme. Think of it as a molecular architect, carefully constructing a DNA building using an RNA blueprint. It's a precise, step-by-step process that permanently rewrites a host cell's genetic code.

    It all starts when the reverse transcriptase enzyme finds and clamps onto a specific spot on the virus's single-stranded RNA. Once it's locked in, its main job begins: reading the sequence of RNA bases (A, U, G, C) and building a brand-new, complementary strand of DNA. This is its RNA-dependent DNA polymerase function in action, creating the first half of the final DNA molecule.

    This first step leaves us with a weird intermediate molecule called an RNA-DNA hybrid. You don't see these very often in biology—one strand is the original viral RNA, and the other is fresh DNA. But this hybrid is just temporary. The original RNA blueprint has served its purpose and needs to be cleared out to make way for the next stage.

    Removing the Scaffold to Finish the Job

    Now, a second, equally critical function of reverse transcriptase kicks in. This is its RNase H activity, which acts like a tiny demolition crew. It specifically targets and shreds the RNA strand of the hybrid molecule, breaking it down and getting it out of the way.

    Once the cleanup is done, all that’s left is a single, lone strand of viral DNA, which we call complementary DNA or cDNA. With the original RNA scaffold gone, the stage is set for the final act. Reverse transcriptase switches hats one more time, activating its DNA-dependent DNA polymerase function.

    Using that single DNA strand as a new template, the enzyme builds a second, perfectly matched DNA strand right alongside it. This final step completes the construction, creating a stable, double-stranded DNA molecule. This new piece of viral DNA looks almost identical to the host's own genes, allowing it to slide right into the host cell's chromosomes. The virus has successfully smuggled its genetic instructions inside. To learn more about how different viruses store their genetic code, check out the various types of viral genomes in our detailed guide.

    This visualization shows the standard flow of genetic information, which reverse transcription famously hijacks.

    A diagram illustrating the flow of genetic information: DNA to RNA to Protein.

    The image highlights biology's central dogma: DNA makes RNA, which then makes protein. Reverse transcription cleverly breaks this rule to achieve its own ends.

    A Deliberately Flawed Masterpiece

    While this process is incredibly clever, the reverse transcriptase enzyme has one major quirk—it’s notoriously sloppy. Unlike the high-fidelity machinery that copies DNA in our own cells, it has no "proofreading" ability to double-check its work and fix mistakes.

    But this isn't a design flaw. For viruses like HIV-1, this sloppiness is a key strategic advantage. The constant stream of random errors, or mutations, creates a hugely diverse population of new viruses.

    This high mutation rate is the engine of viral evolution. It allows the virus to rapidly adapt, developing resistance to antiviral drugs and evading the host's immune system. This makes designing effective, long-term treatments a massive challenge.

    These small, constant changes ensure the virus is always a moving target. It’s a big reason why retroviral infections are so persistent and difficult to cure. The flawed copying process is, ironically, the secret to their survival.

    Reverse Transcription in the Real World: From Viruses to Our DNA

    So, the mechanics of reverse transcription are pretty wild, but where does this biological rule-breaking actually happen? It turns out this process isn't just a textbook concept—it’s a high-stakes strategy used by some of the most stubborn viruses known to science. It even plays a surprising role inside our very own cells.

    Its most notorious application is in the life cycle of retroviruses.

    These viruses carry their genetic material as RNA and use reverse transcription as their ultimate weapon to pull off a permanent infection. Once inside a host cell, they unleash reverse transcriptase to rewrite their RNA code into DNA. This freshly made viral DNA then gets stitched directly into the host cell's own chromosomes, becoming a permanent part of its genetic blueprint.

    From that point on, every time the infected cell divides, it copies the viral DNA right along with its own. The cell is hijacked and turned into a lifelong factory, churning out new viral particles that can go on to infect other cells.

    A Case Study in Viral Persistence: HIV

    Perhaps no virus illustrates the power of reverse transcription more clearly than the Human Immunodeficiency Virus (HIV-1). As a member of the retrovirus family, HIV’s entire game plan hinges on this one process.

    When HIV infects a human immune cell, its first order of business is to convert its RNA genome into double-stranded DNA. This lets the virus permanently embed its genetic instructions into the very cells that are supposed to protect the body.

    The discovery of reverse transcriptase back in 1970 was the critical breakthrough that allowed scientists to finally understand how HIV worked. That knowledge was everything for developing treatments for AIDS, the disease caused by the virus, which has tragically claimed over 40 million lives since the epidemic began.

    HIV isn't the only one with this playbook. Other major pathogens also rely on a similar mechanism:

    • Hepatitis B Virus (HBV): While not a true retrovirus, HBV still uses a reverse transcription step to replicate its DNA genome inside liver cells. This is what leads to chronic infections that can cause severe liver damage.
    • Human T-cell Lymphotropic Virus (HTLV): This retrovirus is linked to certain types of leukemia and lymphoma. It uses the same reverse transcription trick as HIV to integrate itself into host DNA.

    In every case, reverse transcription is the key that unlocks the door to a lifelong, persistent infection, making these viruses incredibly difficult to clear from the body. Understanding how different viruses carry their genetic information gives you a much better picture of their replication strategies. If you're interested, you can learn more about the different types of RNA viruses in our comprehensive guide.

    Genetic Fossils Hidden in Our DNA

    For a long time, scientists thought reverse transcription was strictly a tool for viruses. But the story took a wild turn when we mapped the human genome. Researchers found something astonishing: our DNA is absolutely littered with the leftovers of ancient reverse transcription events.

    These "genetic fossils" are known as endogenous retroelements, and they make up a surprisingly huge chunk of our genetic code. In fact, sequences from these elements account for nearly half of the entire human genome. They are the remnants of retroviruses that infected our distant ancestors millions of years ago.

    Over evolutionary time, these viral sequences were copied and pasted throughout the genome. While many are now inactive "junk DNA," some have been co-opted by our own cells and play roles in gene regulation and even embryonic development.

    This means that a process once seen as a foreign invasion is actually an integral part of what makes us human. These ancient viral artifacts continue to influence our biology, contributing to genetic diversity and, in some cases, being linked to diseases like cancer and autoimmune disorders. The discovery of reverse transcription didn't just explain how viruses work—it also revealed a hidden chapter in our own evolutionary story.

    Harnessing the Process: Reverse Transcription vs. RT-PCR

    You've probably heard the term "reverse transcription" thrown around, especially in discussions about viruses and lab tests. But it can be a bit confusing because the same term describes two very different things: a natural process happening inside a cell and a powerful technique used in a lab.

    They share the same core mechanism, but their purpose and context are worlds apart. Getting the distinction right is key to understanding how scientists cleverly turned a virus's own survival trick into one of our most important diagnostic tools.

    A scientist in blue gloves pipetting a sample into a test tube next to an RT-PCR machine in a lab.

    Here's the simple breakdown. Biological reverse transcription is what a virus like HIV-1 does to hijack a host cell—it's a weapon for replication. In contrast, Reverse Transcription Polymerase Chain Reaction (RT-PCR) is what a scientist does in a lab, borrowing that same weapon to find out if the virus is there in the first place.

    Think of it like the difference between a lightning strike starting a wildfire and a firefighter using a controlled burn. One is a destructive natural event; the other is a careful application of the same principle for a specific, beneficial purpose.

    Borrowing a Viral Tool for Diagnostics

    RT-PCR is a two-step diagnostic powerhouse. It all starts when scientists take a sample, maybe from a nasal swab or a blood draw, that might contain an RNA virus. The problem is, RNA is notoriously fragile and tricky to work with directly. So, the first job is to convert it into something much more stable.

    This is where they borrow from the viral playbook. Scientists add the reverse transcriptase enzyme to the sample, which does exactly what it does in a retrovirus: it reads the RNA template and builds a durable DNA copy from it, called complementary DNA or cDNA. This crucial first step is the "RT" in RT-PCR.

    Once that stable cDNA copy is made, the original, flimsy viral RNA is no longer needed. The lab now has a reliable DNA version of the virus's genetic code, ready for the next stage.

    Making the Invisible Visible with PCR

    The second part of the process is "PCR," which stands for Polymerase Chain Reaction. Even with a DNA copy, the amount of viral material in the sample is usually far too small to detect. PCR solves this by acting like a molecular copy machine.

    It takes that tiny bit of cDNA and makes millions, or even billions, of identical copies. This amplification process dials up the signal, taking the viral genetic material from an undetectable whisper to a deafening roar that scientific instruments can easily pick up.

    If the virus was in the original sample, you get a strong, positive signal. If it wasn't, nothing gets amplified. It’s that straightforward.

    To make it even clearer, let's compare the biological process with the lab technique side-by-side.

    Reverse Transcription (Biological) vs RT-PCR (Diagnostic)

    Feature Reverse Transcription (in a cell) RT-PCR (in a lab)
    Purpose Viral replication and integration into host DNA To detect and quantify viral RNA in a sample
    Location Inside an infected host cell (cytoplasm/nucleus) In a test tube within a thermal cycler machine
    Initiator A retrovirus (like HIV-1) infecting a cell A scientist adding primers and reverse transcriptase
    Outcome Viral DNA gets inserted into the host's genome Billions of copies of a specific DNA sequence
    Goal To perpetuate the virus To diagnose an infection or measure viral load

    This table really highlights how RT-PCR isn't the viral process itself but a brilliant diagnostic application of it. Scientists have effectively weaponized the virus's own machinery against it.

    RT-PCR doesn't just give a "yes" or "no" answer. Quantitative versions of the test (RT-qPCR) can measure the exact amount of viral RNA in the original sample, which is essential for monitoring a patient's viral load during treatment for infections like HIV-1 or Hepatitis C Virus (HCV).

    This incredible sensitivity is exactly why RT-PCR became the gold standard for diagnosing RNA viruses like SARS-Related Coronavirus 2 (SARS-CoV-2) during the COVID-19 pandemic. It can spot an infection even when the amount of virus is incredibly low.

    For anyone looking to dive deeper into the lab procedures, you can explore the complete reverse transcription PCR protocol in our guide. By mastering this process, scientists can find even the faintest traces of a virus, giving us a powerful tool for early diagnosis and treatment.

    The Lasting Impact on Medicine and Technology

    The discovery of reverse transcription wasn’t just some obscure update for biology textbooks. It handed scientists a master key that unlocked entirely new fields of medicine and technology, with applications that reach far beyond diagnosing viruses.

    This clever viral mechanism became the bedrock of genetic engineering, drug development, and therapies that have saved millions of lives. Researchers suddenly had an unprecedented ability to grab genetic information and turn it into something they could actually work with.

    A New Window into the Cell

    This newfound power quickly became a foundational tool in molecular biology labs. One of its earliest—and most important—uses was in creating complementary DNA (cDNA) libraries.

    For the first time, scientists could capture a snapshot of what a cell was doing at any given moment. By isolating messenger RNA (mRNA)—the active gene blueprints—and using reverse transcriptase to convert that fragile RNA into stable DNA, they could see exactly which genes were switched on or off.

    This was a game-changer. Researchers could finally compare a healthy cell to a cancerous one and pinpoint the specific genes driving uncontrolled growth. This led directly to the identification of countless cancer-causing genes, known as oncogenes.

    From Discovery to Drug Development

    Figuring out that reverse transcriptase was central to retroviruses like HIV-1 didn't just explain the disease; it gave scientists a crystal-clear target. The enzyme is absolutely essential for the virus to replicate but completely unnecessary for our own cells to function.

    It was the perfect bullseye.

    This insight led to the creation of a powerful class of drugs called reverse transcriptase inhibitors (RTIs). These medications work by jamming the enzyme's machinery, stopping it from building viral DNA in its tracks. This one action prevents HIV from stitching its genetic code into our cells, keeping the infection under control.

    Thanks to RTIs, an HIV diagnosis went from a near-certain death sentence to a manageable chronic condition for millions of people. It remains one of modern medicine’s greatest success stories, all stemming from this single viral enzyme.

    The 1970 discovery of reverse transcriptase didn't just stay in the lab—it sparked a revolution. It laid the groundwork for both PCR and molecular cloning, amplifying virology research and diagnostics around the globe. A pivotal advance was using Taq polymerase in PCR in the 1980s, inspired by viral enzymes, which allowed for exponential DNA amplification. This technique is now used in an estimated 75% of global diagnostics.

    The impact just keeps rippling outward. In virology, RT-PCR is the gold standard for detecting RNA viruses like SARS-CoV-2 with 95-99% sensitivity. This capability was instrumental in managing the COVID-19 pandemic, which infected over 770 million people and caused nearly 7 million deaths by 2023. You can discover more insights about the profound influence of this discovery on virology research.

    A Cornerstone of Modern Biotechnology

    The applications of reverse transcription are still expanding today, fueling some of our most advanced scientific innovations. It has become an absolutely indispensable tool, making techniques that were once pure science fiction a daily reality.

    Here are just a few examples of its modern-day impact:

    • RNA Sequencing (RNA-Seq): This powerful technique gives researchers a complete picture of every RNA molecule in a cell, offering deep insights into gene expression. The whole process hinges on reverse transcription to convert the entire RNA sample into a cDNA library for analysis.
    • Gene Therapy: In many gene therapy strategies, reverse transcription is used to create DNA copies of therapeutic genes. These DNA copies are then delivered into a patient's cells using engineered viral vectors.
    • mRNA Vaccine Technology: The development and quality control of mRNA vaccines, like the ones used for COVID-19, rely heavily on reverse transcription. Scientists use it to confirm the integrity and quantity of the mRNA sequence before it ever makes it into a vaccine vial.

    From identifying the genetic culprits behind cancer to enabling lifesaving drugs and powering next-generation vaccines, the study of reverse transcription has had a monumental impact. What started as a surprising biological quirk has become one of the most essential tools in science, continually pushing the boundaries of what’s possible.

    The Legacy of a Biological Rule-Breaker

    The discovery of reverse transcription wasn't just another scientific footnote—it completely tore up the old rulebook on genetics. For decades, we believed biological information flowed in one direction: from DNA to RNA. But this process revealed a shocking plot twist. The script could be flipped, allowing RNA to write itself back into DNA and permanently alter a host's genome.

    This single insight pulled back the curtain on the sneaky strategy behind some of the world's most persistent viruses. It explained how retroviruses like Human Immunodeficiency Virus (HIV-1) could weave themselves into our cells so completely, setting up infections that last a lifetime. Figuring this out wasn't just an academic exercise; it was the critical first step toward fighting back.

    From Viral Trick to Lifesaving Tool

    Just as this discovery exposed a viral weakness, it also handed scientists an incredibly powerful new tool. Researchers quickly learned how to co-opt reverse transcription in the lab, turning a viral weapon into a diagnostic powerhouse. This work led directly to RT-PCR, the hyper-sensitive testing method that lets us detect and track RNA viruses like HIV-1, Hepatitis C Virus (HCV), and SARS-Related Coronavirus 2 (SARS-CoV-2) with incredible precision.

    The journey from a surprising biological discovery to a cornerstone of modern medicine teaches us a crucial lesson: The more we understand the fundamental mechanics of viruses, the better we get at neutralizing them, creating effective treatments, and protecting public health.

    This knowledge doesn't just help us build advanced therapies; it also highlights the importance of basic prevention. Understanding how these viruses replicate and spread reinforces the value of simple but effective habits in our daily lives. Breaking the chain of transmission is a huge part of community health, and it underscores the role that proactive hygiene—like using disinfecting wipes on common surfaces—can play in protecting us from all sorts of viral threats.

    Common Questions About Reverse Transcription

    Once you get the basics down, a few questions almost always pop up. Let's tackle some of the most common ones to clear up any lingering confusion.

    Why Do Viruses Bother With This Extra Step?

    You might wonder why some viruses go through this whole convoluted process. For retroviruses like Human Immunodeficiency Virus (HIV-1), it’s not just an extra step—it’s the core of their survival strategy.

    Reverse transcription is their ticket to a permanent infection. By converting their flimsy RNA genome into a sturdy, double-stranded DNA copy, they can literally splice their own genetic code into ours. This act of cellular hijacking turns our own cells into virus-making factories, ensuring the infection sticks around for life.

    Do Our Own Cells Have Reverse Transcriptase?

    Yes, but it's not for anything sinister. Our cells actually have their own version of this enzyme called telomerase, and it plays a vital role in keeping our DNA healthy.

    Think of the tips of your chromosomes like the plastic caps on shoelaces—those are telomeres. Every time a cell divides, those telomeres get a tiny bit shorter. Telomerase works to rebuild them, preventing critical genetic information from being lost over time. It’s a perfect example of how nature has repurposed the same molecular tool for completely different jobs.

    Viral reverse transcriptase is a weapon for invasion, while our own telomerase is a shield for preservation. It’s a fascinating look at the dual nature of enzymes—one can threaten life by enabling a persistent virus, while the other sustains it by protecting our genetic code.

    Can RT-PCR Tests Get it Wrong?

    RT-PCR is famous for its accuracy, but no test is perfect. False positives can happen, though they are incredibly rare and almost never the fault of the test's underlying chemistry.

    So, what’s the culprit? Usually, it's simple contamination. If a tiny speck of genetic material from a positive sample accidentally gets into a negative one during lab handling, the test will amplify it and return a false positive.

    This is why diagnostic labs are so strict about their procedures. They use separate, dedicated areas for each step, run multiple control samples, and follow intense quality control protocols. These measures are all designed to catch potential contamination and ensure the results are as reliable as possible.