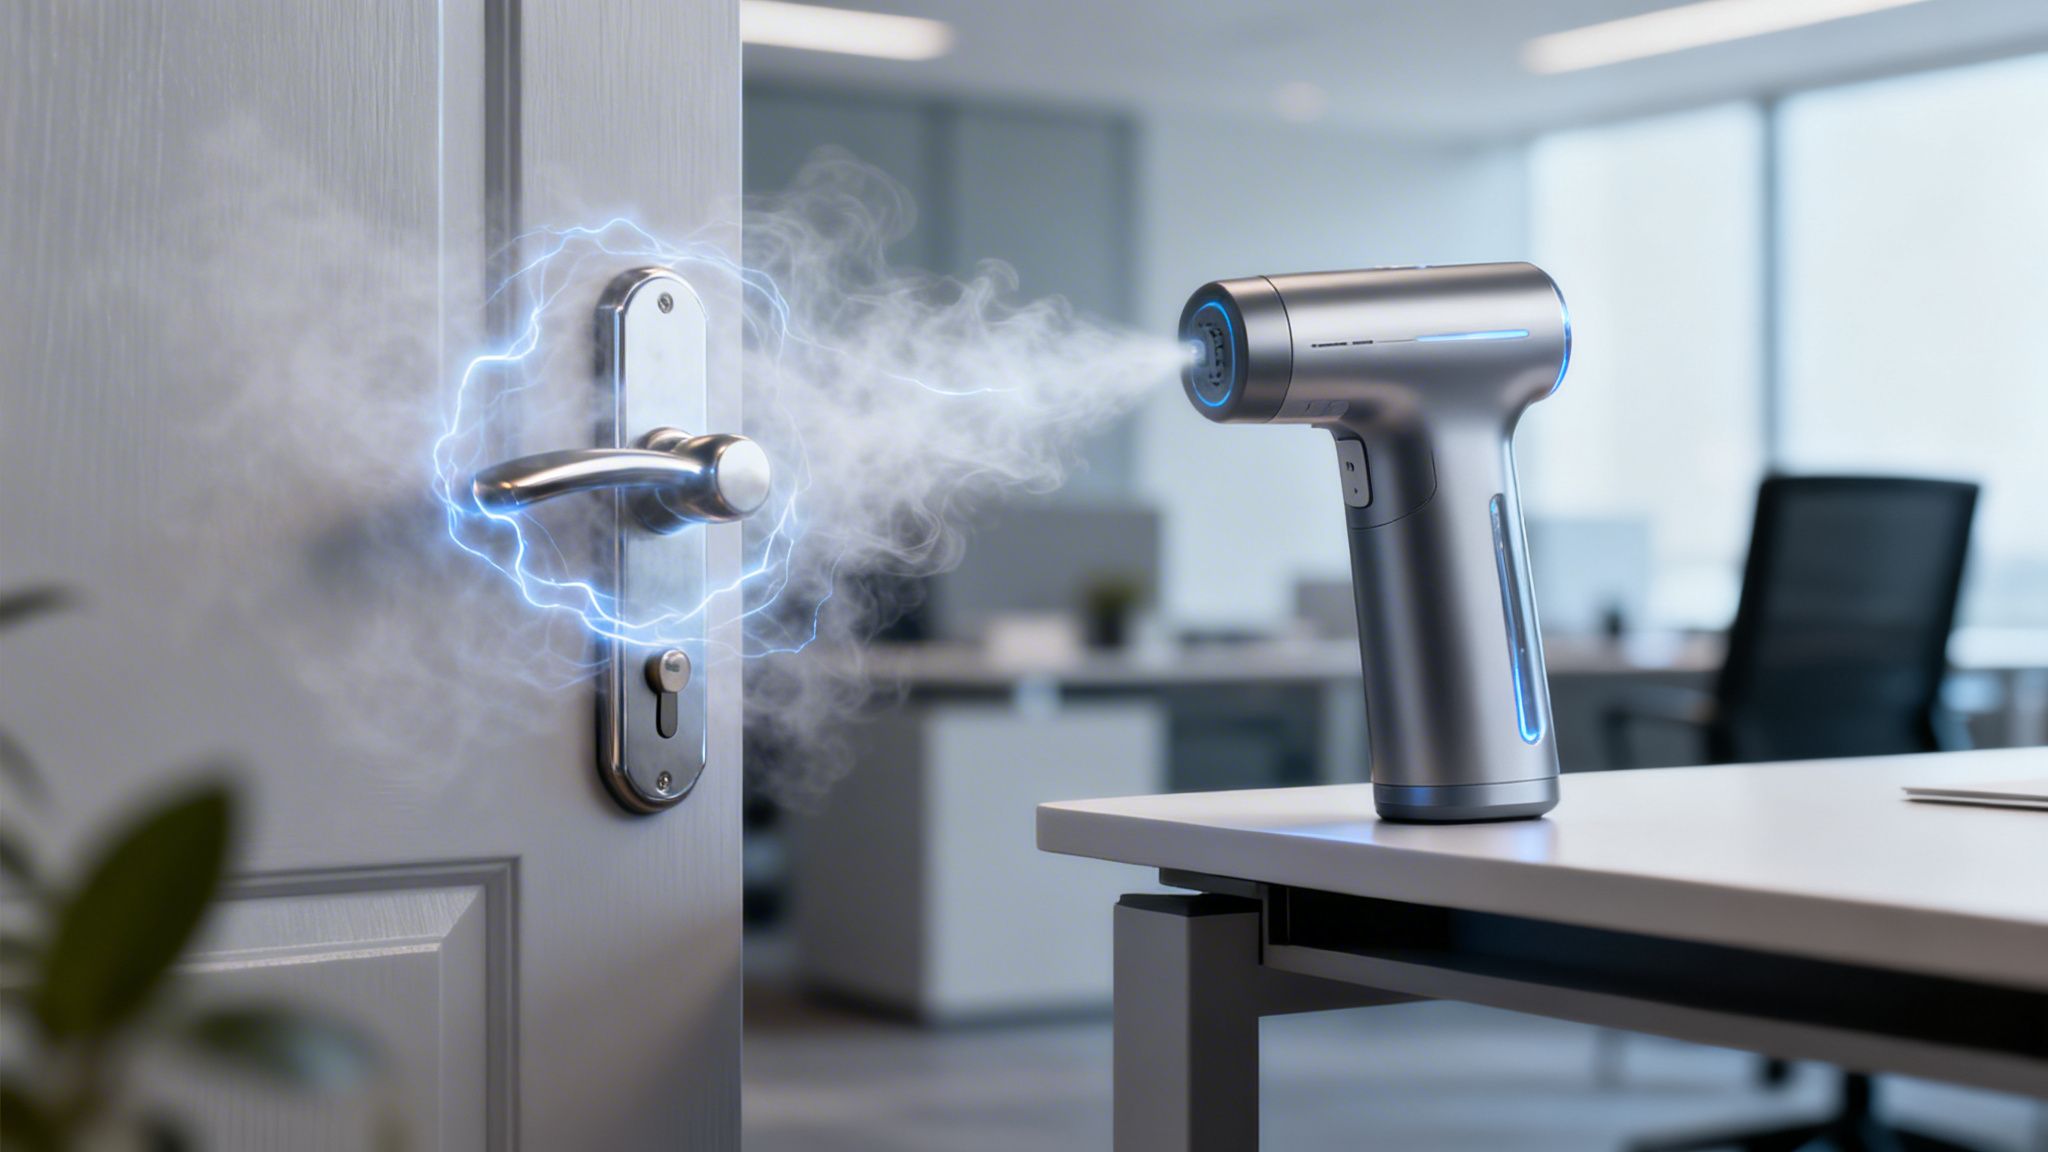
An electric disinfectant sprayer is a tool that turns a liquid disinfectant into a fine mist, letting you cover large areas quickly and evenly. Unlike a standard spray bottle, these devices use electric power to atomize the liquid into tiny droplets. The best models even use electrostatic technology, giving those droplets a positive charge so they stick to and wrap around surfaces like a magnet.
How Electric Sprayers Redefine Surface Cleaning
Have you ever tried painting a complex object, like a chain-link fence or a detailed chair, with a brush? It's a nightmare. You spend ages dabbing and stroking, only to find you've missed countless spots, especially on the back and in all the little crevices.
Now, imagine you could spray a special paint that actively wraps itself around the metal, coating every single angle—front, back, and sides—in one pass. That’s the basic idea behind an electric disinfectant sprayer, and it’s a game-changer for disinfection.
These tools don’t just spray; they transform liquid disinfectant into a fine, charged mist. The science behind it is surprisingly simple but incredibly powerful.
The Science of Electrostatic Attraction
The most effective electric sprayers use a process called electrostatic induction. As the disinfectant solution flows through the sprayer's nozzle, an internal electrode gives each tiny droplet a positive electrical charge. Meanwhile, most surfaces in a room—think desks, doorknobs, chairs, and railings—have a neutral or slightly negative charge.
It’s basic physics: opposites attract. The positively charged droplets are magnetically drawn to these neutral and negatively charged surfaces. This attraction is so strong that it actually pulls the mist toward and around objects, making sure the disinfectant doesn't just land on top but also coats the sides and back. We call this the 'wraparound effect.'
This simple concept is what makes electrostatic technology so powerful for disinfection.

As you can see, the charged droplets don't just fall randomly. They actively seek out and cling to surfaces, creating a complete, uniform coat that you could never achieve by hand. For small, localized contamination, however, a quick pass with a disinfecting wipe can often provide a more immediate and targeted solution without the need for extensive equipment.
To put the difference in perspective, here's a quick comparison.
Standard Sprayer vs. Electric Disinfectant Sprayer
| Feature | Standard Sprayer | Electric Disinfectant Sprayer |
|---|---|---|
| Droplet Size | Large, inconsistent | Fine, uniform mist |
| Coverage | Spotty, uneven | Comprehensive, 360-degree 'wrap' |
| Application | Manual trigger/pump | Electric-powered atomization |
| Chemical Use | High waste, puddling | Efficient, minimal waste |
| Adhesion | Relies on gravity | Actively sticks to surfaces |
This table shows just how much of a leap forward these devices are. They don't just make cleaning easier; they make it fundamentally more effective, especially for large spaces.
Coverage and Efficiency a Step Above
That 'wraparound' effect is what really separates an electric sprayer from a traditional trigger bottle. When you spray and wipe by hand, you get uneven coverage. Large droplets pool in some spots while other areas are missed entirely. This inconsistency is a huge problem, as it can leave dangerous pathogens like Influenza A (H1N1) or Norovirus behind.
By using charged particles, electrostatic sprayers can achieve up to 3X more coverage than traditional methods while using up to 65% less chemical solution.
Because the fine mist sticks exactly where it needs to, you reduce waste and get a far more consistent application.
This uniform layer ensures the disinfectant can meet its required contact time—the amount of time it must stay wet on a surface to kill viruses and bacteria. Better coverage also means the job gets done much faster, saving facilities and businesses significant time and labor. This level of hygiene is also great for home environments, where a sprayer can help you prevent mold in your basements and other damp spots.
While electrostatic models offer the biggest advantage, even non-electrostatic electric sprayers provide better coverage than manual methods by atomizing the liquid. Ultimately, the shift from wiping to spraying represents a major step forward in how we handle large-scale disinfection. For a closer look at the different types of equipment available, check out our guide on surface cleaning machine options.
The Science of Eliminating Viruses from Surfaces
To really get how an electric disinfectant sprayer stops invisible threats, you can't just think about spraying and wiping. You have to think like a virus. Pathogens like SARS-CoV-2 (the virus behind COVID-19) and the common Human Coronavirus are experts at hiding in microscopic nooks and crannies on everyday surfaces, making them incredibly tough to reach. True disinfection is a science, blending physics and chemistry to make sure these hidden germs are completely neutralized.

The whole process comes down to three things: droplet size, contact time, and total coverage. An electric disinfectant sprayer is built from the ground up to master all three, turning a simple cleaning job into a powerful public health tool.
The Importance of Micron-Sized Droplets
Think about using a regular trigger spray bottle. You get big, splotchy droplets that fall fast and leave puddles. An electric sprayer is different. It atomizes the disinfectant into a super-fine mist made of droplets measured in microns—that's one-millionth of a meter. And that difference is everything.
These tiny droplets are so light they can hang in the air for a moment, allowing them to drift and settle evenly over an entire surface, not just one spot. This creates a thin, unbroken film of disinfectant, which is the first step to killing pathogens effectively. That fine mist gets into all the weird angles and curves on complex objects, giving you a consistent coat everywhere.
Understanding Contact Time
Just getting a surface wet isn’t enough. Every disinfectant has a specific amount of time it needs to stay wet on a surface to actually do its job. We call this contact time, or dwell time.
Contact time is the non-negotiable window a disinfectant needs to break down and neutralize a pathogen. If the surface dries too quickly, the virus may survive. An electric sprayer's fine mist is designed to stay wet just long enough to meet these requirements without over-saturating surfaces.
Different viruses have different structures, so they need different contact times. Let’s look at two common but very different viruses:
- Influenza A Virus (H1N1): This is an enveloped virus. It’s wrapped in a fragile, fatty outer layer that most disinfectants can break down easily. Its contact time is usually short, often just a minute or two.
- Norovirus (Norwalk Virus): This is a non-enveloped virus. It’s protected by a tough protein shell (a capsid) that makes it way harder to kill. It usually needs a stronger disinfectant and a much longer contact time, sometimes up to 10 minutes.
This is where an electric sprayer really shines. The uniform mist it creates helps keep the entire surface wet for the full time required, ensuring the disinfectant has enough time to work.
Achieving 360-Degree Wraparound Coverage
The most advanced electric sprayers use electrostatic technology, which is the secret to making sure no spot gets missed. As we've covered before, the charged droplets act like tiny magnets, actively sticking to surfaces and pulling the mist into cracks and even around the back of objects.
This "wraparound" effect is a game-changer for disinfecting tricky items that are almost impossible to clean well by hand, like:
- Office chairs with all their legs and armrests
- School desks with metal frames underneath
- Gym equipment with dozens of handles and bars
- Hospital bed rails and call buttons
By actively coating every single angle, an electric sprayer can neutralize viruses like Herpes Simplex Virus 1 (HSV-1) or the highly contagious Human Rotavirus that might be hiding on surfaces you'd never reach. It transforms potential hot spots into thoroughly disinfected areas, creating a genuinely safer environment.
Of course, it’s all about using the right tool for the right job. While these sprayers are fantastic for large-scale disinfection, sometimes you just need to clean a single doorknob or an elevator button. In those cases, a powerful disinfecting wipe is often more practical and just as effective.
Choosing the Right Disinfectant for Your Sprayer
Picking the right disinfectant for your electric sprayer isn't as simple as grabbing the first bottle you see. It's more like pairing the right engine with the right fuel—get it wrong, and at best, nothing happens. At worst, you could damage your equipment or create a safety hazard.
The partnership between your sprayer and the chemical solution you put in it is everything. A great disinfection plan depends on getting this match right from the start.
Start With the Manufacturer's Rules
First things first: check what your electric disinfectant sprayer’s manufacturer recommends. This is a non-negotiable step. Sprayers are built with specific seals, plastics, and metals, and a chemical that isn't compatible can easily corrode parts, clog the nozzle, or burn out the motor. You don't want to turn a valuable tool into a useless piece of plastic.
Once you know what’s safe for the machine, you need to make sure the disinfectant is actually tough enough for the germs you’re trying to kill. For this, the EPA’s List N is the gold standard.
Why EPA's List N Is So Important
Think of the EPA's List N as a verified "who's who" of disinfectants proven to work against SARS-CoV-2 (the virus that causes COVID-19). A product gets on this list by showing it can kill either SARS-CoV-2 itself, a similar human coronavirus, or a virus that's even harder to kill.
Before you buy, check that the product’s EPA registration number is on List N. This is your assurance that you're using a chemical that's up to the task. Understanding the science behind what kills viruses on surfaces helps drive home just how crucial this step is.
Some of the most common and effective disinfectants you’ll find for sprayers include:
- Quaternary Ammonium Compounds (Quats): These are the workhorses of the disinfection world. They’re effective against a huge range of germs, from Influenza A Virus (H1N1) to Herpes Simplex Virus 1 (HSV-1), and are widely available.
- Hydrogen Peroxide: Often sold in "accelerated" formulas (AHP), this active ingredient is a popular choice because it breaks down into simple water and oxygen, giving it a great safety profile.
- Hypochlorous Acid: While it sounds intense, this disinfectant is surprisingly gentle. It’s powerful against bacteria and viruses but is known for being less irritating than many other chemicals.
Getting Dilution and Contact Time Right
Just because you’ve found an approved disinfectant doesn’t mean you can just dump it in and start spraying. The instructions on the label for dilution and contact time are absolutely critical.
Adding too little chemical to the water makes the solution weak and ineffective. On the other hand, adding too much can leave behind a sticky, grimy residue, damage sensitive surfaces, and expose people to more chemicals than necessary.
It’s a classic mistake to think “more is better.” Over-concentrating your disinfectant won’t make it kill germs faster or more effectively. It just increases risk and wastes money. Stick to the exact ratios on the label.
Just as important is the contact time—the amount of time a surface has to stay visibly wet for the disinfectant to do its job. For example, a Quat-based product might need a full 10-minute contact time to kill a tough-to-beat bug like Norovirus, but only 3 minutes for something like Human Coronavirus.
This is where your electric sprayer really shines. The fine mist it produces is perfect for coating surfaces evenly, helping you meet that required contact time without completely soaking everything in sight.
Still, even the best sprayer isn't the right tool for every single job. For a quick wipe-down of a single doorknob, an elevator button, or a light switch, a good disinfecting wipe is often faster, more practical, and just as effective.
A Step-by-Step Guide to Safe and Effective Spraying
Now that you’ve picked out the right disinfectant, it’s time to put your electric disinfectant sprayer to work. But getting the most out of these powerful tools isn't just about turning them on and pointing; it's about doing it right. More importantly, it's about doing it safely.
We'll walk through the entire process in three simple phases: getting ready, the actual application, and what to do afterward. Following these steps is non-negotiable—skipping them can lead to patchy results or, far worse, put your health at risk.
Phase 1: Pre-Application and Safety Prep
Before a single drop of disinfectant is sprayed, you need to prepare the space. Remember, disinfectants are not cleaners. Their job is to kill pathogens on an already clean surface, so don't skip this crucial first step.
First, pre-clean every surface you plan to treat. Grab some soap or detergent and water, and wipe down everything to get rid of visible dirt, dust, and grime. If you don't, that organic matter can act like a shield, protecting germs like Rhinovirus Type 14 or Hepatitis B Virus (HBV) from the disinfectant.
Once the surfaces are clean and dry, it’s time to gear up. You're about to work with aerosolized chemicals, and your safety is the top priority.
Personal Protective Equipment (PPE) is your first and most important line of defense against chemical exposure. Never operate an electric disinfectant sprayer without wearing the appropriate gear to protect your eyes, skin, and respiratory system.
Here's your essential PPE checklist:
- Safety Goggles or a Face Shield: This is a must to protect your eyes from fine mist and accidental splashes.
- Gloves: Use nitrile or other chemical-resistant gloves to keep the disinfectant off your skin.
- Mask or Respirator: An N95 mask or, even better, a respirator with the right cartridge is critical for protecting your lungs from inhaling the fine disinfectant particles.
If you need a refresher on choosing and using your gear correctly, check out our guide on how to use Personal Protective Equipment.
Phase 2: Mastering the Application Technique
With the area prepped and your PPE securely in place, you're ready to start spraying. Your goal here is to apply a thin, even coat of disinfectant across every surface you're targeting.
Follow this straightforward process for perfect coverage every time:
- Work from Top to Bottom: Always start with higher surfaces and work your way down. Gravity will cause the mist to settle, which helps you avoid re-contaminating areas you just treated.
- Maintain Proper Distance: Hold the sprayer nozzle about 2-4 feet away from the surface. This can vary a bit depending on your specific model, so always give the manufacturer's manual a quick look.
- Use a Consistent Motion: Move the sprayer in a steady, overlapping pattern, almost like you're spray-painting a wall. A smooth "S" motion works great to ensure you don't leave any gaps.
- Target High-Touch Points: Pay extra attention to the things people touch all the time—doorknobs, light switches, railings, faucets, and desks. This is where the electrostatic "wraparound" effect really shines.
Whatever you do, don't over-saturate the surfaces. You're looking for a visibly wet film, not a puddle. If you see the liquid dripping or pooling, you're either spraying too much or you're too close.
Phase 3: Post-Application and Equipment Care
Your job isn't quite finished once the spraying stops. This final phase is just as important for making sure the disinfection was successful and keeping your equipment in good working order.
First and foremost, let the disinfectant do its job. You have to respect the contact time printed on the product label, which can be anywhere from 1 to 10 minutes. The surface absolutely must stay wet for that entire period for the chemical to kill the pathogens.
While the disinfectant is working, get the air moving. Open windows and doors, or turn on the HVAC system to ventilate the space and clear out any lingering mist. No one should enter the area without full PPE until the surfaces are completely dry and the air has cleared.
Finally, take care of your gear. Clean your sprayer immediately after you're done by flushing the system with clean water, just as the manufacturer directs. This simple five-minute step prevents chemical residue from building up, which can corrode internal parts and clog the nozzle over time. A well-maintained sprayer is a reliable sprayer.
Keeping Your Sprayer in Top Working Condition
Your electric sprayer is a workhorse, but even the toughest equipment needs a little routine care. Think of it like changing the oil in a car—a few simple steps protect your investment, guarantee it works when you need it, and help you avoid frustrating downtime from clogs or corrosion.

Just a few minutes of care after each use makes a huge difference. The most important thing you can do is flush the system. This single step prevents chemical buildup and keeps your nozzle spraying perfectly every time.
Daily Maintenance Checklist
After you finish a job, run through this quick five-minute routine. It’s the best thing you can do to keep your electric disinfectant sprayer running like new and extend its lifespan.
- Empty the Tank: Never store chemicals in the sprayer. Pour out any leftover solution, as it can corrode the internal parts over time.
- Rinse the Tank: Add a little clean water, swish it around to rinse the inside walls, and then dump it out.
- Flush the System: This is the critical step. Fill the tank with a small amount of clean water, turn the sprayer on, and let it run for 1-2 minutes. Keep it running until the spray coming from the nozzle is completely clear. This cleans everything from the pump to the nozzle tip.
- Wipe Down the Exterior: Grab a clean, damp cloth and wipe down the outside of the unit. This removes any chemical residue or dust.
- Store Properly: Put the sprayer away in a clean, dry place where it won't be exposed to extreme temperatures.
Troubleshooting Common Sprayer Problems
Even with perfect maintenance, things can still go wrong. The good news is that most issues are simple to fix on the spot. Here’s how to handle the most common problems you’ll likely encounter.
A sprayer that fails to deliver a consistent, charged mist cannot achieve proper surface coverage. Learning to spot and fix these issues quickly is key to ensuring your disinfection efforts are effective against viruses like Rhinovirus Type 39 or Feline Calicivirus.
Problem 1: Inconsistent or Clogged Spray Pattern
- Cause: Nine times out of ten, this is caused by a clogged nozzle from dried disinfectant.
- Solution: First, turn off and unplug the sprayer. Following the manufacturer's guide, carefully remove the nozzle. Let it soak in warm water to dissolve the blockage, then use a small, soft brush to gently scrub it clean. Put it back together and give it a test.
Problem 2: Weak or No Electrostatic Charge
- Cause: This could be something simple like a dirty electrode or disconnected grounding strap, or it could be an internal issue.
- Solution: Start by checking that the user is properly grounded (if your model requires it). Then, with the unit off, look at the nozzle electrode for any buildup and carefully wipe it with a soft cloth. If it’s still not working, it’s time to call the manufacturer for service.
Problem 3: The Sprayer Won't Turn On
- Cause: This is usually a simple power problem—a dead battery, a loose cord, or a tripped breaker.
- Solution: For battery-powered models, make sure the battery is fully charged and clicked in securely. For corded units, check that the plug is firmly in the wall socket and test the outlet with something else, like a phone charger. If it's not the battery or the outlet, check your user manual or give customer support a call.
The Future of Disinfection in Public Spaces
The pandemic didn't just change our habits; it completely reset our expectations for what "clean" means in public spaces. Suddenly, advanced sanitation went from a niche concern to a front-and-center priority for everyone from school principals to facilities managers. Out of this shift, the electric disinfectant sprayer became one of the most visible tools in the new fight for public health.
This wasn't just a temporary trend. The public now expects a higher standard of hygiene in hotels, classrooms, and on public transit. For many businesses, advanced disinfection is no longer an optional extra—it's a core part of keeping doors open.
The Market Catches Up to a New Reality
This demand for faster, more thorough disinfection created a massive surge in the market. With everyone hyper-aware of how viruses like SARS-CoV-2 and Avian Influenza Virus (H5N1) travel through the air and on surfaces, the need for reliable, large-scale solutions became crystal clear. This is where electric and electrostatic sprayers found their moment.
The numbers back this up. The global market for electrostatic disinfectant sprayers hit about USD 351.2 million in 2024. Projections show it climbing to anywhere from USD 579.9 million by 2032 to a staggering USD 791.0 million by 2031, with healthcare and hospitality leading the charge. You can dig into the specifics in this full report on sprayer market projections.
This isn't just about selling more equipment. It's proof that a new, non-negotiable standard for public hygiene is here to stay.
What's Next? Smarter, Better Sprayers
As the market grows, the technology is getting a serious upgrade. Manufacturers are focused on making the next generation of electric disinfectant sprayers not just more powerful, but smarter and easier for anyone to use.
The goal is to move professional-grade disinfection out of the hands of specialists and make it accessible, manageable, and provable for everyday users. It’s all about improving the user experience and integrating data.
We're already seeing some key innovations take hold:
- Lighter, More Comfortable Designs: Let's be honest, early models were often clunky and heavy. New designs are far more ergonomic, so operators can work longer without getting tired.
- Data-Driven Disinfection: The next wave of sprayers will come with built-in sensors and digital tracking. Imagine a system that automatically logs which areas have been treated, how much chemical was used, and generates reports to prove cleaning protocols were met.
- More Power, No Cords: Battery life and power are getting a huge boost. Cordless models are becoming the standard, giving operators the freedom to cover large areas without being tethered to an outlet.
These improvements are cementing the electric sprayer's place as a go-to tool for modern virus prevention. But it’s important to remember they’re not the only tool. For quick, precise jobs—like a contaminated doorknob or a single elevator button—you still can't beat the simplicity and effectiveness of a good disinfecting wipe.
Your Electric Sprayer Questions, Answered
Even after you get the hang of an electric sprayer, you’re bound to have some practical questions. Here are the answers to the most common ones we hear, designed to help you use your equipment safely and get the best results.
Can I Use Any Disinfectant in My Electric Sprayer?
No, and this is a huge point for both safety and performance. You should only ever use disinfectants that are specifically labeled for use in electric or electrostatic sprayers. Pouring in the wrong chemical is asking for trouble.
An unapproved formula can eat away at the internal seals and nozzles of your electric disinfectant sprayer, causing leaks, clogs, and damage that will almost certainly void your warranty. Even more importantly, many chemicals are not safe to be aerosolized and can become a serious health hazard if you breathe them in. Always check the sprayer manufacturer’s approved list first, then double-check that the disinfectant is on the EPA’s List N for killing pathogens.
Is an Electric Sprayer Better Than Wiping Surfaces?
That really depends on the job. For big, complex areas—think an office full of desks and chairs or a school gym—an electric sprayer is in a league of its own. It delivers comprehensive, 360-degree coverage in a tiny fraction of the time it would take to wipe everything down by hand.
But for a quick, targeted hit on a single high-touch spot like a doorknob, elevator button, or a small spill? A traditional disinfecting wipe is often faster and more practical. There’s no setup or major PPE required. The best approach usually involves a mix of both methods, each used where it makes the most sense.
Do I Still Need to Clean Before Using a Sprayer?
Yes, absolutely. Skipping the pre-cleaning step is one of the most common—and critical—mistakes people make. Disinfectants are formulated to kill germs on an already clean surface, not to power through layers of dirt and grime.
Pre-cleaning isn't an optional step. Dirt, dust, and grime create a physical barrier that literally shields pathogens like Hepatitis C Virus (HCV) or Human Rotavirus from the disinfectant. If you spray over a dirty surface, you’re just getting it wet, not disinfecting it.
Always start by wiping down surfaces with soap and water to get rid of any residue. Once the surface is clean, your sprayer can finally do its job effectively.
What Kind of Power Source Do Sprayers Use?
Electric sprayers are designed with different power sources to fit various jobs. You’ll find corded models that provide nonstop power for big projects and battery-operated units that give you the freedom to move around without being tethered to an outlet. The right one for you usually comes down to the size of the area you’re covering and how easily you can access power. When you're looking at different models, it's useful to know about all the power options. For example, you can learn more about 12 Volt Sprayers and see how they're used in various situations.
How Often Should I Disinfect a Space?
There's no single right answer here; the best frequency really depends on the environment and how much foot traffic it gets. You'll need to assess your own space.
- High-Traffic Areas: Places like lobbies, public restrooms, retail shops, and shared office kitchens may need to be disinfected daily.
- Moderate-Traffic Areas: General office spaces or classrooms could be on a schedule of two to three times per week.
- Low-Traffic Areas: A conference room that’s rarely used or a storage area might only need a weekly treatment.
Take a look at the risk and the number of people coming and going, then create a schedule that fits. You can always adjust it as things change.
Leave a Reply