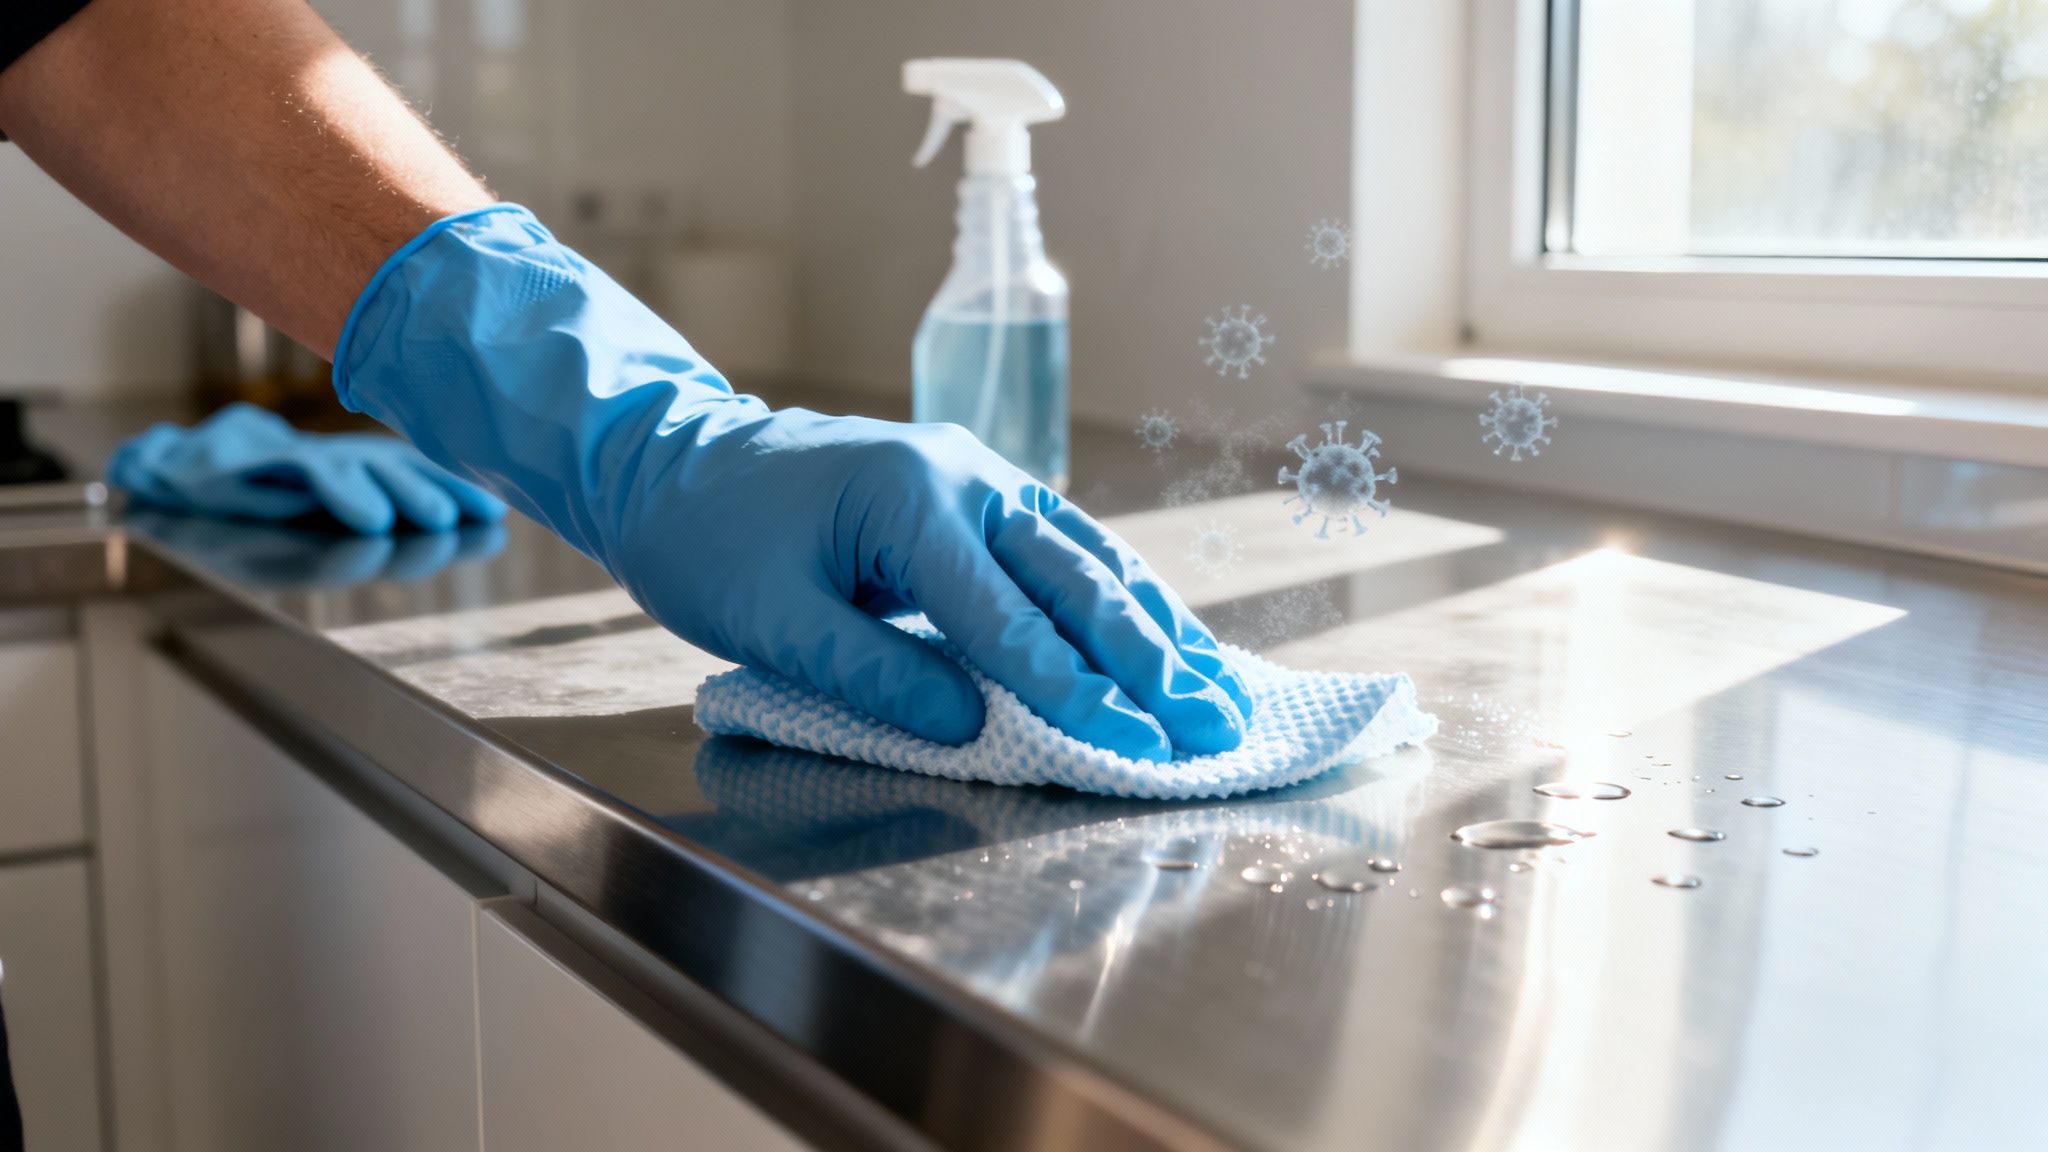
Effective cleaning & sanitation are the cornerstones of preventing virus transmission, but they are absolutely not the same thing. People use the terms interchangeably, but in the world of hygiene, they mean very different things.
Think of it this way: Cleaning is what you can see—physically removing dirt, dust, and grime. Sanitizing and disinfecting are what you can’t see—killing the microscopic pathogens left behind. Grasping this hierarchy is the first step to creating a space that’s not just tidy, but genuinely safe from viruses like Human Immunodeficiency Virus Type 1 (HIV-1) and Hepatitis B Virus (HBV).
Understanding Surface Hygiene From Tidying Up to Total Disinfection
Walking down the cleaning aisle can be overwhelming. "Cleans," "sanitizes," "disinfects"—what's the real difference? It’s not just marketing jargon. These terms represent distinct levels of germ control, forming a progressive system where each step builds on the last to create a truly hygienic environment.
It all starts with cleaning. This is the simple, mechanical process of using soap or detergent and water to wipe away dirt, spills, and other gunk from surfaces. Just like tidying a room removes clutter, cleaning removes the physical debris that viruses love to hide in. If you skip this step, even the most effective disinfecting wipes can't do their job properly because they can't reach the pathogens buried under all that grime.
The Hierarchy of Hygienic Action
Once a surface is visibly clean, you can move on to the next level of defense: sanitizing or disinfecting. Your choice depends entirely on the situation and the level of risk you're dealing with.
- Sanitizing: This process lowers the number of bacteria to a level considered safe by public health standards. It's often the go-to for food-contact surfaces, where the main worry is controlling bacterial growth.
- Disinfecting: This is the real heavy hitter for daily use. It's designed to kill or inactivate a broad spectrum of microorganisms, including tough viruses like Human Coronavirus, Norovirus (Norwalk Virus), and various Influenza strains.
The diagram below breaks down the proper order of operations, showing how everything rests on that foundational first step of cleaning.

As you can see, disinfecting is at the top of the pyramid, but you can only get there after a surface has been properly cleaned and prepared for treatment.
Cleaning vs Sanitizing vs Disinfecting At a Glance
To make it even clearer, let's break down the key differences between these three crucial processes. Each has a specific job, a unique mechanism, and a different level of power when it comes to fighting viruses.
| Process | Primary Goal | Mechanism of Action | Effectiveness Against Viruses |
|---|---|---|---|
| Cleaning | Remove visible dirt, soil, and organic matter | Physical removal using soap/detergent and friction | Low; removes some germs but does not kill them effectively |
| Sanitizing | Reduce the number of bacteria to a safe level | Chemical agents that lower bacterial counts by 99.9% | Limited; may not be effective against many viruses |
| Disinfecting | Kill a wide range of microscopic pathogens | Chemical agents that kill or inactivate bacteria and viruses | High; kills viruses like influenza and norovirus by 99.999% |
Ultimately, choosing the right process for the job ensures you're not just wasting time and product but are actually making a difference in the safety of your environment. For everyday virus prevention, a single-step disinfecting wipe is often the most practical solution.
The most effective approach to virus prevention is not just about using the strongest chemical; it’s about following the right process. A disinfectant applied to a dirty surface is a wasted effort.
This structured approach ensures you aren't just making a surface look clean but are actively breaking the chain of virus transmission. For a deeper dive, you can learn more about the difference between sanitizing and cleaning in our detailed guide. And for practical tips on specific hygiene challenges, like removing stubborn odors from bedding, these resources offer valuable solutions.
Mastering this hierarchy is key to protecting yourself and others from pathogens like SARS-Related Coronavirus 2 (SARS-CoV-2) and Herpes Simplex Virus 1 (HSV-1).
The Science Behind Cleaning, Sanitizing, and Disinfecting
To really stop viruses in their tracks, you have to think beyond just tidying up. It's about understanding the science. We've already talked about the hierarchy of clean, but now it's time to dig into what cleaning, sanitizing, and disinfecting actually do. Each one represents a totally different level of control over germs, and knowing which to use—and when—is everything.
Cleaning is your first and most fundamental step. Think of it as the physical, mechanical part of the process. You're using soap or detergent, water, and some good old-fashioned scrubbing to get rid of the visible stuff: dirt, dust, and grime. Viruses can't survive for long on their own, and all that surface gunk gives them the perfect place to hide. If you don't clean first, even the strongest disinfectants might not be able to reach the viral particles hiding underneath.
Moving Beyond Just "Looking" Clean
Once a surface is physically clean, the real fight against the microscopic threats begins. This is where sanitizing and disinfecting come into play, and they are definitely not the same thing.
Sanitizing is a step up from just cleaning. Its main job is to reduce the number of bacteria on a surface to a level that public health standards consider safe. This usually means a 99.9% reduction. That’s why you see "sanitizer" all over food-contact surfaces in restaurants and kitchens, where the big worry is bacteria. But when you’re up against tough viruses, a 99.9% reduction just might not cut it.
A surface can be sanitized and still be a viral threat. While sanitizing knocks down bacteria, it offers no guarantee against resilient viruses like Norovirus or Rhinovirus. For those, you need a true disinfectant.
This is a critical distinction. When you're dealing with something highly contagious like Influenza A Virus (H1N1) or SARS-CoV-2, simply lowering the germ count isn't enough. You need to outright destroy them.
The True Power of Disinfection
This brings us to disinfecting, the heavy hitter in the world of cleaning & sanitation. Disinfection uses specific chemical agents designed to kill or completely inactivate 99.999% of microorganisms on a surface. This includes a whole spectrum of bacteria, fungi, and most importantly for our purposes, viruses. Any product you see labeled as a "disinfectant" is registered with environmental protection agencies and has proven "kill claims" against specific germs.
This is the level you need to break the chain of transmission for viruses like Herpes Simplex Virus 1 (HSV-1) and Hepatitis B Virus (HBV). The chemicals in disinfectants work by destroying a virus's protective outer layer or shredding its genetic material, making it impossible for it to infect anyone. You can learn more about exactly how these chemicals work in our guide on how bleach kills germs.
As a final note, it’s worth mentioning sterilization. This is the absolute highest level of decontamination, meaning the complete elimination of all microbial life, including tough-to-kill spores. Because it's so intense, sterilization is reserved for critical settings like hospitals and labs—it's not something you’d do in your kitchen.
The journey from cleaning to disinfecting teaches us a vital lesson: using the right tool for the job is non-negotiable. While you can do these steps separately, combining them is far more efficient. A good disinfecting wipe, for example, is made to do both at once. Its textured material cleans away the grime while the chemical solution goes to work killing the viruses underneath. This dual-action approach saves time and delivers a much higher level of protection.
This careful, science-backed approach to hygiene is essential everywhere, but it's even more critical in regions lacking basic infrastructure. While progress has been made globally, a shocking number of people still don't have access to safely managed drinking water and basic hygiene facilities.
How Viruses Survive and Spread on Everyday Surfaces
Ever wonder why the flu seems to vanish from a doorknob in a day, but a nasty stomach bug can linger for what feels like an eternity? It all comes down to the virus's unique biology and how it battles the outside world. Understanding how these tiny invaders survive on their own is the first step to kicking them out for good with proper cleaning & sanitation.
A virus’s ability to hang around on a countertop or a couch depends entirely on its structure. This is where we need to talk about two very different types of viruses: enveloped and non-enveloped.

Enveloped Viruses: The Fragile Invaders
Many of the viruses we're familiar with—like Influenza A Virus (H1N1), SARS-Related Coronavirus 2 (SARS-CoV-2), and Herpes Simplex Virus 1 (HSV-1)—are enveloped viruses. This just means their core genetic material is wrapped in a delicate outer layer made of lipids (fats).
Think of this envelope like a fragile soap bubble. It pops easily.
Because this fatty layer is so flimsy, it's easily damaged by heat, chemicals, and even simple friction. It dries out quickly, which is why enveloped viruses don't tend to last very long on surfaces, especially porous ones like fabric or cardboard. This weakness is their Achilles' heel, making them relatively simple to take down with the right disinfecting wipes.
Non-Enveloped Viruses: The Resilient Survivors
Then you have the tough guys: viruses small non-enveloped. These include pathogens like Norovirus (Norwalk Virus) and Rhinovirus Type 14. They don't have that fragile fatty envelope. Instead, their genetic material is protected by a hard, protein-based shell called a capsid.
This protein armor makes them incredibly stubborn and much harder to kill.
Non-enveloped viruses are the tanks of the viral world. Their sturdy protein shell helps them withstand harsh conditions, including drying out and many common disinfectants, allowing them to survive on surfaces for days or even weeks.
This resilience is exactly why Norovirus can tear through a daycare or office so fast. The virus can sit on a doorknob or a keyboard long after an infected person has left, waiting for its next victim. Getting rid of these hardy viruses requires specific disinfectants that are proven to crack that tough protein shell.
Environmental Factors That Influence Viral Survival
Beyond a virus's basic structure, its survival time is a direct result of its environment. Several key factors can either help a virus thrive or stop it in its tracks:
- Surface Material: Viruses generally survive longer on hard, non-porous surfaces like stainless steel and plastic. Studies have shown SARS-CoV-2, for example, can remain infectious on these materials for days. Porous surfaces like clothes and paper towels tend to trap the virus and help it dry out faster, shortening its lifespan.
- Temperature and Humidity: Most viruses are happiest in cool, low-humidity environments. It’s one of the reasons respiratory bugs like the flu are more common in the winter—we’re all inside with dry, heated air. Higher temperatures and humidity, on the other hand, can speed up the breakdown of a virus's structure.
- Presence of Organic Matter: Dirt, grime, and food spills act like a shield, protecting viral particles from disinfectants and the elements. This is why the physical act of cleaning a surface before you disinfect is so critical. You have to remove the shield first.
Understanding these variables helps you clean smarter, not just harder. For a more detailed breakdown, check out our guide on how long viruses live on surfaces for specific survival times. This knowledge turns cleaning from a chore into a strategic defense, letting you focus your efforts where they'll make the biggest impact.
Choosing Your Tools for Effective Virus Control
Putting theory into practice means picking the right tools for the job. Now that you know how viruses hang around on surfaces, you can arm yourself with the most effective agents for cleaning & sanitation. This is less about marketing hype and more about the science behind what's actually in the bottle.
The world of disinfectants really boils down to a few key players. Each one has a different way of attacking viruses, which makes them a better fit for certain germs and certain surfaces. Getting to know them is the first step toward making a smart choice.
Decoding the Active Ingredients
When you grab a disinfectant, the "active ingredient" is the chemical doing all the heavy lifting. Three of the most common you'll see are quaternary ammonium compounds, alcohol, and hydrogen peroxide.
- Quaternary Ammonium Compounds (Quats): Often listed as benzalkonium chloride on the label, quats are fantastic against many enveloped viruses like Avian Influenza Virus (H5N1) and SARS-CoV-2. They work by tearing apart the virus's fragile, fatty outer layer, causing it to literally fall apart.
- Alcohol (Ethanol or Isopropanol): You'll see this in concentrations between 60-90%. Alcohol is a fast-acting agent that also destroys the envelope of viruses like Herpes Simplex Virus 2 (HSV-2). The only catch is that it evaporates very quickly, which can make it tough to meet the required contact times.
- Hydrogen Peroxide: This compound works through oxidation, basically breaking down the virus's most essential parts. You'll find that accelerated hydrogen peroxide formulas are especially good at knocking out tougher, non-enveloped viruses like Rhinovirus Type 39.
Knowing which active ingredient targets which type of virus helps you match the product to your specific problem. To get a better feel for the products available for keeping things hygienic, you can explore these different types of sanitizer solutions commonly used in all sorts of settings.
To help you connect the dots, here’s a quick rundown of which disinfectants work best against common viruses.
Common Disinfectants and Their Target Viruses
This table breaks down the most common active ingredients, what they’re good at killing, and how long they need to stay on a surface to get the job done.
| Active Ingredient | Effective Against | Typical Contact Time | Common Viruses Targeted |
|---|---|---|---|
| Quaternary Ammonium Compounds (Quats) | Enveloped Viruses | 3-10 minutes | Influenza, SARS-CoV-2, Human Coronavirus |
| Alcohol (60-90% Ethanol/Isopropanol) | Enveloped Viruses | 30 seconds – 1 minute | Herpes Simplex Virus, Influenza, HIV-1 |
| Hydrogen Peroxide (Accelerated) | Enveloped & Non-enveloped Viruses | 1-5 minutes | Norovirus, Rhinovirus, Rotavirus |
| Sodium Hypochlorite (Bleach) | Enveloped & Non-enveloped Viruses | 5-10 minutes | Norovirus, Hepatitis B & C, C. diff spores |
Remember, this is a general guide. The specific contact times and kill claims will always be on the product label itself, so make sure to check it every time.
How to Read a Disinfectant Label Like a Pro
Think of a product's label as its instruction manual and its proof of performance. Ignoring it is like guessing the right dose of a medication—you just don't do it. There are two pieces of information that are absolutely critical.
First, look for an EPA Registration Number. This little number confirms that the product has been scientifically tested and approved by the Environmental Protection Agency as a legitimate disinfectant. It's your guarantee that the product actually does what it claims.
Second, find the specific kill claims. The label will list the exact viruses and bacteria it's proven to kill, with phrases like "Effective against Human Coronavirus" or "Kills Norovirus." If a virus isn't on that list, you can't assume the product will work against it.
The Critical Importance of Contact Time
Here’s the one thing almost everyone overlooks on a disinfectant label: the contact time. You might also see it called "dwell time."
Contact time is the non-negotiable window during which a surface must remain visibly wet with the disinfectant solution to ensure all targeted pathogens are killed. If the surface dries before this time is up, the disinfection process fails.
This is a huge challenge with sprays and solutions you apply yourself. A product might require a 4-minute contact time, but the solution could easily evaporate in just 30 seconds, leaving live viruses behind. You’d have to keep reapplying it over and over again to meet the requirement.
This is where you can really see the practical advantage of a pre-saturated tool. Disinfecting wipes are designed to hold a precise amount of solution, making it much easier to keep a surface wet for the entire required contact time. This simple design feature takes the guesswork out of the equation and dramatically boosts the odds of achieving true disinfection, giving you a much higher level of safety and peace of mind.
Practical Protocols for High-Touch Environments
Knowing the science behind virus transmission is one thing, but actually stopping it comes down to action. A single, heroic deep clean won't cut it. Real virus prevention is built on consistent, daily habits focused on the surfaces we touch all the time.
The key is to create simple, repeatable routines for these critical areas. By developing a rhythm of cleaning away the grime first, then disinfecting the germs, you turn a complex job into a manageable one. This is where having a ready-to-use disinfectant wipe makes all the difference in your daily defense.

Fortifying Your Home Against Viruses
Our homes are our safe havens, but they're also major hubs for germ transmission. While kitchens and bathrooms are obvious hotspots, viruses like Rhinovirus Type 14 (a cause of the common cold) and Human Rotavirus can survive on surfaces all over the house.
Your best defense is a systematic, two-step approach: clean first, then disinfect. This simple mantra ensures your disinfectant can actually reach and kill the viruses without being blocked by dirt and grime.
Home Hotspot Checklist
- Kitchen: Zero in on faucet handles, cabinet pulls, appliance buttons (especially the microwave and coffee maker), and countertops. These get touched constantly.
- Bathroom: Target toilet handles, light switches, doorknobs, and sink faucets—surfaces that can easily spread germs between family members.
- Living Areas: Don't forget the things everyone shares: TV remotes, game controllers, tablets, and light switches are some of the germiest items in a home.
For each area, start by wiping away any visible dirt with a quality disinfecting wipe. Then, using a fresh wipe, go over the surface again, ensuring it stays wet for the required contact time on the label.
Creating a Safer Workplace
In an office, shared spaces are the superhighways for virus transmission. One person’s cold can quickly travel through the entire team via contaminated surfaces. Proactive cleaning & sanitation isn't just a good idea; it's essential for keeping everyone healthy and productive.
The biggest challenge is the sheer number of people touching the same objects all day long. This makes frequent disinfection of high-touch surfaces completely non-negotiable.
In a shared workspace, every surface is a potential bridge for virus transmission. Consistent disinfection of high-touch points like keyboards, conference tables, and breakroom appliances is the most effective way to protect the entire team.
Workplace Hotspot Checklist
- Personal Desks: Regularly disinfect keyboards, mice, desk phones, and the desk surface itself. Think of it as your personal germ zone.
- Shared Equipment: Copiers, printers, and communal phones should be wiped down multiple times a day, especially in a busy office.
- Break Rooms: The coffee pot handle, microwave door, refrigerator handle, and sink faucets are among the most-touched surfaces in any workplace.
- Meeting Rooms: Before and after every meeting, wipe down conference tables, chair arms, and any shared tech like remote controls or smart boards.
By implementing these protocols, you build a culture where everyone shares the responsibility for health and safety. Placing disinfectant wipes in these key areas makes it easy for employees to pitch in and keep their environment clean. This is especially important for tackling tough viruses like Feline Calicivirus, a common surrogate for the hard-to-kill Norovirus.
Navigating Public and Retail Spaces
Public spaces are the ultimate challenge for virus control because of the constant, high-volume flow of people. From retail stores to public transit, countless anonymous hands touch the same surfaces every hour. Here, consistent and visible cleaning isn't just about hygiene—it's about public trust.
For business owners, showing a clear commitment to cleanliness can directly boost customer confidence. For the rest of us, just being mindful of these high-touch points can significantly reduce our personal risk.
Public Area Hotspot Checklist
- Retail Environments: Payment keypads, shopping cart handles, checkout counters, and door handles are all critical disinfection points.
- Public Transit: Handrails, grab bars, seat-back handles, and stop request buttons are major pathways for transmission.
- General Public Areas: Elevator buttons, public touchscreens, and water fountain controls should always be treated with caution and cleaned frequently by staff.
The principle is the same no matter the setting: find the surfaces that act as germ hubs and hit them with a consistent cleaning and disinfecting schedule. When this process becomes a routine, visible part of daily operations, you protect individuals and the entire community from the spread of viruses.
Common Questions About Cleaning and Sanitation
When it comes to keeping spaces safe, the details matter. Even when you get the science, it's the real-world application that stops a virus in its tracks. Let's clear up some of the most common questions and make sure you can put your hygiene strategy to work with confidence.
Think of this as your go-to guide for the "what ifs" and "how tos" of smart disinfection.
Can I Use the Same Wipe to Clean Multiple Surfaces?
It’s tempting, I get it. You're in a hurry and want to make that single wipe go as far as possible. But using one wipe across multiple surfaces is one of the biggest cleaning mistakes you can make. It creates cross-contamination—a fancy way of saying you're just spreading germs from one spot to another.
Imagine you wipe down a doorknob that’s been touched by someone with a cold (Rhinovirus Type 39). Then you use that same wipe on your desk or the kitchen counter. You haven't actually cleaned anything; you've just given the virus a brand new home.
The rule of thumb is simple: one wipe, one area. Use one for the doorknob, grab a fresh one for the light switch, and another for the remote control. This is the only way to be sure you're truly removing germs, not just moving them around.
What Is the Difference Between Antibacterial and Disinfectant?
These terms get thrown around a lot, but they are absolutely not the same thing—and the difference is crucial when you’re trying to stop viruses.
- Antibacterial products are designed to do one thing: kill bacteria. That's it. They won’t be effective against viruses.
- A disinfectant is a much bigger gun. It’s formulated and proven to kill a whole spectrum of nasty pathogens, including bacteria, fungi, and most importantly, viruses like Influenza A2/305/57 Virus (H2N2) or Hepatitis C Virus (HCV).
If your goal is to prevent viral illness, you need a product that is explicitly labeled as a "disinfectant" and lists the viruses it's effective against. An antibacterial hand soap or spray simply won't cut it.
Is It Necessary to Clean a Surface Before Disinfecting It?
Yes, 100%. This is probably the most critical and non-negotiable step in the whole process. If you skip it, you're just wasting your disinfectant and your time.
Think of dirt, dust, and grime as a microscopic shield protecting the viruses underneath. If you just spray a disinfectant over a dirty surface, the chemical can't get through that shield to kill the germs. It’s like trying to paint a dirty wall—the paint won't stick.
Cleaning first—physically wiping away the gunk—clears the battlefield. It exposes the viruses so the disinfectant can make direct contact and do its job. Luckily, many modern disinfecting wipes are built for this. Their textured material helps scrub away the grime while the chemical solution gets to work killing germs like Bovine Viral Diarrhea Virus (BVDV) and Duck Hepatitis B Virus (DHBV), making it a simple, one-step process.
How Important Is the Contact Time on a Disinfectant Label?
Contact time (or "dwell time") might just be the most important—and most ignored—instruction on a disinfectant label. It’s the minimum amount of time a surface must stay visibly wet with the product for it to actually kill the germs it claims to.
Let's say a product needs a four-minute contact time to kill Norovirus. If you wipe a surface and the disinfectant evaporates in 60 seconds, you haven’t actually disinfected anything. The surface might look clean, but it could still be covered in live, infectious virus particles.
Always check the label and make sure the surface stays wet for the full time listed. If it starts to dry out, you need to reapply the product. This small step is what separates a surface that looks clean from one that is truly, microbiologically safe. This is also where disinfecting wipes provide a significant advantage, as they are engineered to deliver enough solution to meet these critical contact times effectively.
Leave a Reply